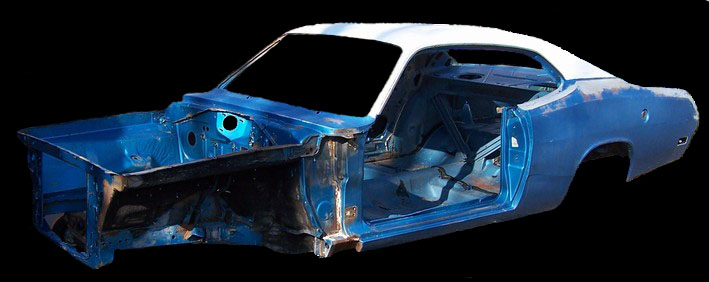
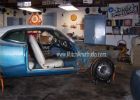
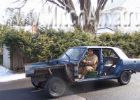
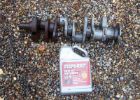
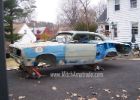
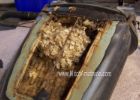
This page is dedicated to my Duster project. Scroll-down for the latest updates. As new updates are added all those on the "Duster Progress" mailing list will be notified. If you would like to be included in this mailing list or have any questions or comments you can contact me at info@MitchAmatrudo.com . I bought the Duster in October of 2005 from an Ebay ad. The seller was in the Philadelphia, PA area. The car was last registered in Oregon in 1991. The car had been sitting since that time. The bad news about the car was that during the time it sat, the entire top-end of the engine was stolen. When I got it, it had only a short block in it. The heads, manifolds, distributor, carb, air cleaner, etc were all long gone. The good news about the car... it is 100% all-original. It has never been painted. All of it's original sheet metal is still in place. No modifications of any kind have ever been performed on the car. Even the original AM radio is still in place in the uncut rallye dash. This is a true numbers-matching automobile. The block, 727 automatic transmission, dash, and radiator support all share the same original VIN. I have found no evidence of any other components ever having been swapped out or replaced. Even the original Chrysler broadcast sheet is still with the car. This Duster is a great color combination. It's finished in B5, "blue fire" paint. It has a full white vinyl top and white interior with factory bucket seats. Best of all, the ONLY rust repair that this car requires is to replace the bottom section of the spare tire well in the trunk, and a very small amount of rust in the lower rear quarter panel extensions. There is absolutely no other rot anywhere on the car. The fender wells, floors, and all of those other spots that always rust out are completely intact. There was a lot of surface rust, mainly in the interior of the car. Much of this went away with only pressure washing it. The rest will be blasted off in the future.
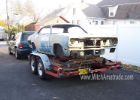
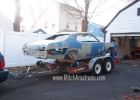
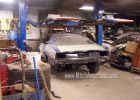
December 26, 2005
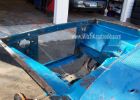
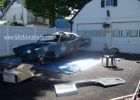
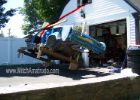
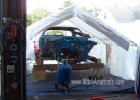
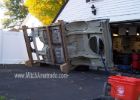
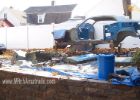
Car delivered from Philadelphia
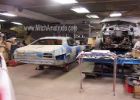
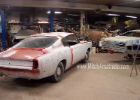
January 12, 2006
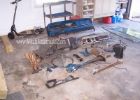
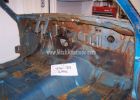
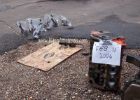
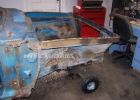
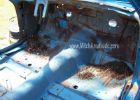
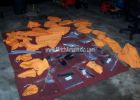
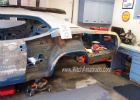
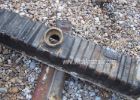
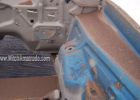
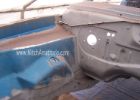
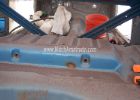
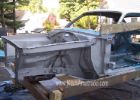
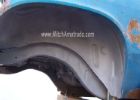
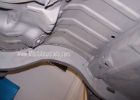
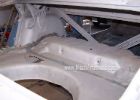
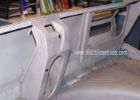
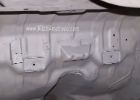
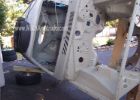
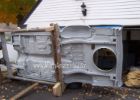
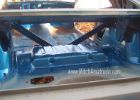
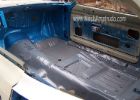
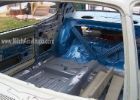
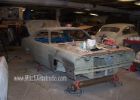
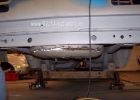
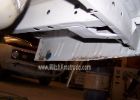
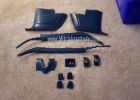
Removed all bolt-on sheet metal. Only rot-through on entire car is a quarter sized area on the bottom of the spare tire well in the trunk. All rust seen in the pictures is only surface rust that can be cleaned up. Removed entire interior with exception of dash.

January 24, 2006
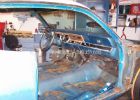
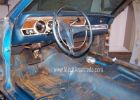
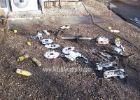
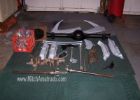
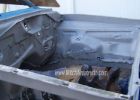
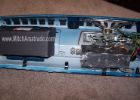
Dash and all related parts including pedals, heater assembly, etc. have been removed. Continuing to carefully bag and label all parts and hardware that I remove from the car
February 5, 2006
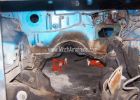
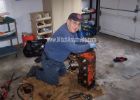
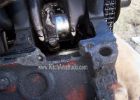
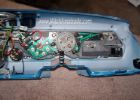
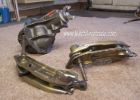
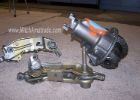
Engine and tranny removed from the car. Since there's no top end on the engine, and I removed everything else from the engine compartment, all I had to do was to remove the stuff from the front end (water pump, etc) and I was able to raise the car up on ramps, then remove the engine by dropping it rather than going through the dreaded engine hoist rental procedure and pulling it. Saved a lot of hassle and some expense.
February 11, 2006
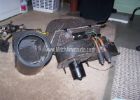
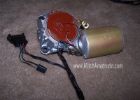
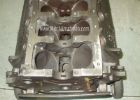
The wiper motor has been overhauled and painted with an Eastwood paint that simulates the original gold iridite plating. I found a can of the correct red "Glyptal" coating online and applied it to the face of the motor. I restored the under dash heater box assemblies. Put in a new heater core, cleaned up and painted everything real nice, then re-assembled it all using an aftermarket foam seal kit that worked out nice. Repaired / re-taped the dash wiring harness. Engine block is now disassembled with the help of some old guy.

February 16, 2006
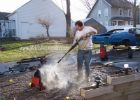
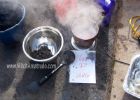
Leave it to your local Firefighter to be the guy in the neighborhood to do stupid stuff with heat and chemicals. I began to clean and degrease parts by developing the "Dipmaster 2000", which consists of a stainless steel bowl that sits atop an electric hot plate, and is filled with a a lethal mixture of Castrol Super Clean and diesel fuel. It worked beautiful, not only removing the grease, but stripping the paint from most of the small parts as well !
March 12, 2006
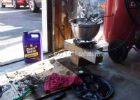
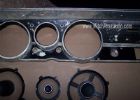
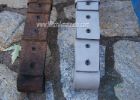
Work on the car has slowed down a bit in the last month, but the entire front suspension is now removed and I have installed a temporary front axle for moving the car around. I left the K-frame on the car, thinking that if the car gets bumped or dropped or whatever while in the sandblasting or body shop that the K-frame might help to keep everything aligned. I'll remove it and clean / paint it prior to re-assembling the car. The engine compartment has been stripped clean of all wiring and stuff. I shipped out the dash bezel, dash lenses, and the glove box trim to CV Vacuum Platers in Canada to be re-chromed and restored. I sent the dash speaker for the AM radio to a guy in Colorado to be re-conditioned.
The car did not have a tach in the Rallye dash when I got it, but it did have a factory blank thing installed in it's place. The fender tag includes the N85 code that indicates it should have a tach though. This is weird because I've found nothing on this car that is not original. Maybe they forgot to include it at the factory or maybe someone removed it at some point in time. I found one on Ebay that was NOS and decided I'd like the car to have it. I paid pretty good money for the tach, but it's real cool looking and I feel it will be a valuable addition to the car. I also Installed a new IC type circuit board in the factory tach from RealTime Engineering to replace the original transistorized one.
April 23, 2006
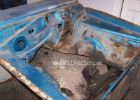
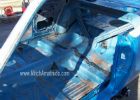
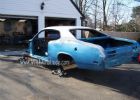
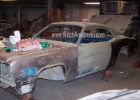
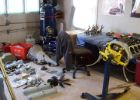
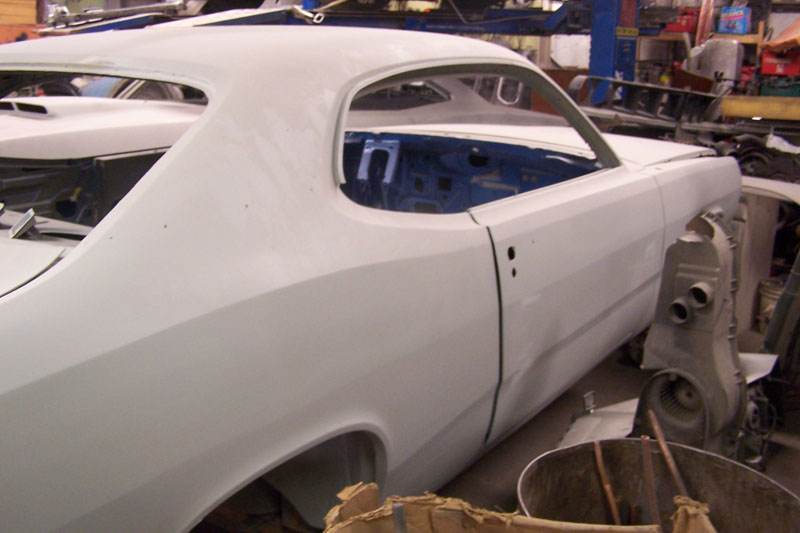
The car is now COMPLETELY disassembled. In one of the photos of the interior you can see a bunch of crap on the floor. This is all of the junk that I cleaned out from the cowl vents and the fresh air vents. What a dirty job. I had to fabricate attachments for the blower and the vacuum to be able to get in there and clean it all out. My theory now is that this junk clogged up all of the water drains, causing water that entered the cowl vent to drain inside the car, ruining the carpet (which was not in the car when i got it) and rusting the floor. I borrowed an electric pressure-washer for another project and decided to give it a try on the car. Holy cow, what a difference ! The engine compartment cleaned up real nice. Most of the loose rust inside on the floor and in the trunk was blasted away. The solidness of this car is even more apparent now. I could actually get away with not even having the shell sandblasted, but I'm still going to do it so that it's done right.
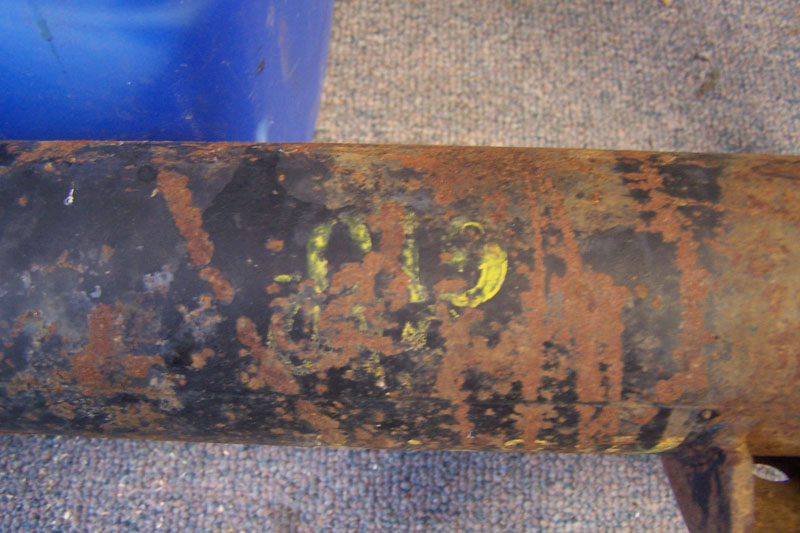
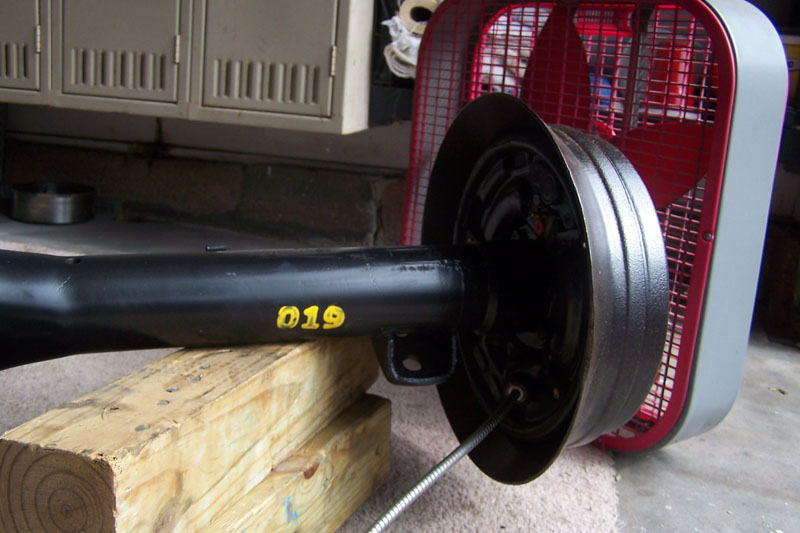
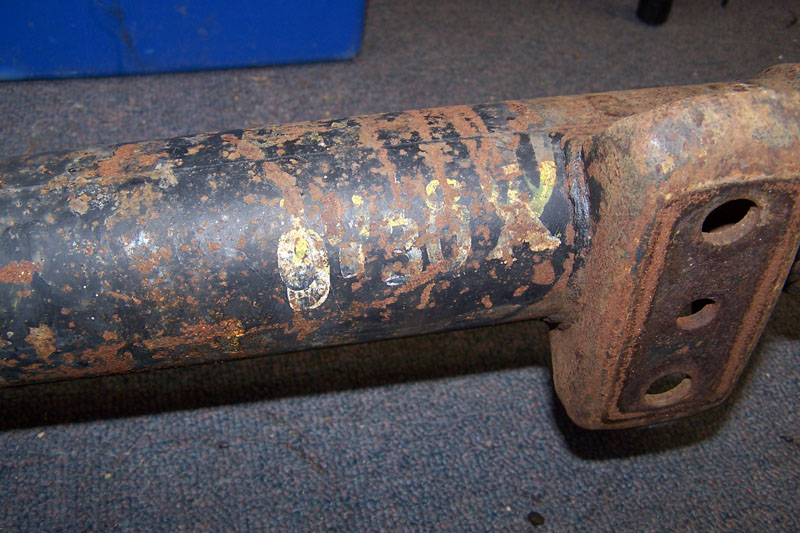
I did a "gross degreasing" of all parts using about a dozen cans of oven cleaner from the dollar store. This ended up being much cheaper and more effective for this purpose than the legendary "Gunk". The cool thing is, after the cleanup I could see original markings from the assembly plant on some of the components. Stenciled or even hand painted numbers on stuff like the tranny, who's hand-painted 3 digits match the last 3 digits of the tranny's part number, which matches the number on the broadcast sheet, etc. Very cool.
I'm trying to decide whether or not to paint over these markings or to just clear-coat the parts to keep it looking as it did when it rolled off the line in December of 1969. I bought a parts cleaning tank from Northern Tool. Working out very well. I filled it with 10 gallons of Super Clean then just let stuff sit in there for a few days with the pump running. After a quick rinse with the hose most of it came out perfectly clean, and in some cases the paint was gone too.
The reconditioned speaker for the dash came back. I've been compiling some NOS parts from Ebay, and I just today sent a check to pay for the restored rallye dash bezel, which should arrive in 4-6 weeks. Looking forward to seeing that. The next big step is to send the shell out to be blasted, paint the engine compartment, undercarriage, trunk, and interior myself, then figure out who to send the car to for it's long-term body work and paint. meanwhile I'll be blasting all of the small parts myself using aluminum oxide and a small pressure-blaster, and finally painting or clear coating all of them. Don't expect too much progress this summer. Work on the car has already come to a grinding halt because of other projects that I have going on this year.
July 30, 2006
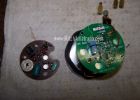
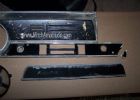
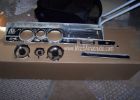
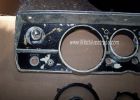
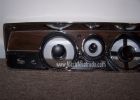
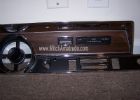
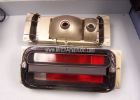
As predicted, I've done NOTHING to the car since April. The only thing that is new, is that the long-awaited restored dash bezel recently came in from CV Vacuum Platers. Their 4-6 week time estimate ended up being about 4 months, but I was in no hurry for it at all so I have no problem with them about it. It came out awesome ! It will be hard to see in the pictures but it's really, really nice. I knew from the start that this would be one of those items that would help to make the difference between a mediocre restoration and a top-notch one. people are going to be impressed when they look inside the car at shows and see this. These pictures show before / after pictures of the dash speaker and the dash bezel and glove box trim

September 16, 2006
Well, I ended up spending the whole summer working on my pond, so I actually did nothing on the Duster. This week I finally got the pond to a point where I don't have to worry too much about the pond anymore, and finished up some other household projects. I was on night shift and knew that on my 1st day off I 'd finally be working on the car again and I was really psyched about it. It's funny how things go when you're working on a car though, because as excited as I was to be working on it again, by the 2nd day of doing this junk I finally had to admit to myself..."alright, this sucks" !!!
What I had to do was put the car as high as I could in the air and scrape all of the factory undercoating from beneath the car, using chemical paint stripper and/or a propane torch and a putty knife. It was a dirty job but one that had to be done in order to achieve my goal of the car having a "brand new" appearance when complete. I hoped that I would be able to get the car to the blasting shop so that I could paint the undercarriage and stuff, but he can't do it until the end of September or early October. It's gonna be too difficult to get a couple of days warm enough to paint that late in the year so instead of rushing and stressing I'm going to put it off until spring. I'll have plenty of other stuff to do during the winter anyhow.
September 25, 2006
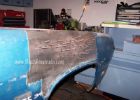
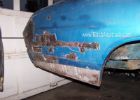
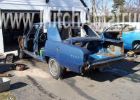
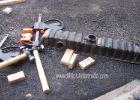
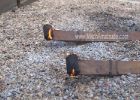
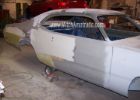
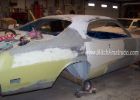
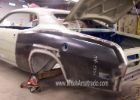
Started messing around with some body work. I had no intention of doing any body work on this car. Since I want it to be perfect, I figured I'd leave it up to a professional, especially when you consider that my track record with body work is not very good. But, I changed my mind. I figure that if I at least get all of the rough work done it should save me a lot of money. Maybe I can even do all of it, we'll see. Since there's no hurry to finish it I can take as much time as I need to get it perfect, besides, your ALWAYS hearing horror stories of cars going out to some guys garage and not appearing again for a year, and coming back with shoddy work anyhow. We all know it's always best to whatever you can yourself, and I figure the less idiots I let get their hands on this car the better. SO....all of that said, I bought a used Matco spot welder/dent puller tool on Ebay. Guys, this is the best automotive tool since the inception of the ratchet. After a minimum of trial and error, I got good at using it. My RF fender was bashed in real good. it would not "pop" out or even bang out from behind. I tried 3 or 4 studs on it but still couldn't get the dent to budge.
The next day I decided to try again, and found that you just have to do this pulling procedure a liiiiitle bit at a time rather than trying to get a big dent out in 1 or 2 pulls. You can see in the picture how many studs I used on the fender (which I bolted back on the car temporarily). An inch or so at a time and eventually you're golden. I haven't even bought a can of bondo yet and this fender that I was this close to replacing is nearly perfect ! I did some pulling on the R rear 1/4, but this panel was hit pretty good right in the rear corner. I'm not sure if I can save it without replacing that section of the panel, but I'm going to try again. I did find some very small rot holes (pinholes) in the very lower part of that same 1/4, and I cut that section out. Along with the spare tire well, these will most likely be that only sheet metal pieces replaced. I Inspected the same section of the L 1/4 panel and it is pristine.

October 25, 2006
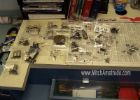
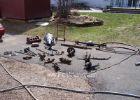
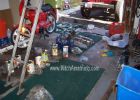
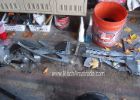
It's been a very busy late summer and fall for me with a huge project at home and a bunch of other time-consuming stuff going on. Every day I've been thinking to myself "maybe tomorrow I can work on the car" but it just never seems to happen. Finally I was able to come up with 2 days of doing almost nothing but working on the car, and even though it wasn't the most pleasant work, it felt great. This round of work was media blasting small parts. Some time ago I bought a small pressure-blaster from the Cummins traveling tool sale in town.
Whenever you get a new tool that you have no experience with you always wonder how it will work out for you. Especially things like this, where you can get one for anywhere from 100 dollars to probably thousands. This thing was VERY quirky, but in the end it got the job done, and I even ended up doing many more pieces than I had anticipated since it was able to handle larger parts than I thought it would. If you want to hear more about this machine and also why doing this kind of work in the fall in New England is perfect, then click here. So, I had a large pile of parts that had previously soaked in the cleaning tank and cleaned up nice. I loaded up the machine with 50 pounds of aluminum oxide, set up a portable screen house with a tarp floor and some sawhorses to do the work in, and went to work. The screen house thing worked beautifully, containing most of the media and the dust. I try not to get pissed when I work on the car because it's supposed to be all fun, but I had a lot of troubles on my 1st day of blasting. It started out great but after only minutes I began to have troubles (see the above link for more info). After 2 days though, I was finished. I'm sure there will be some stragglers along the way but I'm confident that I got to most, if not all of the car's small metal parts, and they look great.

November 12, 2006
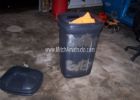
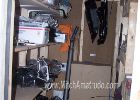
Most of the blasted parts have been primed and painted. The only exceptions are the items that have to be painted the same color as the car, or the interior stuff (door hinges, steering column housings, etc). It all looks really nice. I used Eastwood paints almost exclusively. Eastwood paints are expensive, but they look real nice, and are advertised to be durable. We'll see on that. They have a lot of cool paints that simulate the natural colors of materials like bare metal and cast aluminum, and their chassis black and underhood black paints have just the right amount of gloss in them to simulate the original factory colors, rather than just the usual Rust-O-Leum gloss or flat blacks. It's exciting to finally start to see stuff that was removed from the car, degreased, stored, blasted, primed, and painted all looking brand new and ready to be bolted back on the car someday. For now however, they've all been bagged in pillowcases or plastic bags, put in a big garbage can, and off to storage in my undisclosed official parts storage area.

November 15, 2006
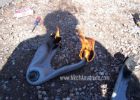
"Burn baby, burn". This was kind of a cool job. After doing some research online, I learned that the best way to remove the front suspension control arm bushings (if you don't happen to have an hydraulic press, that is) is to burn 'em out. The lower bushings were uneventful I had to heat up the rubber in the bushings enough so that it would soften, then gouge out what I could with a screwdriver before finally driving them out with a hammer and a drift. The upper bushings were a lot more fun though. The rubber in them actually caught on fire and oozed out of the bushings. It looked a lot like those charcoal snakes that we had when we were kids, since as the rubber oozed out of the bushings it got more oxygen and burned intensely, constantly oozing out and burning until all of the rubber was consumed. I was unable to install the new bushings myself without a press, so I dropped all of it off down the street at Bryon Cwikla's "Restoration Suppliers of Connecticut". Bryon's warehouse is a treasure trove of used Mopar parts, and happens to be conveniently located just a few blocks from home. I painted the newly refurb-ed arms with Eastwood Chassis Black and added them to my collection of parts ready to re-install.
November 20, 2006
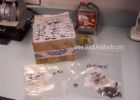
Rebuilding the front disk brake calipers, which are the old Mopar 4-piston type. They were froze up real good after having sat for so long. I soaked them in rust penetrant for days, C-clamped them and viced them to try to free the pistons, heated them up, tried everything I could to free up the pistons but had lots of trouble. My shop manual clearly stated NEVER to use air pressure to try to force the pistons out, so I figured that would be the most efficient way to do it. Eventually I got them freed up enough with solvents and heat so that I was able to pop them out with compressed air. It was cool because the pistons would start to come out slowly, and I'm wondering what the big deal is about using air for this, when suddenly "BANG", and like the cork from a champagne bottle, the pistons would shoot out clear across my back yard.
I removed 7 of the 8 pistons successfully, but had to break 1 of them, and another became scored up pretty bad from all of the abuse trying to remove it. Rockauto.com, which is a great resource for parts, had the pistons and the seal kit in stock. I honed out the bores, reassembled the calipers, painted 'em with Eastwood caliper paint, and added them to the growing collection of rebuilt parts and assemblies.
November 27, 2006
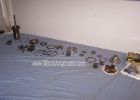
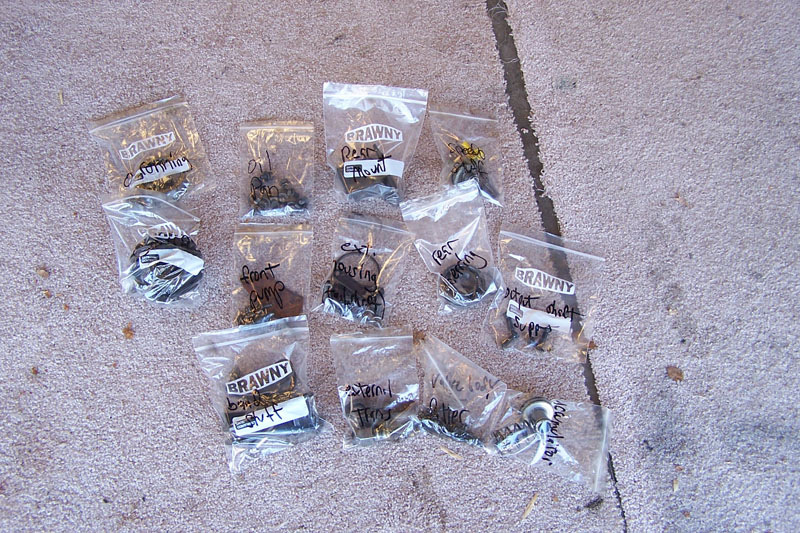
After a long hiatus, the legendary "Dipmaster 2000" has been put back into service for the arduous task of cleaning up all of the car's hardware. All of the nuts, bolts, screws, and whatever other small items were boiled in the same mixture as before of Super Clean and diesel fuel to remove all of the grease and dirt. Since all of those items were previously bagged and tagged to keep everything in order for re-assembly, I needed to be careful not to lose that, which meant having to do a ton of small batches at a time, which kind of sucked after a while. After this procedure, each batch was dipped in a product called "Evaporust", which is a great product for removing rust from stuff. It's a non-hazardous, non-toxic liquid, and all you have to do is put the parts in a container and fill it with the product. Let it sit overnight in a warm environment (the boiler room at my Fire Station works great for me) and all the rust just melts off. Then they get a rinse and a dry, get a quick buff with the wire wheel, and everything looks like new again. The final phase is either priming them for future paint, or dipping them in Eastwood's metal blackening solution, which simulates the factory's black oxide coating. Another really nice product which will greatly add to the car's attention to detail when complete.
December 1, 2006
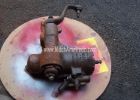
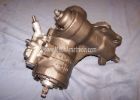
After finishing the brake calipers, I also rebuilt the power steering pump. Not too bad of a job with the help of the diagrams in the shop manual. Took advantage of the Auto Zone's free tool loaner program for the first time by using their pulley puller. Can't beat that deal. This car restoration is cool, because for the first time I have the chance to get into things like this. Most people would just get rebuilt stuff and bolt it on, but I've got plenty of time to do everything myself, and I like the feeling that I'm retaining as much as I can of the car's original parts. Think about what it's going to be like the first time I drive the car, with everything being rebuilt, repaired, or replaced at once. It will be interesting to see how long it'll take to get all of the bugs out. I also refurbed the taillight assemblies, which was just a quick disassembly, cleanup and repaint of the housing, and polishing of the lenses. The weatherstrips were cracked and dry, but they are not available to buy new so I applied a coat of black silicone to them. Looks lousy in the pictures but this won't be seen when they are installed. The lights look great !

January 25, 2007
I took a little bit of a rest for the last couple of months. All I did was continued to clean up as much of the hardware and small parts that I could easily get out of storage. Most of it has either been primed, painted or chemically-blackened, and I decided that it's time to put this phase of the project (small parts) to bed for the rest of the winter. I bought a '67 4-door Dart. My intention was to drive it for the winter, then tear it apart to keep what I could use from it and sell-off the rest. The car turned out to be really rusty, and there were some things that needed attention so I decided to abandon the idea of registering it and driving it. I tore it apart this month and sold what I could. All I really ended up with for the Duster is one big bag of hardware and stuff, but this will be very helpful when it comes time to put everything back together, since I know that there several cases in which the original "correct" hardware was missing or shot. Should have seen me before I pulled the motor, driving the car as pictured around the neighborhood, sitting on a milk crate in the freezing cold blowing the horn and stuff !!
November 25, 2007
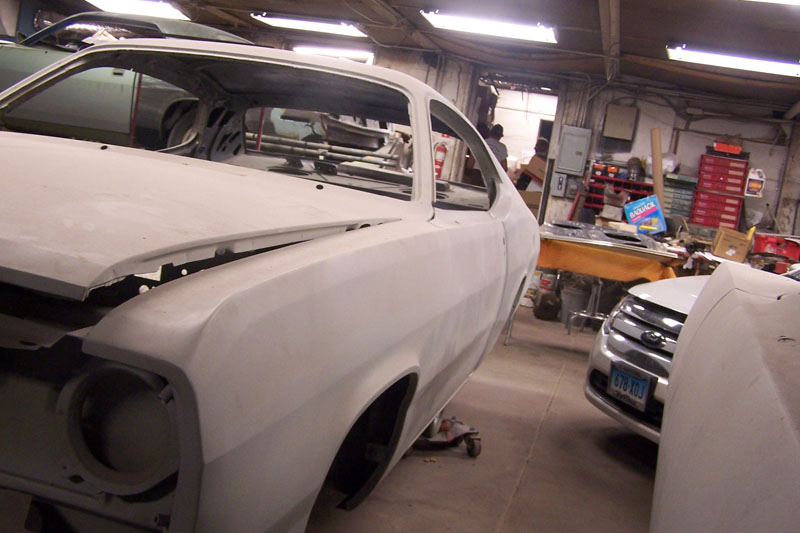
Finally, after 10 months of silence, I'm back. I salvaged what I could from the '67 Dart and sadly had the wrecking yard come and haul away what was left of it. I hated to ruin this car, but trust me, it really was too rusty for anyone to be able to deal with. I bolted the fenders and the doors back on temporarily so that I could do some bodywork. Pulled and/or re-pulled some more dents, and finally started the dreaded process of doing bondo work. I've never been very good at this, but I'm taking my time and doing the best that I can. I figure that even if I can't get it perfect, I can always sub the work out to someone good after I've got all the rough work done. There was probably a stretch of several months that elapsed before I even touched the car, and even though it was time for the incredibly dirty and laborious task of sanding bondo, it felt great to be working on the car again. I'm getting good at banging out or pulling dents to the point where all I need is a thin coat of mud, so don't be alarmed at the appearance of tons of bondo on the car. I have a rough application and sanding done on the left side of the car only. It's slow, but it's getting there.
I harvested a replacement spare tire well from a donor car, and it's cut, grinded, and ready for my welder to install. Finally, I had my annual day of blasting parts last week. This time I had even more troubles than I did last year, (see "pressure blaster") but in the end the stuff came out real nice, and has since been primed and painted with Eastwood paints. As for this coming winter, it looks like I'm pretty much S.O.L. for being able to get anything done. Sure, there's more sub-assemblies that I can work on in the garage, but I'm planning on spending most of my free time trying to get my business off the ground (see "MAVMAS") I was hoping to sand some mud in the closed, heated garage by fabricating a custom exhaust system for the dust, but the 1st prototype of the "SuperEvac 5000" bondo dust removal system was a complete failure, so it might not become a reality.
Oh yeah, I also dropped off the engine block to a local machine shop. He's going to clean it up and magnaflux it. If it gets a clean bill of health, he's confident that he can fabricate a new piece to replace the broken chunk. The blasted and primed parts shown above include the steering column, shift tube, wiper linkage, bumper jack components, front sway bar, bottom of radiator, and front bumper brackets
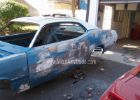
July 4, 2008
This update has been a looong time coming. Over 7 long months. I basically spent the whole winter working to get my "Diamond Plate Productions" business off the ground, so little time was spent on anything else. The latest report from the machine shop is that he came up with a junk 318 block, from which he's going to cut a piece to machine and prepare the block to accept this donor piece, so that it can be welded in.
I shelled out tons of my hard-earned cash for a pair of numbers and even date-code correct exhaust manifolds. These things are way overpriced, but I figure I better pick up a pair while I can still get them at all. From Ebay, I got a good deal on an aftermarket 1/4 panel for the left side. I had the guy cut it into 2 sections for me, which was all I needed. I decided that even though all of the mud on this panel is very thin, I would rather just replace the sheet metal.
The 1st two pictures below show basically where I had the guy cut the panels (to ship the entire panel would have been cost-prohibitive). I proceeded to cut the panel section at the front of the rear wheel. Came out OK, but I found that breaking the spot-welds was a difficult task. Even more difficult was cutting the "new" piece to match the section that I cut from the car. So difficult that of course I mis-cut it and basically ruined it. Figuring I'd probably have the same troubles with the rear section, I decided to cut my losses at this point (only 60 bucks or so). I took a ride to see the friendly folks at
Auto Body Specialties in Middlefield, CT and bought an entire 1/4 panel for the car. As much as I wanted to try to retain the car's original sheet metal, I am OK with this decision. The original panel was banged up pretty bad, and to replace just those sections would have resulted in a lot of weld area to cover. By replacing the entire panel, much of the welding will now be spot-welds in inconspicuous areas. Not a great feeling though, taking the cutting tools to the original sheet metal on this car. I will be getting professional help in welding the new panel in place. Speaking of the spot-welds, I invested in yet another special tool for this project, which is a set of Blair spot weld cutters. This is a nice drill tool, which basically reams itself through the weld and the outer layer of sheet metal, leaving the inner panel intact with just some surface mess to grind off. It did take a little practice, as when I began to attack the first few welds, I went through both layers, but with some practice it ended up working real nice.
The 3rd picture shows the gaping hole left after the rough-cut of the 1/4 panel. After that is a shot of the inner 1/4 panel section, displaying yet another example of this car's lack of body rot. As with many other parts of the car, the rust you see here is all just on the surface. I'll give it a blast and probably cover it with POR-15 or something to prevent any further deterioration. Finally on the bottom row there's some shots of the Blair tool and the spot weld removal process. You can see what's left of the cut-up 1/4 panel that is still spot-welded to the wheel opening. I sliced it into small sections, then did my thing with the tool. Finally, I grabbed the pieces with channel locks, gave 'em a little wiggle, and off they came.
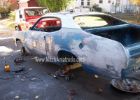
July 11, 2008
Finally got in a good, whole day of working on the car. I reloaded the pressure-blaster with #80 grade aluminum oxide instead of the #46 that I had used previously. Since I had hard times with blasting last fall I wanted to try something different. This time around I blasted all day with very few problems. I hit all of the areas on the car behind where the new LR quarter panel goes, did the entire back-side of the new quarter panel to remove the "overseas primer" so that a good quality prime coat can be applied, and the exterior sections of the same panel in the areas where it will be welded. Finally I cut-off a good section of the RR quarter panel that will be replaced by a patch panel. This little bit of work took the whole day to do, since working with the pressure blaster is a very slow process due to so much time spent waiting for the air compressor to catch-up, plus there was a 2 hour+ cleanup process removing all the blast media from the car.
Unfortunately I found a pinhole in the LR quarter panel extension, which is the section behind the panel (the 4th picture above, under the bondo can) so I'll be replacing that panel as well, along with the same panel for the R side. I'll have a small amount of grinding to do where the spot-welds were drilled out, then I have to prime everything that I blasted today. Then, the real serious stuff will begin as I install the quarter panel and patch panels. Stay tuned !
1st photo is today's overall work area. 2nd the blasted inner section behind the 1/4. Then the blasted rear section, which will have to be replaced. The 4th photo is actually the inside of the new 1/4 panel, and finally the piece removed from the RR quarter.
September 5, 2008
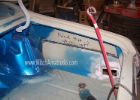
I painted the inner part of the car, which will be behind the new 1/4 panel when it is installed, and also the inside of the new panel. Most of this will not be seen when the car is re-assembled, so I didn't have to do a great job on this. I used just an acrylic enamel with my old suction spray gun, and it actually came out quite nice. It's exciting to see the actual color of the car for the first time. Hoping to have the panels welded on before the winter.
March 15, 2009
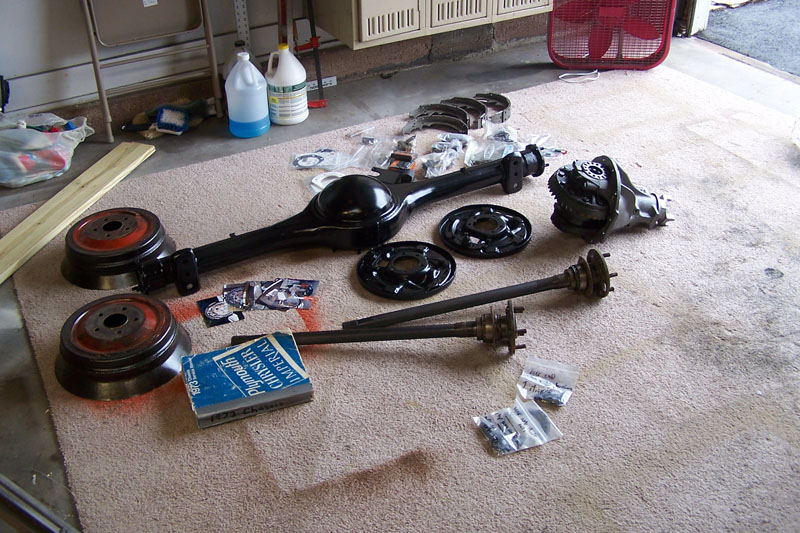
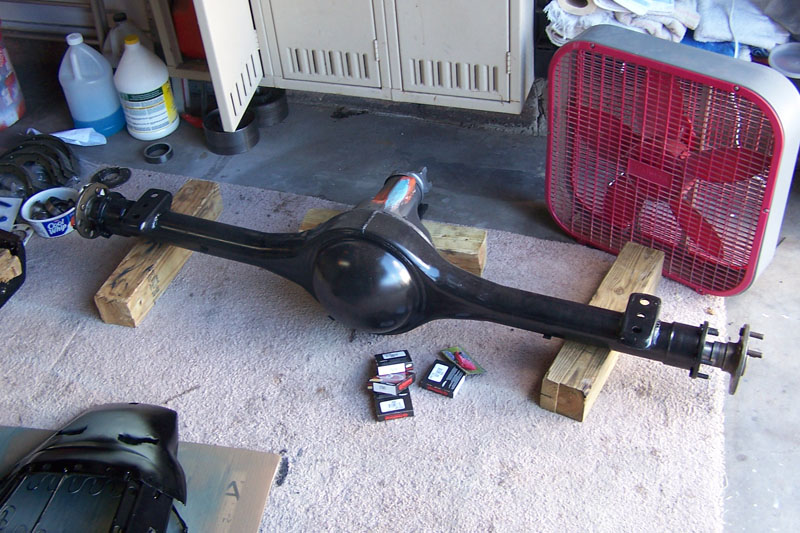
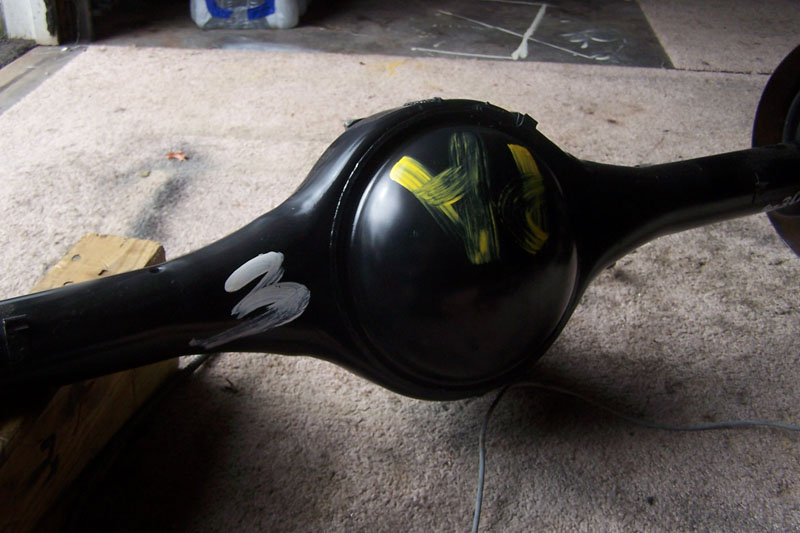
Well, December marked 3 years since I got the car. We've had a long, cold, crappy winter. It's still too cold to work outside, and I'm sure it'll be another month before I can resume any bodywork. I didn't have the motivation to crank up the heat in the garage this winter, so when it started to get cold I moved to doing whatever I could inside the house. Never got a chance to have the panels welded in place. Before it got too cold I did another round of blasting, cleaning, and priming and/or painting of stuff.
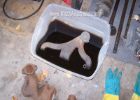
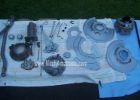
The pictures below are in no particular order, but show all of this stuff in various stages of work. Some notable items are the rear-end housing, and the valve covers and exhaust manifolds, both of which were Ebay items and are the "correct" parts for 1970. Also you'll see that the rear axle shafts have been cleaned up and I installed all new bearings, seals and studs on them. The red milk crate contains most of the engine hard parts that are cleaned up nice now. The crankshaft is another example of how great "Evaporust" works. You can see the before and after sections that showed themselves after dipping the first half of it. I had to get creative in coming up with containers for the many different Evaporust dips, including using PVC pipes that I capped one end of, and even a stove pipe that I siliconed to the bottom of a plastic bin, into which I dipped the crankshaft, one-half at a time while it was hanging from a rope from the bar of the garage door opener. Not my most professional moment but it worked !
The air cleaner is another expensive but correct Ebay item. After blasting and priming it, I decided to go ahead and give it the also-correct black wrinkle finish and got the cool 340 pie tin for it. I needed something to get me psyched after doing all of this dirty work and it worked ! Pretty cool. No pictures yet, but my other still on-going indoor projects are restoring the steering wheel, the outside and inside rear view mirrors, and whatever outside emblems and nameplates that are save-able.
August 30, 2009
As all of you in this area know, it's been a lousy summer. It rained most of the time right up until just a few weeks ago. It was hard to get motivated to do any work on the car. I actually did not touch it until earlier this month, when I redeemed some vacation time from work. Part of the reason for lack-of-motivation was encountering my first big setback with the Duster. Last fall I found a big crate in front of someone's house marked with my favorite 4-letter word...FREE. I hooked up the trailer and snagged it, knowing that with a little modification it would be perfect for storing the finished parts that by now I had all over the place. I weatherproofed it real good and sealed it up tight. I put it out under my vinyl carport, put all the finished stuff in it, covered it with a tarp, and called it a day. Problem is, we got a lot of snow, and as I mentioned it rained constantly from April through July. I had been concerned about the condition of the stuff in the crate.
Finally I opened it up and sure enough disaster had struck. The totally rusted axle shafts and oxidized brand-new alternator were the first things to greet my eyes, and the stench of mildew was overpowering. All I could do was to close the lid. It was probably a month before I had the guts to pull everything from the crate and inspect it all. Basically everything in it was "ruined". All of the blasting and painting I had done over the last few years was shot.
I patiently separated stuff into batches that needed to be re-blasted, those that could just be cleaned-up, etc. I took some vacation time from work and was able to get a LOT of work done on this and also some other stuff. With Evaporust, paint stripper, and a lot of elbow grease I was able to save much of the stuff in the "needs to be re-blasted" pile. There's still a pretty good batch of stuff that was too rusted to save which I will have to do this fall during annual blasting week.
It sucked to have to spend this much time doing work that was already done, but in a rare display of positive attitude for me I realized how fortunate I was to have the car in the garage and dozens of rusty parts laid out around me. I know there's a lot of guys who wish they had a car, a pile of ruined parts that they had to re-do, and the resources to do it all. I was one of those guys not too many years ago.
So.....for a week straight I stripped, cleaned, and painted things. Again. However I managed to sneak in some other stuff in addition to the messed-up stuff so that I'd feel like I accomplished at least something. I even built a new shed in which to house all of the finished items from now on. The last thing I did on this work vacation was to take inventory of all of the stuff in the "needs to be done" area, while putting all of the "done" stuff in the new shed. I didn't realize it until now, but I have gotten a tremendous amount of work done on this car. After pulling from the "undone" pile everything that I will blast this fall, I now have very little stuff left in that pile. I now have more finished parts in the shed than I do unfinished parts on the undone parts storage deck. It's even possible that this year's blasting will be the last.
I've been buying new stuff little by little as my bank account allows, and I now have almost everything that I need to re-assemble the car as a rolling chassis. That step is still a long way off though, because the car will need to be painted before it can be put back together. Below are some new pictures, in no particular order, to get all of you up-to-date. These photos show most of the items that had to be re-done along with some newly done stuff including original master cylinder that I rebuilt, new KYB shocks that were stripped and painted the correct black color, headlight buckets, trunk latch.
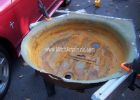
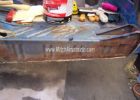
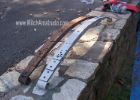
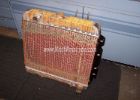
Consistent with the rest of the car, this is the original matching-numbers radiator that was in the trunk of the car when I got it. The core is shot, and when I took it out of storage I noticed that the filler neck and another section of the top tank were smushed pretty bad too. I figured that when I send the radiator for a re-core, the person either won't be willing to straighten the tank, or will do a lousy job of it. Not having any idea what I was doing, I was able to torch off all the solder holding the tank to the core. Then with a clever array of tools including body hammers and woodworking clamps, I was able to do a real nice job at making the tank almost like-new again. Still have to find someone who can re-core it for me though, and I'm guessing that good radiator guys are rare these days.
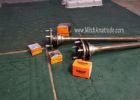
Once again, and sadly for the last time, I had the opportunity to burn-out bushings. This time from the front eye of the rear leaf springs. 2nd picture is an example of the mess I was dealing with all week. 3rd is the new KYB shocks that I stripped and painted black, and finally yet another example of the miracle product Evaporust. In this case I dunked the badly rusted driveshaft overnight and after a quick rinse it looks absolutely brand-new. Notice that even the seam is again visible. The driveshaft even still had the original Spicer U-joints in it.


November 1, 2009
I was on vacation earlier in October for a week and finally had a chance to get a lot of work done at one time. I spent 2 days on the annual fall blasting extravaganza. I had the usual equipment problems that made it take a long time. This work requires a lot of patience. It's dirty, noisy, unhealthy, and there's a great deal of set-up and cleanup time involved as well. In the end it's always worth it though, as it's both very satisfying work to see completed, and a relief to be done and over with it for the year.
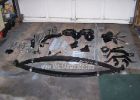
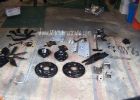
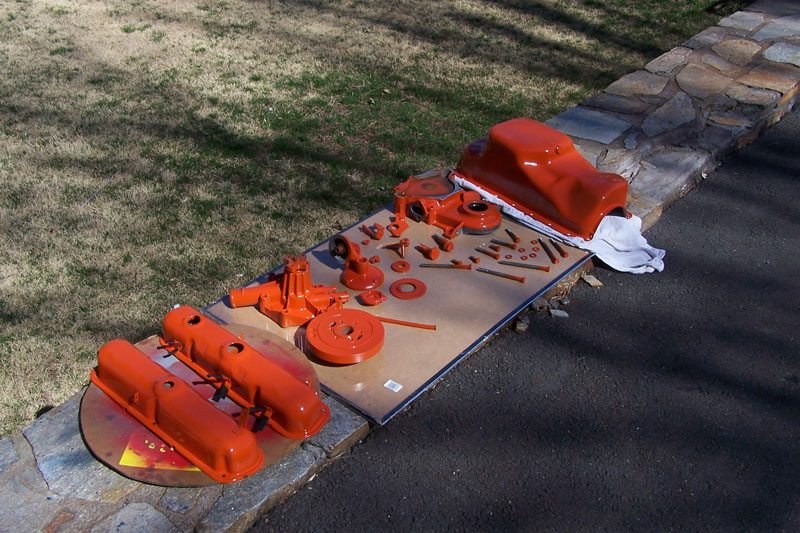
I got a real good amount of stuff done this year. Much of it was re-doing the stuff that got ruined by the moisture, but I got a lot of other stuff done as well. Here's the latest pics.. 1. A shot of the blasting tent. 2. Some of the blasted stuff. 3,4. Leaf springs before and after blasting (nice) 5,6. This year's batch complete and painted as follows: Rear bumper brackets, Tie rod sleeve, Steering column to firewall cover, Fan, Trunk torsion bars, Battery tray, Fender to frame supports, Gas cap, Parking brake assy, Leaf spring mounting plates, Glove box door and hinge, Pulleys, Rear brake backing plates, Brake pedal assy, Trans crossmember, Rear spring mounting brackets, Gas tank strap bolts, Horn, Front sway bar links, Rear spring U-bolts, Rear license plate bracket. CLICK THE VIDEO ICON BELOW FOR THE FIRST VIDEO SEGMENT THAT I'VE INCLUDED IN THESE UPDATES ! MORE TO COME IN THE FUTURE

Fall / Winter 2009
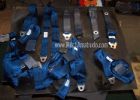
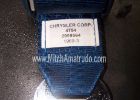
I spent a lot of time with trial and error (mostly error) on trying to restore my seat belts. I won't even explain it here because it'd take too long. In the end I pretty much ruined the webbing with chemicals so I gave up on them. Luckily I researched and found a guy named Bill in Tennessee who's business is called "Upholstery Mods & More". Bill hooked me up real good with a complete of new reproduction belts. They're really nice, and he even repro'ed the original labels, as pictured below.
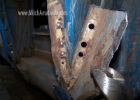
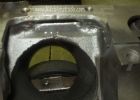
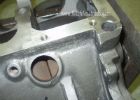
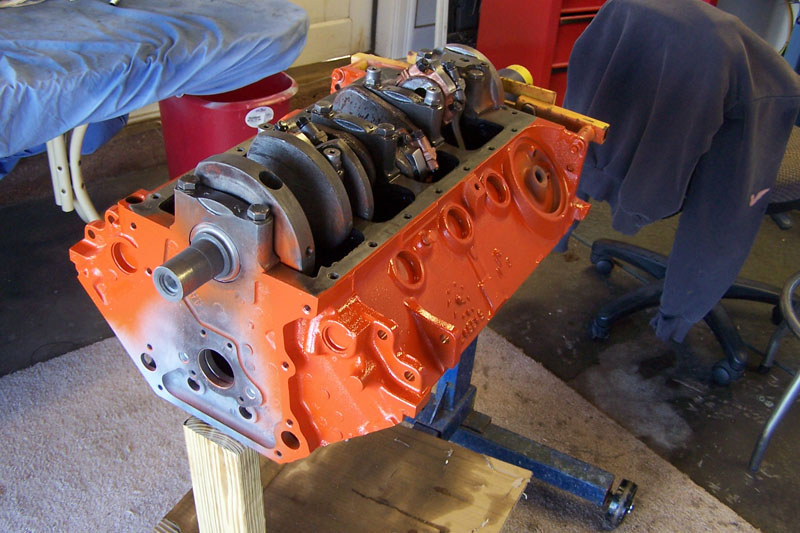
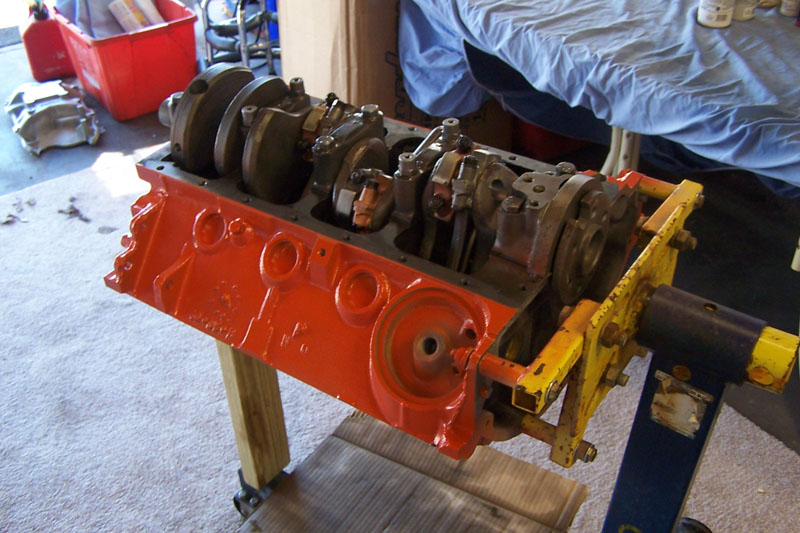
Now for the good part. Remember that broken engine block ? After much research I decided to have the block "stitched" to repair it. I would say that half of the people out there say that welding cast-iron is not a problem. I've heard from guys who've said that they have welded plenty of race motors without any problems. The other half however strongly advised against it, and some said there's a good possibility that it would ruin the block. Remember that this is a numbers-matching automobile so ruining the block is not acceptable.
The closest place I could find that does stitching is J & M Machine Company in Southborough, MA. The guys seemed nice enough during my correspondence with them so I decided to give them a try. Last year I opened a Christmas Club at my bank with the intention of using the funds for this engine repair. I thought that was a cool way to ease the pain of paying for this repair. I delivered the block, a junk 318 donor block, and the crankshaft to J & M in October. They quickly went to work on it and within only a few days I got the report that the block and the crank both checked-out fine with the magnaflux. No further cracks or injury. I previously had a local shop mag the block a couple of years ago and he too said it checked-out fine, so now I have a 2nd opinion.
They cleaned the block by "bake-blasting" it which involves baking the block in an oven to loosen all of the crud, then it goes into a shot peen booth. The block also passed a pressure testing procedure that they performed, then they proceeded with the repair. I'll let the pictures tell the rest of this story. As John (The J in J&M) said..."The block is as good as new. The only people who will ever know this repair was done are you and me". Of course now the whole world can know, but I have no problem with that because I have 100 % confidence that the block is indeed good as new.
Earlier this summer I was at my local AutoZone store on a Sunday. The guy in front of me was buying a radiator. Knowing that it was a stupid question since he was at the AutoZone buying a radiator, I asked him if he knew of a good radiator shop. Turns out he ended up being a car guy and threw a recommendation right at me of Perrault's radiator in Meriden, which is about 30 miles from me. This guy said that he had to get his car on the road right-away (hence the AutoZone radiator), otherwise he would have gone to Perraults. I figured I'd give them a try. So, I dropped it off and gave him the usual "no hurry" line. I never even asked for a price, and he called me maybe a couple of weeks later to say it was all set. Looks real good and the guy is real nice. The cost was even a little less than what I was hoping it would be. I told him not to paint it so it looks crappy in these pictures. I'll give it a real good rattle can job soon.
What's next ? Nothing for a while. I have a few things that I started but never finished. I'd like to get them taken care of before the end of the winter, but other than that I'm perfectly satisfied with what I have accomplished this year. I don't think I even touched the car until late summer, but as I sit here compiling this update I find myself basically ready to take a break from the Duster for a while. I have to coordinate with J & M about buying the proper parts that he needs to finish machining the block, which I'm working on now.
The final pictures below are exciting. This is a "deck below my deck" that I built when I first got the car. This is where I tossed all of the parts that were removed from the car. For the last 4 years as you've seen in these reports, little by little I'd grab a batch of stuff for blasting or an item for rebuilding from this deck and complete it. Then it would get moved to the "completed area" which is now the new shed. As you can see there is very little left on the deck. Most of it is exterior trim pieces that need to be replaced or simply cleaned up. There are a handful of larger items stored in other areas such as the hood, deck lid and the seats, but this is all easy stuff to re-do. In a nutshell, all I really need to do is finish the body (huge) and put the car back together.
June 2010
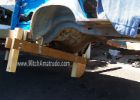
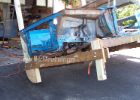
It's June and I'm having a very busy year with other stuff at home so again I have not had time to do anything with the car until now. The next thing I need to do is to clean-up and paint the undercarriage of the car, as well as the engine compartment, interior, and trunk. My original plan was to have all of this media or soda blasted. I thought I could trailer the car there, have them do it and trailer it home, but come to find out it seems that none of those places can accommodate an entire vehicle, so they offer a "we come to you" service. If I lived somewhere nice and had 5 or 6 acres I could simply drag the car to the "back 2" and have them do it there, but since I live in the ghetto and my neighbors have been putting up with all kinds of noise and eyesores for the last 5 years with this project (not to mention having to wear a hard hat at all times while outside to avoid being struck by flying tools) I decided that having something like this done so close to other people's houses is asking too much. Besides, I took a good look under the car again and realized that it is so clean and rust-free that I don't think it's even necessary.
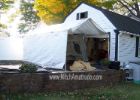
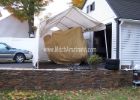
So, I started thinking about how I was going to access the bottom of the car and I started googling stuff like "how to build a wooden rotisserie". What I came up with was an idea that I stole from another guy that he calls a "tilty", and I thought I'd give it a try. Luckily I had a lot of used lumber lying around from another project, but I had to make a ton of trips to the hardware store for bolts and stuff, and there was a lot of thinking and planning time involved so it took a couple of weeks to finally get this thing together. Using the existing temporary front and rear axles, I basically built a wooden cradle that the car attaches to.
The idea is that 2 gorillas can pull down on the 4x4's while another picks up on the other side of the car to make it tilt up on it's side. I wanted to add a more high-tech edge to this extremely redneck device so I worked my existing winch (the one I use to haul the car in and out of the garage with) into the project. Besides you can't always find 2 gorillas when you need them. I finished it up and tried it out and I'm confident it's gonna work great. This will most-likely be a 1-time use device only so I didn't want to unnecessarily stress anything out, but I hoisted it about halfway up and everything seemed secure. The plan is to go all the way over with it so that the car rests on the 4x4's and also leans up against the front of the garage so that it can't go anywhere. I would NEVER think of working under the car just hanging from the winch cable as shown in the picture. The last picture shows the car hoisted up on the tilty. You can see the red line that indicates the route that the winch cable takes. Stay tuned for a report on the dirty job of restoring the bottom of the car.


September 10, 2010
Annual blasting time has arrived, and I could not be happier with my results ! I expected to have to devote 4 days to doing only the outside of the front fender wells, but ended-up achieving much, much more. I guess it was a combination of good luck and my new much larger compressor.
After 4 long, dirty days of blasting I finished the entire front clip of the car. I had planned on only doing the outsides of the fender wells and hiring someone to do the engine compartment and trunk. Not only did I do the front end, but also the interior side of the firewall, which was the rustiest part of the car. My original plan was to POR15 this area and call it a day, but since the blasting was going so well I decided to just go-ahead and do it the right way. Then I moved on to some areas under the car near the front, around the windshield opening, the rear wheel wells, and the door jambs. This is really crummy dirty, loud, time consuming work. There's half a day of setup and a day of cleanup involved as well. As described in previous updates, there's still the usual equipment maintenance and repair issues involved as well.
I expect there to be 3 1/2 phases of blasting work on the chassis. This was round one. The next will be doing the back end of the car such as inside the trunk and the rear frame rails. Round three will be when the car is tilted. The 1/2 round will be when all of the big stuff is done there's gonna be some touch-up work all-around to hit any missed spots. All or most of the blasted surfaces will also need to be hand sanded to knock down the rough freshly blasted texture, then etch-primed for protection.
I also learned that my body guy will be able to do the body over the winter so the pressure is on to get all of this blasting and priming done while I can still work outside. If all of this becomes a reality the car will be back next spring ready to put back together !!!! Expect more frequent updates in the coming weeks and pray for good weather !
Lots of pics to see this time and another video. Special thanks to Dad for once again coming up to help out and to take the pictures.


September 22, 2010
Another big round of blasting, again with excellent results. The 1st two pictures are of the blasted dash frame. Hard to see in the pictures but lots of nooks and cranny's to get into. This was another piece that I was planning on having done "professionally" due to it's size, but I felt that I was not confident in anyone's ability to get into all of the hidden areas. Also, the all-important VIN tag is riveted to the dash, and if they were to destroy it this would be disastrous for the final value of this numbers-matching automobile. A few layers of legendary duct tape carefully trimmed to fit around it and some careful manipulating of the blast nozzle and all was fine.
I was advised by my body man to hand-sand the entire front clip with 320 to smooth out the somewhat rough texture of the blasted steel. Not sure which sucked more, the blasting or the sanding, but it really did come-out nice and smooth. Problem is, for some reason the sanded steel began to flash-rust much sooner than the blasted-only steel, so I had to coat it with Evaporust to prevent any further rust until I can prime it. The third picture is the front clip after hand sanding.
Next project was moving on to the rear section of the car. As expected, this was a really crummy job. Inside the trunk there are lots of places that were real hard to get-at with the blast nozzle. Lots of crawling around, working upside down, banging my head, etc. Then I moved on to the bottom of the car. I planned on doing the whole bottom of the car after it is tilted on it's side (see June 2010) but since the areas from the rear wheels back are pretty easy to get to while the car is on the "tilty" cradle, I decided to get it over with now, since when the car is tilted I'm going to want to get things done very quickly.
This was a 2-day blasting session, followed by another entire day of cleanup and regrouping, and again I could not be happier with the results. I also retired my old blue pressure blaster that is seen in some previous pictures and replaced it with a newer model. It was beginning to get worn out, but after 4 1/2 seasons of blasting that old machine doesn't owe me a thing.

October 20, 2010
Since the last update we had about 2 weeks straight of rain. This was not good for the front section of the car as the flash rusting continued. I tried messing around with this and that to clean it up but in the end I decided just to re-blast it all to be sure it was done right. Next, I primed all of the blasted areas with PPG DPX-171 self-etching primer.
The next step was to activate the legendary "Tilty" which has since been renamed the "Redneck Rotisserie". After some careful final preparations and safety checks and with my wife at the winch control, up the car went without a problem. I erected the "tent" around the car and went to work for the next couple of days blasting and etch priming the center section of the bottom. Then I applied the final finish on the bottom of the car, which was a Mipa 4+1 Acryfill primer. Remember that these cars were not produced with any other paint on the undercarriage other than the gray primer dip. The Mipa primer is very light gray so I also tinted it with some black urethane to more closely resemble the original finish.
It's 40-ish degrees outside at night now too, so each night the car was wrapped-up good with blankets, sheets and a car cover to keep it from getting wet with dew.
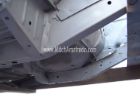
Some shots of the competed, primed bottom. It looks GREAT !! (note that the spare tire well still needs to be installed)... The car has since been lowered to the ground (lowering it turned out to be a little bit hairier operation that lifting it was) and is safe and sound in the garage again. SPECIAL FEATURE !! "Redneck Rotisserie". Click the Video icon.

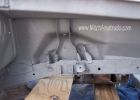
November 10, 2010
I've still been doing a lot of hard work on the car since the last update to get it ready to go to the body shop. I blasted and etch-primed the insides of the fenders, the bottoms and edges of the doors, the front-end sheet metal, and the insides of the hood and deck lid. I am now definitely finished blasting for the year, in-fact the only things I know of that still need to be done at all are the 4 wheels and the K-frame which I can knock-out in a day or 2 next year. It ended-up that I did not have to hire an outsider to do ANY of my blasting. I'm tired now. I've been putting a lot of time and work into the car but it's starting to look real good. I've been stepping over stuff that's been laying around outside and on the garage floor for weeks now. My poor wife has been having to park her car outside for months now and the weather's starting to get lousy.
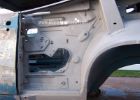
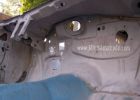
I removed the door glass from both doors and also all of the window regulator hardware. I had to take a lot of pictures and make a lot of notes because there's a LOT of parts inside these doors and it's gonna be real challenging to get it all put back together correctly. I was very disappointed to find that the glass is scratched pretty badly and will have to be replaced. My initial research found that it's going to be difficult if not impossible to find a guy that sells new repro, date-coded glass for Dusters, so I might have to choose between scratched original glass or non-authentic aftermarket stuff.
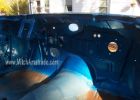
Finally for this update, I painted the inside of the firewall and the front part of inside the trunk the actual EB5 blue color that the car is going to be. I really wanted to do the whole engine compartment and the trunk myself, but we decided just to leave it for the body shop to do during the process of "jambing it out", since chances are it would all get messed-up during the bodywork process. It came out really nice and it's really cool to see some actual finished paint work on the car that is the actual final product.
November 20, 2010
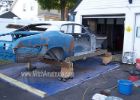
"Off To See The Wizard", or as Hall & Oates would say "She's Gone". This was a huge day, albeit a stressful one. Since the last update 10 days ago I've still been working hard to get the car ready to go to the shop. I POR-15'd and sanded the top (remember it's going to be a full vinyl top so the finish under it doesn't really matter). I POR-15'd the interior ceiling and floor. The ceiling didn't really need to be done at all but I wanted to put something over the bare metal and under the headliner. You could say that I took the easy way out by not blasting the floor however there was never anything wrong with the floor other than some surface rust, and I did spot-blast the worst of that. I could have/maybe should have done the floor correctly with a blast/prime/blue paint but I just didn't feel it was worth it since it's all gonna be covered with carpet and trim anyhow. The bottom insides of the doors were POR-15'd as well to halt any rust that may have been lurking those vulnerable areas. I was instructed by the body guy to install and line-up all of the sheet metal. I was hoping that he would line everything up but he got delayed and had me do it to save time.
The procedure here is that I get it all lined-up correctly, then he'll mark where everything goes and keep track of all the shims used, disassemble all of it again to paint the jambs and the insides of stuff, then when he puts it all back together there won't be any problems with stuff getting scratched and chipped from undesirable contact. This was kind of a pain in the ass to do but as I got closer it got more fun. These $3,000 cars weren't known for their strict attention to detail and fit & finish back in 1970 so it was challenging to try to get good clean body lines. I was pretty pleased with my results though, and as much a mess as the car still is, it's really starting to look like a car again with all the sheet metal bolted back on.
The last thing I did was made a lot of notes on the car with a sharpie to help the body guys out by pointing out what needs to be done where, then I sadly dismantled the tilty/redneck rotisserie device forever and sat the car back down on the temporary axles again. Loading the car onto the rental trailer was near disastrous and proved to be the most stressful, unenjoyable day of working on the car in the 5 years I've had it. I won't even get into the problems I had. Let's just say it was a comedy of errors and mishaps. At the end of the day however, the car was delivered safely to the shop after the 800 foot journey from my home to the shop, and that's all that really matters.
The pictures show the interior with the POR-15'd floor, the Duster re-assembled and back on the temporary axles, loaded onto the trailer, and finally in it's new temporary home along with a couple of it's old friends. Yeah, I know this was a long update and thanks for taking the time to read it. I was shocked and actually somewhat disappointed to learn that the car might be ready in as little as 1 month. I was kind of hoping to have a clear bay in the garage to use this winter and some room to work on other stuff. I know of horror stories where guys send their cars out out for this kind of work and don't see them again for years (JS's Cuda and maybe PJ's T/A) so if I had a choice I'd clearly pick the 1-month time frame.
Updates to this page will be less frequent over the winter. As tempting as it will be to start doing the fun stuff (putting it all back together), even if the car is back in January I'll probably wait for warmer weather before I really start getting into it. I'll be photographing the progress at the body shop but I'll probably wait until it's all done and bundle it all together in one really cool update.
September 2011
Ready in a month? Well, here we are 10 months after the car was delivered and it's not close to being finished. As I am writing this latest update I see that I never published the latest progress from the body shop so here you go... Most of the work you see here was done soon after the car was delivered. The sheet metal work is finished including installing the LR quarter panel, R side quarter patch panel, lower rear quarter panel extensions, spare tire well, and whatever else I might be forgetting. He started doing some mud work as you can see too. All of this was done probably by January of 2011 or so, but the work mostly has stopped at this point.
Things are starting to get behind schedule now however I'm still not real worried about it. I'm guessing I won't see the car until at least after this coming winter is over. That will give me plenty of room in the garage to work on other things that I can have ready to install as soon as I get the car back. The last thing I want to do is rush the guy and I am still 100% confident that he is going to do an awesome job on the car.
I have found myself to be at a point where I have several projects going on at once. Some of them have been in progress for years. This is a bad practice because that's how things get lost and broken. My current priority is to finish-up everything I've started before moving on to anything new. The one exception to this is that in anticipation of wanting to assemble the steering column and dash, and while it's still painting season, I painted all of the dash and steering column stuff. This was done with the expensive "real-deal" suede blue paint that has long since been discontinued but is still available from Mopar dash guru Mike Mancini in Rhode Island. This is another example of spending some extra cash to do things right because the stuff looks REALLY nice, just like from the factory.
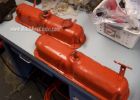
I've been working on the exhaust manifolds, grinding the rust pits from them using Eastwood's manifold smoothing kit. This task was every bit as unpleasant as I knew it would be as it involved 4 days of grinding with a die grinder with the compressor running constantly and me getting filthy. They look like they may have come out good though. I have an interesting strategy for these. I got them as smooth as I could with grinding, then I decided I'm going to leave them outside to rust for a month or so before blasting them. I'm hoping that this will rust and blast away the marks from the grinding process and give them the slightly rough texture that cast iron manifolds should have.
The first picture shows the freshly grinded right side manifold, and the left manifold which I have already grinded but has been outside rusting for a week. I still have to do something with the heat riser assembly on the right manifold. I will provide another update on these when they are done. The next picture is the restored torsion bars, that I stripped and repainted duplicating the dripping paint and the blue markings from the factory almost perfectly. Next is some parts that have been restored or acquired including a nice used fan clutch, master cylinder cover, brake switch that I cleaned up nice, rear end pinion snubber that I blasted/painted, and installed new rubber bumper.
Then there's the inside rear-view mirror. I probably have 10 hours invested in this one piece alone including removing the glass by having to drill out 2 rivets, sending the glass out to "Reflections Again" be re-silvered (beautiful), re-installing the glass with screws instead of rivets, doing body work on the screws to make them look like rivets again, sanding, priming, painting the whole thing, working the paint to give it the correct textured finish, cleaning and painting the stem and bracket. I stole most of this quote from someone else, and maybe I already mentioned it, but it's stuff like this that makes the difference between a home grown guy like me restoring a car himself or a professional restorer. Even if you were building a car for Warren Buffett, you simply cannot bill-out that kind of time to a customer.
The latest project is re-assembling the freshly painted steering column. I was very apprehensive about this job (just like I am with the dash assembly) because I anticipated problems, especially considering that it seems I did not take any pictures of the disassembly (an inexcusable mistake). I decided to invest in a 1970 Plymouth factory service manual. This provided step by step instructions on how to put it all back together. Having a 1970 Chrysler parts manual helped out greatly too. So far it's all going together nicely with all new switches and ignition lock. I'm hoping to finish it today and will provide a final update soon. Doing the body work to fill little dings and rust spots on the metal dash was really time-consuming and reminded me again that regardless of how long it's taking, I did the right thing by hiring someone to do the car because body work sucks !
You can see the pictures of the painted dash and column components. Finally for now is the outside rear-view mirror. This was another very big project. To disassemble the mirror enough to have the parts re chromed involved dismantling the remote cables which was very tricky, since all of it is assembled with special crimps that were very hard to remove and to duplicate. Luckily I found a lot of 4 beat-up mirrors on Ebay for real cheap. This gave me the flexibility to experiment with different techniques, and enough parts to be able to replace whatever I ruined in the process. The mirror parts were re chromed by New England Chrome Plating in East Hartford. The glass was replaced by Ed Steben Glass in South Windsor. Like the inside mirror I have many hours invested in this, but the end result is essentially a new mirror.
Thanks for your patience with yet another very long update. I will try to keep more up-to-date in the future. I have a ton of things that will keep me busy throughout the winter. Much of it won't be very exciting but I'm sure most of my readers will be interested to see it anyhow. The pressure is on now. last weekend was the "Cruisin' Main" car show here in Manchester. Soon after starting work on this car I set a goal of the 2012 show as being the first time out for the Duster. Less than a year away already.


January 2012
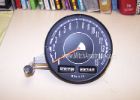
Gonna try to make this update a little quicker this time because I have a lot of other stuff going on. Still making a lot of progress on parts and assemblies, namely the steering column and dash are now complete, and both are now new-appearing and awesome. I noticed one day that the speedo, which had been sitting on my workbench for years had now developed some surface rust on the face, so I sent it to Mike Mancini at Instrument Specialties in Rhode Island for a refacing and calibrating job. He returned it to me good as new in only a couple of weeks.
I reassembled the dash entirely and tested all the lights and gauges. Several of the lights did not work due to bad connections and slight corrosion. It was an easy repair on the bench but would have been near disastrous to try to do it after the dash was installed in the car so it's a good thing I thought to do it. The dash is gorgeous. You have to see it on person for the full effect. The only thing missing from the photo is the glove box knob which was out for chrome plating at the time, along with the correct lighter knob. I previously had the wiper and headlight switch knobs re chromed as well.
Painting all of the blue plastic interior trim parts turned-out to be a big chore, involving a lot of trial and error with different paints and colors and some irritating adhesion problems. I think I ended-up spraying a dark blue urethane, followed by a lighter blue mist coat, then a satin clear.
The parking brake assembly is complete including a new repro handle. The lower control arms are now complete after at least a couple of try's at pressing in the bushings, and re-blasting the black paint from them in favor of a more "correct" paint scheme mimicking the factory cosmoline coating.
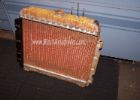
The differential, which was rebuilt last year (with stiffer 3:73's in lieu of the factory 3:23's for a little more fun) was painted, and the orange and blue paint is a reproduction of the factory markings that it came with. The radiator is now finished, though I forgot to photograph it before storing it. I decided to clean up some solder drips and spatters from the re coring job. As expected this opened-up some leak repairs again but nothing that some solder and a pressure tester couldn't fix. It's painted black now and looks great. The radiator photo was taken on October 30, 2011 when we got slammed with a bunch of snow. Shortly after this was taken all heck began to break loose in the neighborhood with tree branches crashing down, power lines falling, and exploding transformers. My power was out for 8 days.
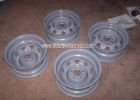
The factory rallye wheels were blasted and I shot them with an epoxy primer awaiting refinishing in the summer. I rebuilt the power steering gear. Not sure if this was wise or not because there's a LOT of parts in there and did not go as smoothly as I hoped, but I was able to rectify any issues that I encountered. This was one time where having the factory service manual was a big help. It's nice to be at a stage where I can sit at my work table in a relatively clean environment and just work on stuff like that.
Finally I removed the seats from storage and disassembled them for reupholstering with the Legendary Industries seat covers that came in and look real nice. The seats have a plastic back (I also got nice new ones) that is removed in the picture and you can see where some critter had a comfortable home one winter. I blasted and painted the seat tracks. When disassembling the seats I found an old penny buried deep somewhere in the upholstery. "What are the chances?", I asked myself. Sure enough it was a 1970. How cool is that? It is now polished-up and clear coated and I'm sure I'll find a cool place for it in the car somewhere.
Next? I'm still waiting for the engine parts to come back from the machine shop. When they do I'll be able to assemble the engine. I need to rebuild the 727 transmission. I'm still doing some final stuff on the exhaust manifolds, and some other small parts. At some point I'll need to send the seats out to have the covers installed but it's got to a point where I really don't have room to store any more large completed assemblies. Mostly I'll be taking a break for the rest of the winter so that I can work on recording my album, which you will hear about at a later date. Thanks for your continued interest, and please remember to make sure you have working smoke detectors in your home with good batteries !! This reminder comes in the wake of a tragic Christmas morning fire that killed 5 here in Connecticut.


March 2012
Welcome to the all-new Mitch Amatrudo.com. Please do not hesitate to let me know about anything at all that needs attention. Whether it's a spelling error, bad photo, something that just doesn't look quite right, whatever.
Still nothing new with the car but I have to press-on and try not to get discouraged, even-though the March 15 deadline that I gave the body shop several months ago has come and gone with almost no progress.
Also this update was compiled on March 17 but I'm not releasing it until the go-live date for the new MitchAmatrudo.com, so I don't know when you'll actually be seeing it for the first time.
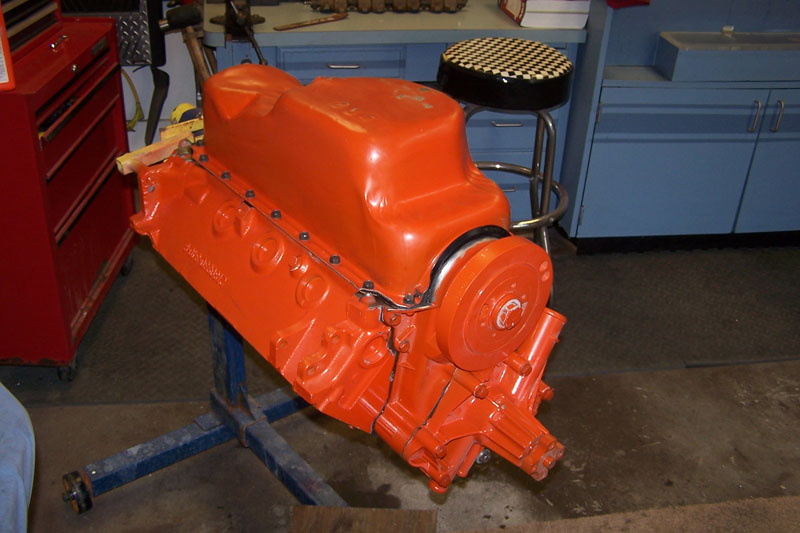
I've started to assemble the engine, which is stressful but satisfying. Everything seems to be going together real nice so far. Not really a heck of a lot else to say about it. The weather here is slowly getting warmer so I'm trying to take advantage of the warmer days to work on car stuff and take a break from recording my album. Check out the video, and I'll see ya next time.
August 2012
Same old broken record about being really busy with other stuff at home, and of-course the car still sits in the body shop waiting to be finished. Back in May I got a little upset with the guy when I paid a visit and found that the only thing new with the car was that it had become a great place to store stuff. In, on, and around. I lit a fire under him for the first time in 21 months after seeing this and I guess he got the message and got a lot of work done in a short period of time, but this was 3 months ago and I haven't seen any progress since, so it might be time for another fire. All I can do is wait. The worst part is that the August 2012 date for the car being finished (Cruisin' Main Manchester car show) has long-since expired, and this was a very liberal goal when I set it some years ago. At the time I felt that there was a possibility that it would be done August of 2011, but knew that a more realistic goal was 2012. The major bodywork is done and the car is primed and it looks great, but there's still a lot more that has to be done which is guide-coat/blocking, removing all the panels to paint the jambs and insides and stuff, re-assembling it, then doing the final paint and buff.
Meanwhile I've been scrounging around looking for other things to do, and at this point when I finish these in-process tasks I'll only have a very small number of things that I can do before the car is back home. I've also gotten to the point where I have to store completed items in the living space of my home since i've run out of room in storage. I'm gonna do this update in a different format than the others and take a section at a time, with pictures following each section.
THE CAR
These are pictures of the car as it sits now.

ENGINE
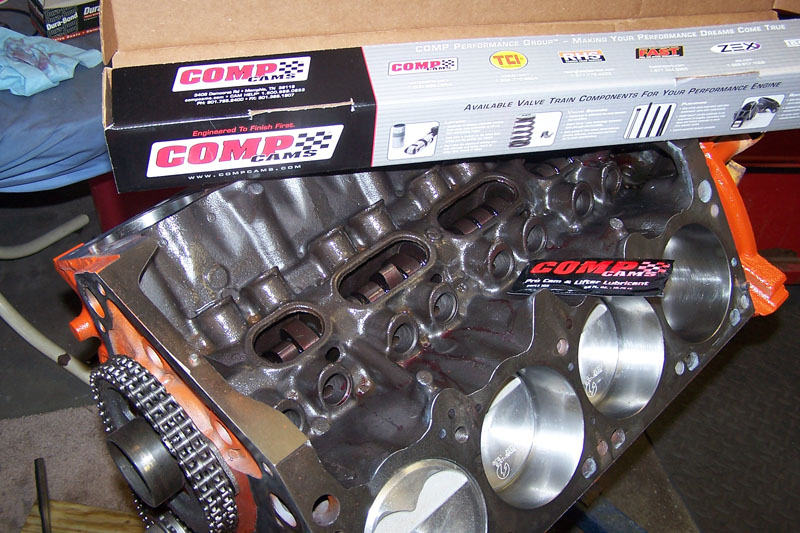
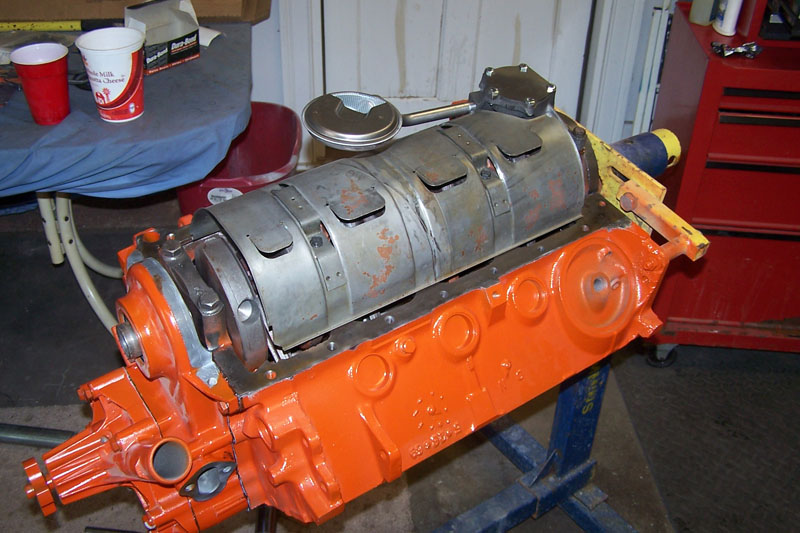
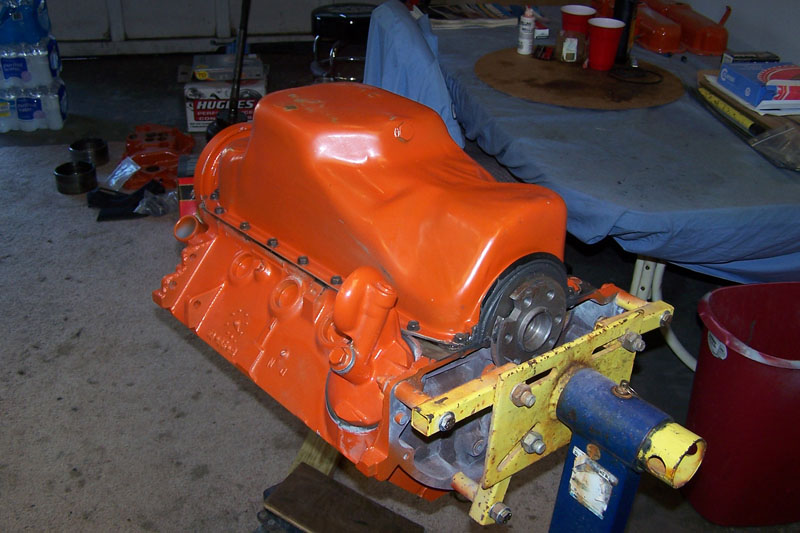
The short block is assembled and painted and it all went really well, and was a pleasure to do. That said, this is another example of where things go so wrong when you have to depend on other people. My machine shop guy is a really good guy, but it takes him forever to get things done. I waited a very long time for the last batch of stuff, and now it's been 6, maybe 8 months since I dropped-off the heads. There's nothing more I can do with the engine until the heads are installed so I have a bin full of painted parts on the garage floor waiting to be assembled while the engine sits on the stand undone. The cam is a non-stock Comp Cams. I don't have the specs with me now but it's basically a bump-up from the original 1970 340 numbers, nothing too wild.

TRANSMISSION
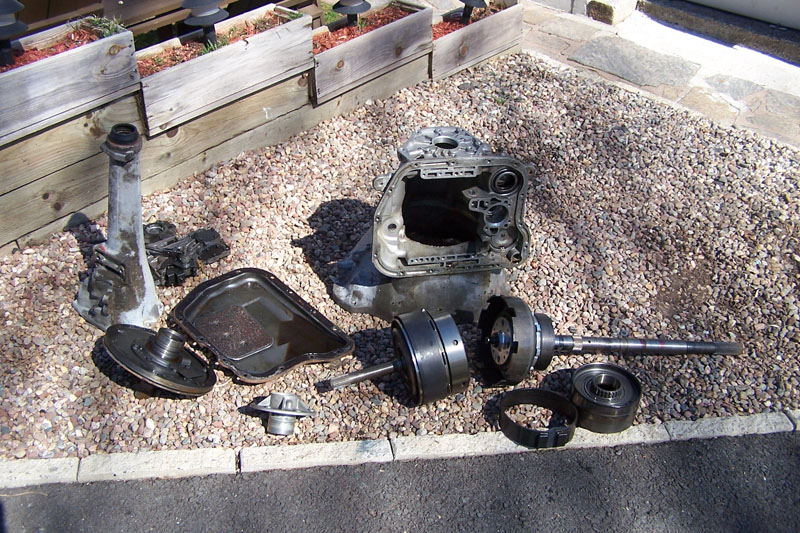
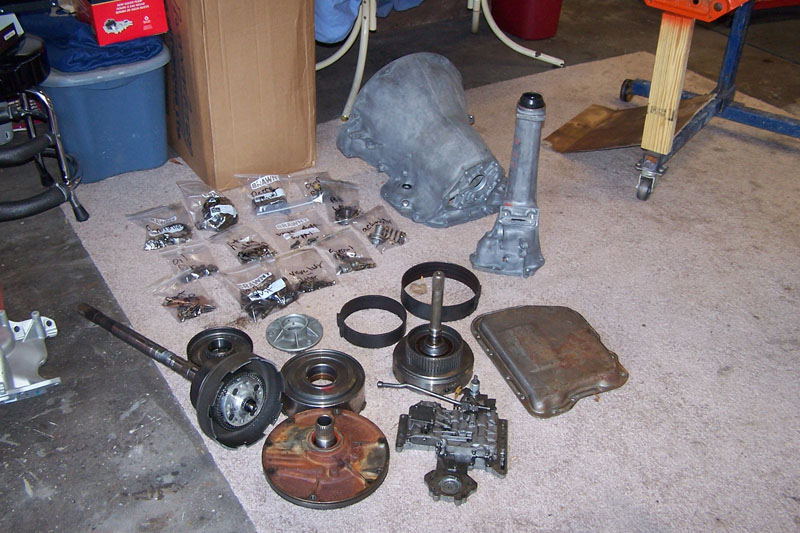
The tranny rebuild went very badly. There were probably 3 different days when I finally found the time to work on it, each day hoping to finish it, yet it seems that I had parts problems nearly every step of the way, and each time it happened it was the very first thing I tried to do that day. For example I would sit on the garage floor thinking how cool it was to finally have the time to do this, and the FIRST PART I tried to install was problematic, causing me to have to do a bunch of research, order the part, wait for it to arrive, then wait for another window of time to work on it again, and this same thing happened probably 3 times. This is the 3rd Torqueflite I've done and the first one that ever gave me problems like this.
Like with everything else, in the end it got done and I think I did a good job on it. I didn't do any crazy modifications to it but I did put a shift kit in it for snappier shifts. The torque converter I selected is a Hughes with a higher-than-stock stall speed.
You can go online and find lots of guys with step-by-step photos of a 727 being rebuilt so I didn't feel it was necessary to go into all of that here. The pictures I have are of the assortment of parts somewhere in the process of being cleaned and organized, and of the tailshaft with the original factory markings on it. It looks nice and clean but I decided that I am going to seal it up real good and give it a quick blasting to try to give it a new appearance, then I'll reproduce the factory markings. The last thing will be to put some fluid in it while it's out of the car to check the pan for leaks, since I have a long history of having Chryslers with transmission pan leaks. Remember that this is the original transmission that came in the car, with the matching VIN number stamped on it.
REAR END
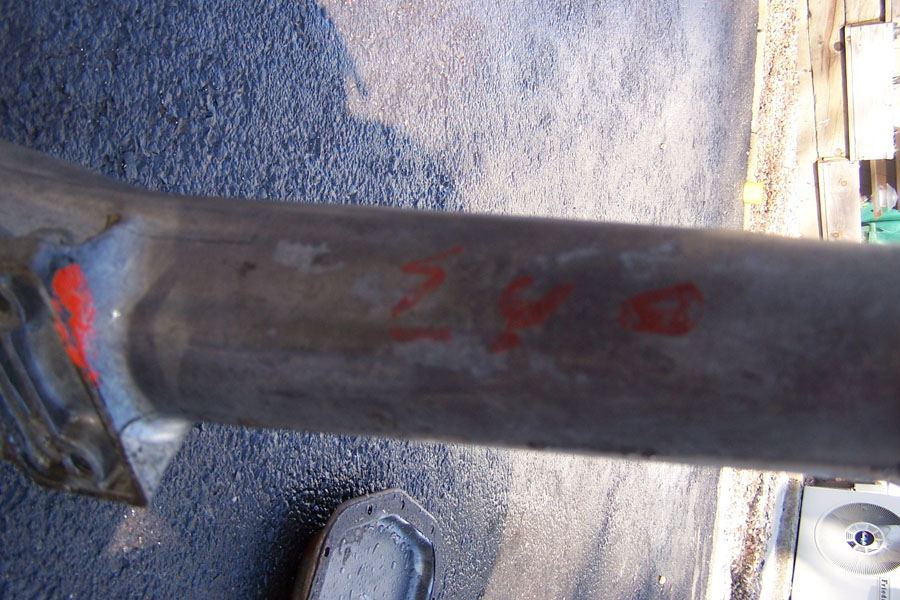
The rear is finally back together after more problems. While I was going through the transmission problems I "shifted" my focus to assembling the rear end. The differential chuck was rebuilt by Randy Juliani who is a local Mopar transmission and rear end guru. This was done quite some time ago and has been sitting in the basement since then. I upped the original 3:23 gears to a healthier 3:73 ratio. Perhaps a risky move as far as drive-ability goes but it's one of the few modifications in my plans that hopefully will make the car more fun while still retaining a stock appearance (such as the shift-kit, torque converter, and camshaft).
The problem that plagued me with the rear was that I was unable to adjust the axle end-play. After a ton of research time and trying this and trying that I still couldn't make any progress so I called Randy Juliani and offered to pay him an hour labor to come to the house to take a look. He graciously offered to come-out at no charge. I couldn't imagine what I was doing wrong, and after Randy looked things over real good he was stumped as well. It didn't look to him like I did anything wrong at all. Now I'm pissed because this was going on during one of the "waiting for parts" times with the transmission and now this. I have to say that this was the lowest time for me so far in this 7 year-old project. The car is of-course still sitting at the body shop undone and now it seems that everything I try to do in the meantime is turning to crap.
One of the cool things is that in almost every component on the car I have already done all the prep work and/or already have the new parts in-stock to re-assemble stuff (great example is the rear-end housing which was blasted and painted a long time ago). When I grabbed the axles out of storage they were all set to go with the new bearings and seals installed years ago. I was psyched that all I had to do was slide them in, adjust them and I'd be done. Now I find myself cutting off the brand-new bearings, ordering new bearings and seals, driving to the next town to use a friend's press to press them on, yada yada yada. All the same stuff that was already done. No fun.
I inspected everything real closely and my conclusion is that there was no problem with any of the parts and I made no mistakes installing them. This will forever remain a mystery, since the 2nd time around I was able to adjust the axles without a problem.
In the end (I think I say that a lot) the rear is done and looks GREAT. The paint markings are reproductions of whatever factory markings I could find. There are thieves online who sell "number stamps for your mopar hemi parts" at ridiculous prices. I found in an experiment that all I had to do was find a matching font on my computer, design the appropriate stamp, and order it from an online rubber stamp place. I designed them all onto one large square stamp for which I did not even have to have a backing or handle included and it was probably 10 bucks or so for the whole thing. Simply cut each one out, dip it in some paint and apply. If it doesn't come-out the way you want simply wipe it off and try again.
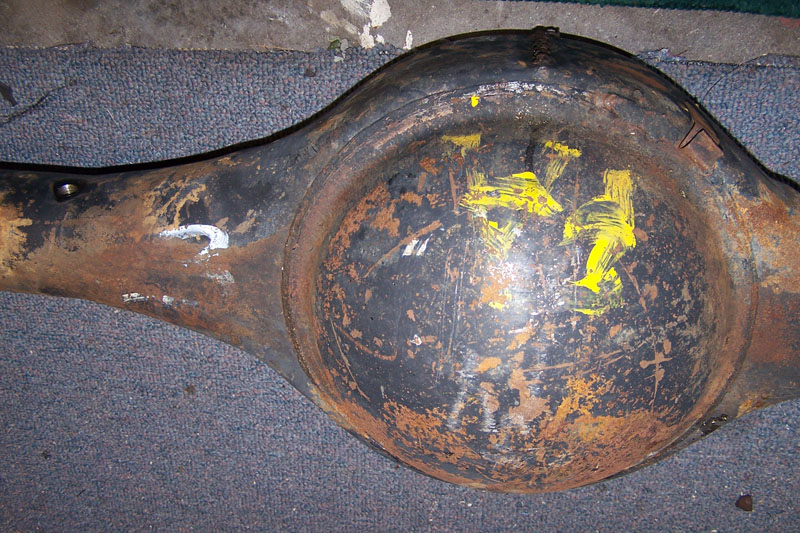
By the way the brake drums appear to also be the original ones for the car and still had more than enough meat on them to be turned-down. The red paint on them is original and I think this was an original factory "thing". In this case I did not reproduce this detail but left it as it was.
SEATS
Another big decision to make was to try to install the reproduction seat covers myself or sub the job out. Even given the fact that I will likely never hire anyone to do anything for me ever again, I still struggled with this decision for a while. When you go online it's about half and half between guys that say "no way, hire an upholstery guy" or "you can do it yourself". When my old friend George Romano from Trumbull, CT said that I should give it a try I decided to go-ahead.
The Legendary Industries seat covers
have been in storage for a long time, so I got 'em out and began to do the research on everything.
I started by yanking the old seat covers and the foam from the frames. While viewing the pictures note that at some point in time one of the original white seats was replaced with a black one. The black one was in way worse shape than the white one. You can see in one picture where someone must have installed a racing harness and the seat back was slit to accommodate the straps. He also butchered 2 holes in the frame for the straps to go through. Not a big deal though, I simply epoxied-in a small metal patch over each of the holes in the frame and of-course the cover will be replaced.
After disassembly I started by working on the back section of the white seat. The frame was in decent shape with just some light surface rust so I decided to just do a quick sanding / wire-brushing of the sections of it that might be exposed, then threw a spray-can coat of semi-gloss black on it.
The next step was to replace the burlap backing and the support wires. I got the burlap and some other materials at the local fabric store. For the support wires I used TIG welding wire that I got at the Airgas store in town. Duplicating the configuration of the setup and weaving the wires through the burlap was quite a task. Easy, but pretty time-consuming and boring. Then this assembly was either nylon-tied or hog-ringed to the frame.
Next was placing the original foam back over the frame and installing the new seat cover. Like with rebuilding the transmission, I won't get into the details of how this is done because it would take forever, but you can find other guys online who show the whole process. It's a weird job to do for a first-timer because basically it looks pretty bad until just about the very end of the installation, when you pull everything tight.
There is a picture of the final result of the first seat back that I did and it is "OK". I wanted it to look a little better but I decided I would leave it as-is and move on. I pulled the cover off the black seat to find that the frame was in much worse shape than the frame for the white one. This was the seat that the critter had gotten into so the burlap was real bad. The foam was in bad shape, and the frame was really rusty. This changed my plans considerably. I was hoping to be able to re-use the original foam for the car (for no reason other than cheaping-out) which I already did for the white seat. After seeing the foam from the black seat I knew it should be replaced. The foam is expensive and is sold in a package for both seats. This meant that since I already installed the seat back cover for the one seat, I might as well remove the cover and do the job again with the new foam since maybe the result will be better than "just OK'.
I again toyed with the decision of whether to blast the rusty frame or not. None of this can be seen after the seat covers are installed, and blasting is real crummy, dirty work. It didn't take long to decide though, since I knew that after all the hard work I've done on this car so far, I would not be happy knowing that rusty frames resided under the nice new seat covers.
So, I blasted
and painted all the frames, installed the burlap and the support wires, and ordered new foam. At this point all of this hard work resulted in really nice, new looking frames and supports.
The new foam for the seat bottoms looks great but the foam for the seat backs is somewhat different than what I had originally. An inquiry to legendary about this issue has thus-far gone un-answered after 15 days. (and after spending some $1,000 on their stuff). I made a second-attempt just yesterday so if I still don't hear anything after this week I'll have to figure-out the issue for myself. I will update you on this. Another example of dealing with other people and being disappointed, speaking of which the instructions for installing the foam were inexcusably bad so it took some time to figure out how to do that.
Yesterday I installed the cover for one of the seat bottoms over the new foam. I tore it in a corner which I was pissed about but
I think I can repair it to keep it from spreading, and I think it's in an area where it won't be seen. Other than that I think it looks real good. I don't have the photos yet but I will update ASAP. It's nice and tight with only 2 small wrinkles that I'm told might come out with a heat gun or maybe just some time sitting in the sun. I'm gonna let it sit for a few days to see if it stretches or changes or anything over time before I mess with it.
The next step will be to re-install the first seat back cover (the one that I already did but using the old foam) over the new foam. I hope that with the new foam it will come-out nice and tight this time.
I have a great deal of time into this seat project and i'm certain that all of the hard work I did on the frames is way more than any "professional" would have done with them and that always feels good. The weird thing about this job though is that "it aint over till it's over", and until each seat cover is fully installed and is tight and wrinkle-free, none of the behind-the-scenes work on the frames really matters. Lastly, installing the seat covers is HARD WORK. You have to press really hard to get stuff to line-up and get close-enough so that you can grab it with the hog ring pliers and lock it all into place. Lots of pulling, stretching, pressing. The single seat bottom was all that I was able to handle for 1 day.
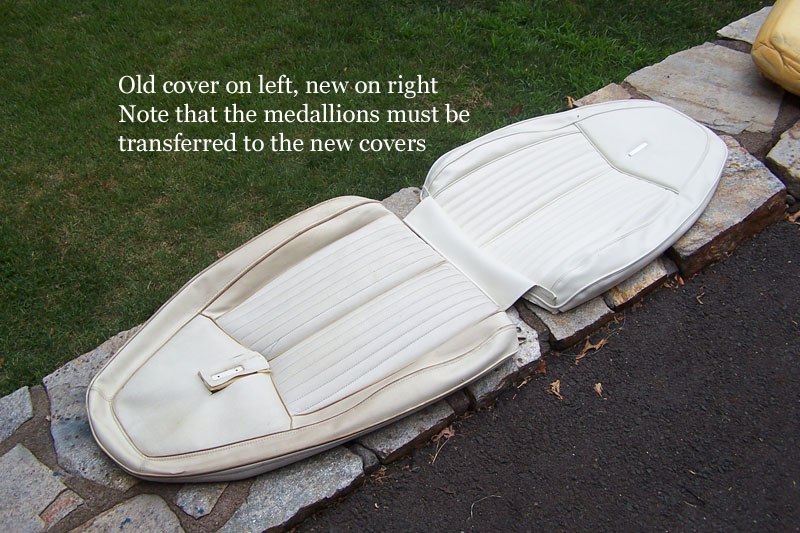
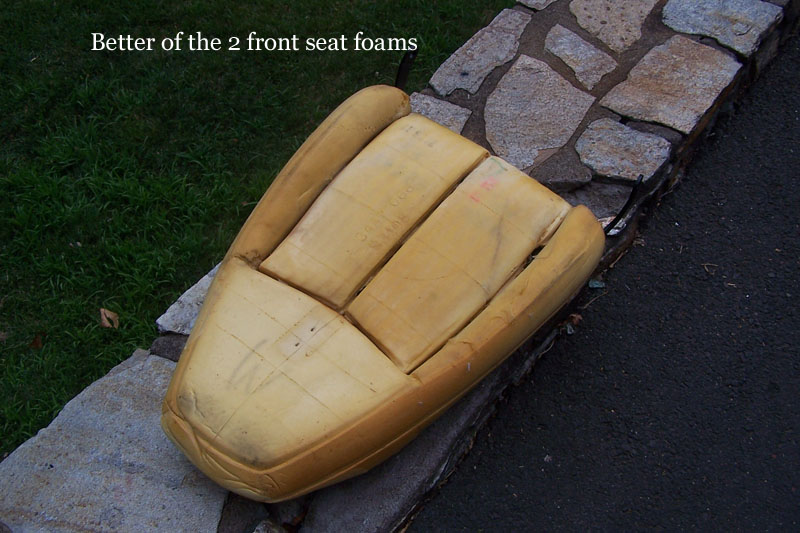
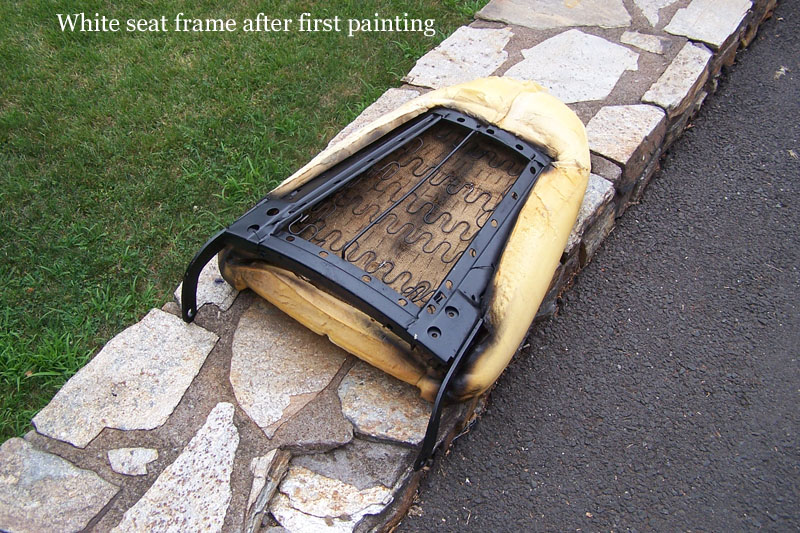
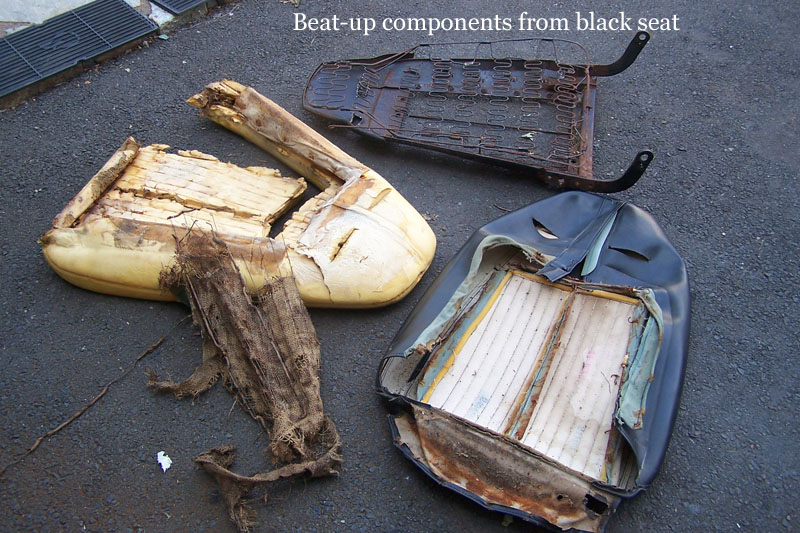
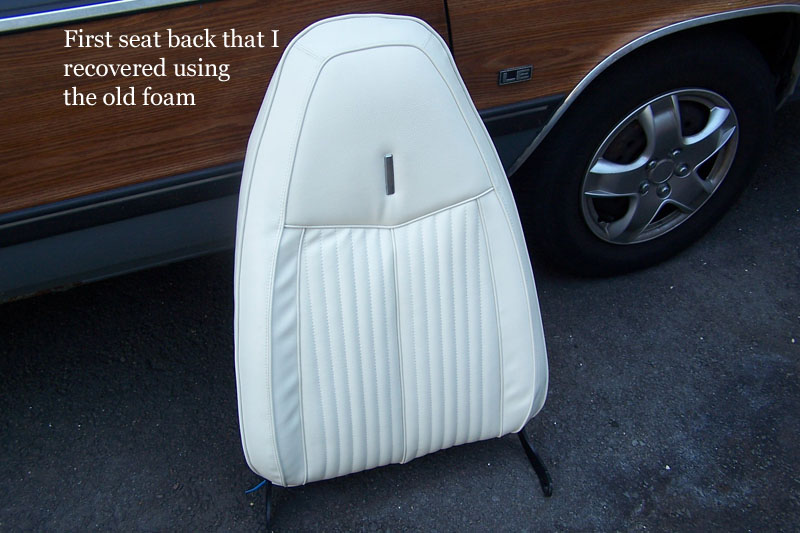
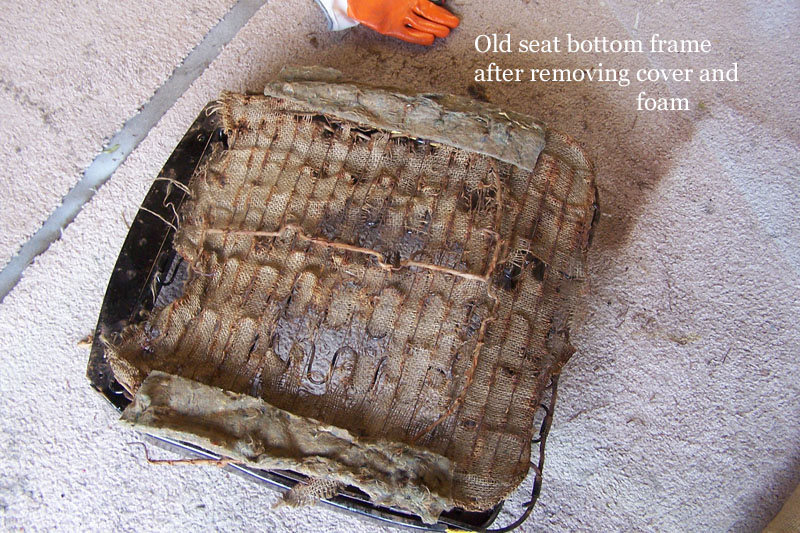
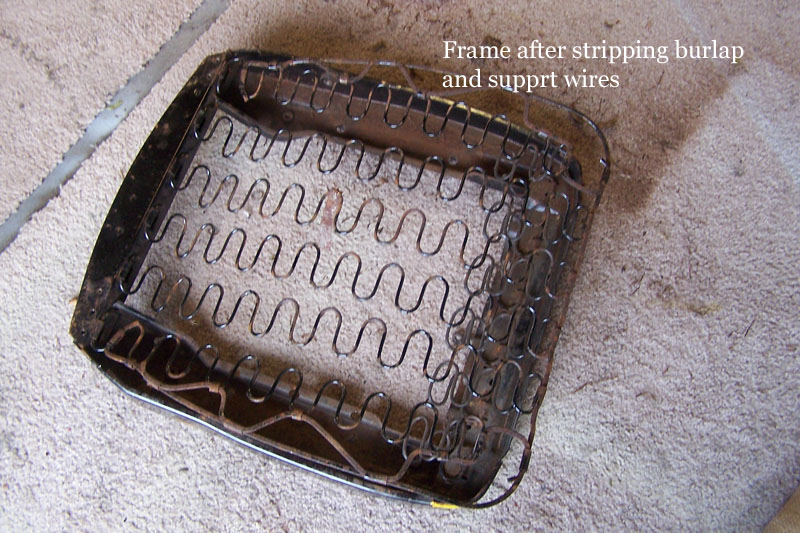
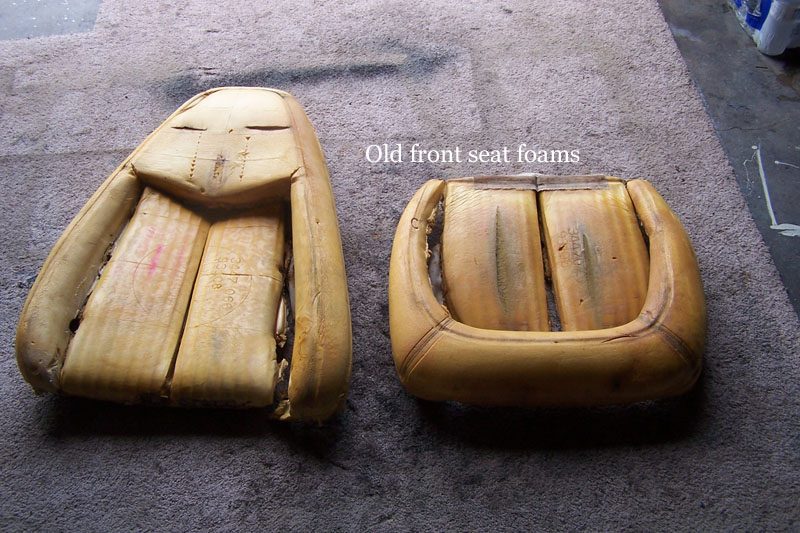
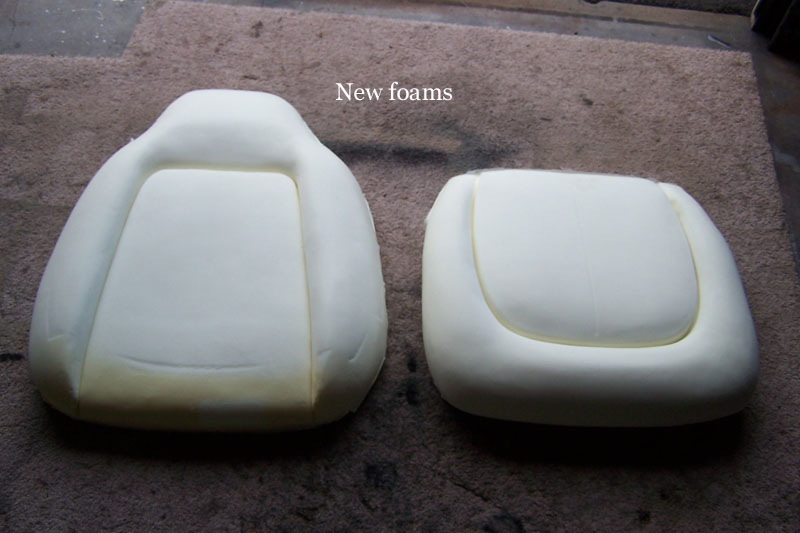
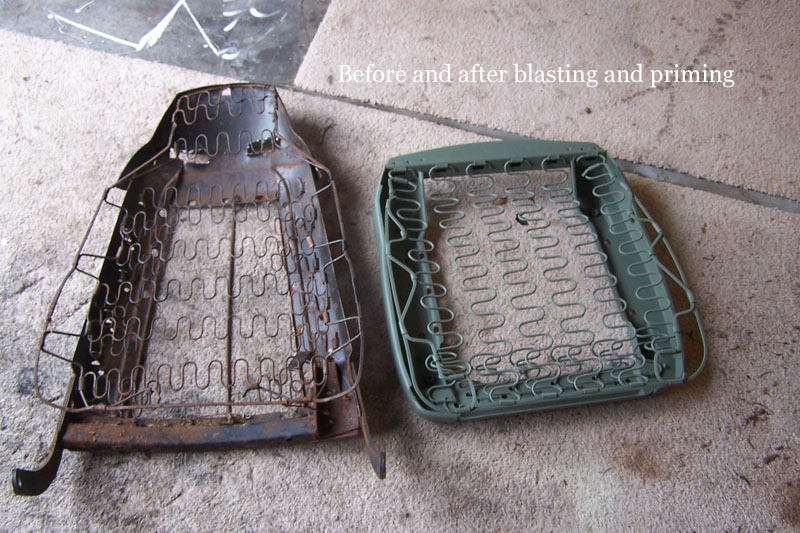
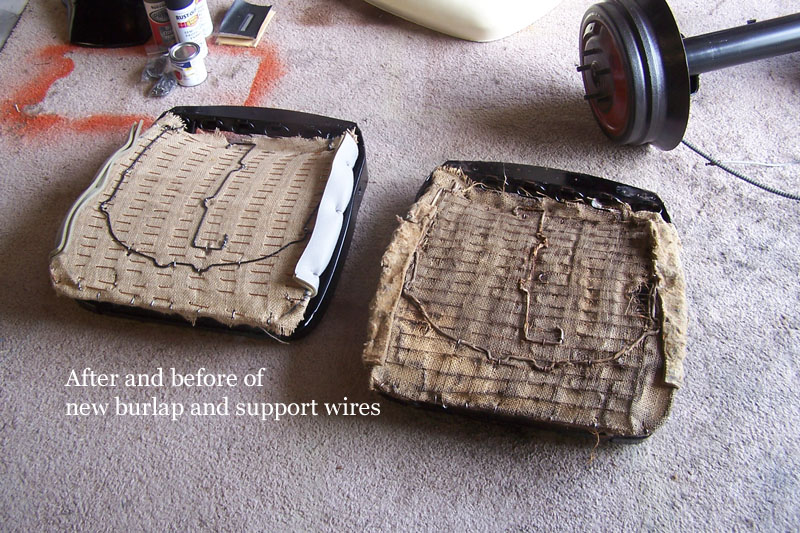
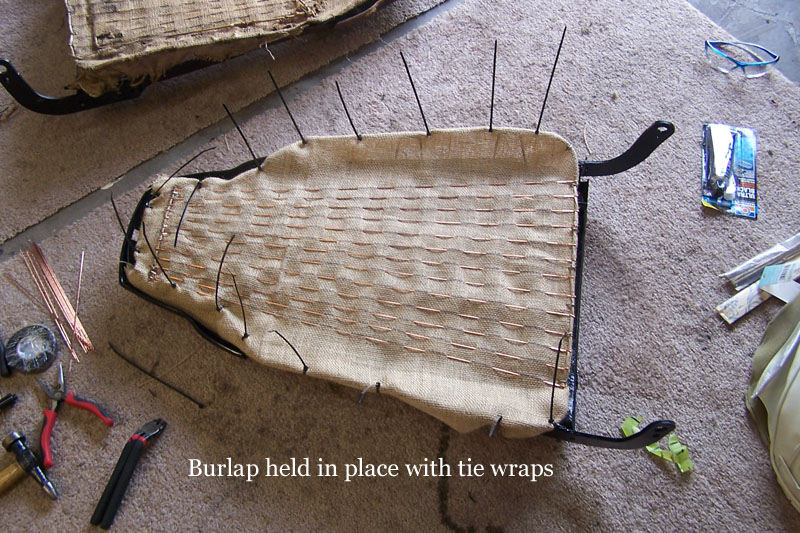
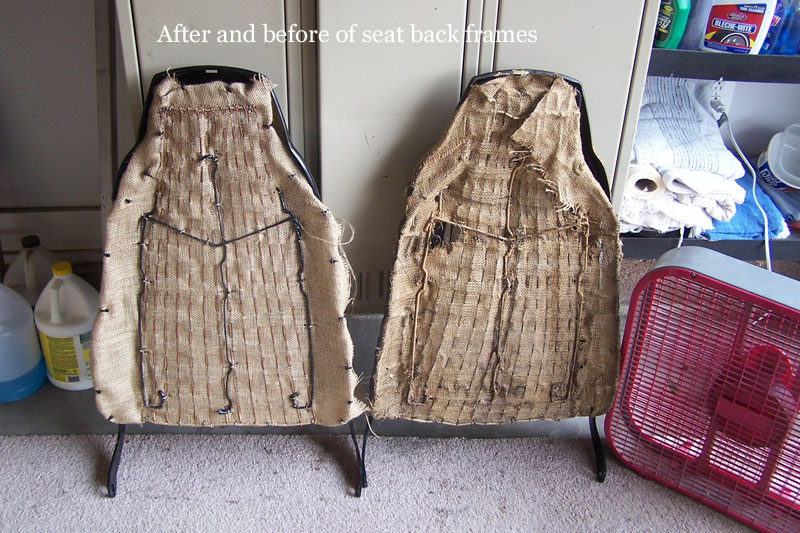
CONCLUSION (thank heavens!)
The next update will come when all or most of the following stuff is done...
The heads are back and the engine is fully assembled. The tranny has had it's final cleanup. The front seats are finished.
I just did an inventory both of the new, finished parts and of the stuff that still needs to be done. I have to say that once the above mentioned stuff is completed there is VERY LITTLE that I can do until I get the car back.
Thank you all for reading and I hope to get back to you again within the next couple of months.
March 2013
The car is still in the body shop, 28 months after sending it there. The latest promise was for it to be completed this February (last month). Now he is talking the end of this month again, and the car has now been moved to the center of the shop from it's last home stuffed in a back corner, and both of the times I went there in the last week I actually caught him working on it. He's still blocking it out and doing the final bodywork, and it looks good.
Since my last update in August, I only put another couple of months of work into the car. The project has reached a point where since I don't really know if I will ever get the car back painted as-promised, I lost both any motivation to continue and to spend any more money on it. I also have stuff, big stuff, sitting-around all-over my property. Stuff like an engine, tranny, rear end, seats, complete dash, basically everything that belongs on a car except for the car itself. Stuff in the garage, stuff in the house, stuff in my recording studio, stuff in storage. There's no room for any more stuff anywhere.
Also, I have been hard at work recording my upcoming album "Sole Survivor", (web page under construction as-of this writing) and that project has become my priority.
I might rebuild the carburetor and finish-up whatever other small stuff I may have started sometime soon, but other than that I am not spending any more time or money on the Duster until it is in my garage and painted. The next update you receive will be either be to say that the car is in the garage ready to put-together or that the unfinished car and the aforementioned stuff is all for sale. BUT, with all that negativity out of the way, my last visits to the shop were positive ones, and once again I have a feeling that maybe I will see the car sometime this calendar year, if-not this or next month.
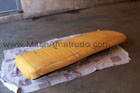
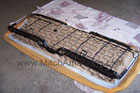


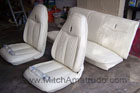
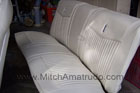
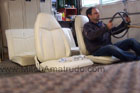
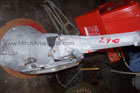
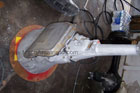
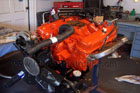
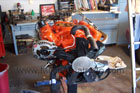
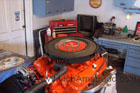
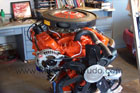
The pictures for this update show some of the construction of the back seat and of the re-covering process. It was not necessary to blast the frame. I felt a quick paint job would suffice. The factory construction of the rear seat was much different than the front seats. The seat back is sort-of a whitish jute material attached to the metal frame. I did not even remove it from the frame, and was able to simply paint the frame and install the new cover over it.
The seat bottom had the familiar burlap and wire support, which I reconstructed just like the front seats. The factory foam is simply a rectangular piece slit at the corners and "folded" down. There was no need to replace it.
Since I never heard back from Legendary Industries about the front seat foam issue, I went-ahead and modified it my own way. I removed the new cover from the one seat which had the original foam and re-covered both front seats, back and bottom, with the new foam. Again this is hard work. They were still a little wrinkly so after a trip to Harbor Freight I tried the heat gun trick on them. it was cool (hot) to see the upholstery tighten-up before my eyes like they did. All the seats are now finished, nice and tight, and are very, very nice.
The transmission is done. You can see in the pictures that the pan and bolts are starting to rust. I've changed course on something at this point. Previously I've been painting with a natural steel color all of the parts that were bare metal from the factory. I'm afraid now that this might give the car an over-restored appearance so I think I'm going to leave the rest of the bare metal stuff alone. Maybe I'll even strip the new paint from some of the items that I already painted like the leaf springs and drive shaft.
The engine is pretty-much entirely assembled now and looks real cool. Not much left to do with it other than rebuild the carburetor. Notice the reproduced part number that I rubber-stamped onto the front of the fan.
See ya next time, hopefully with good news.
May 1, 2013
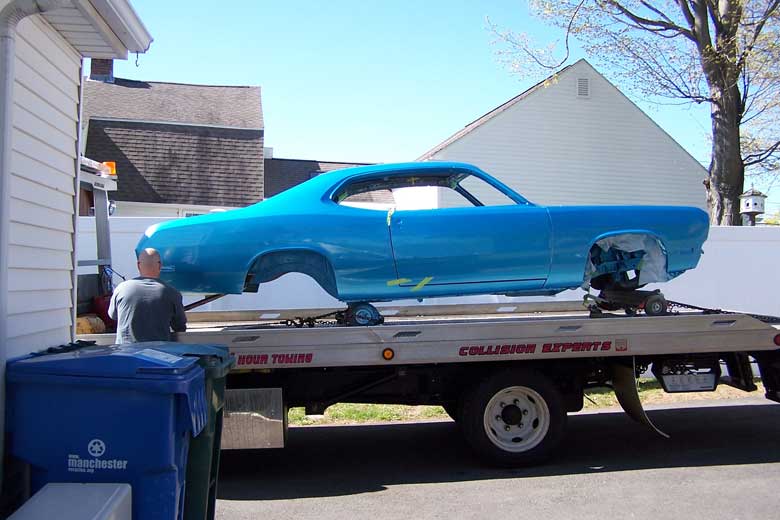
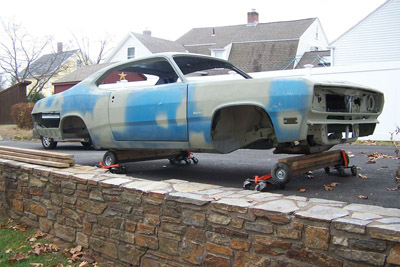
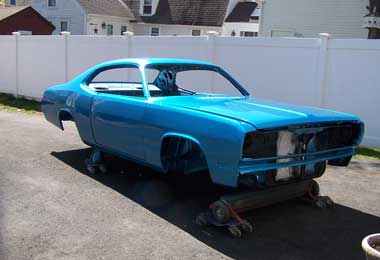
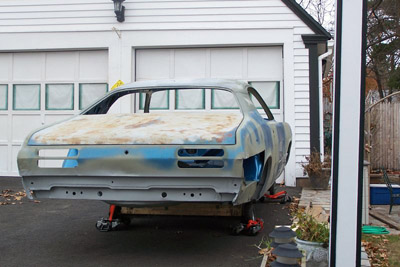
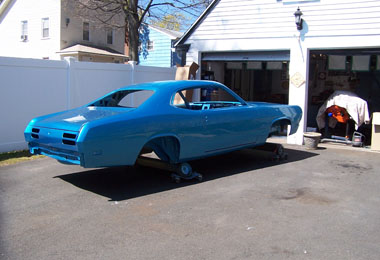
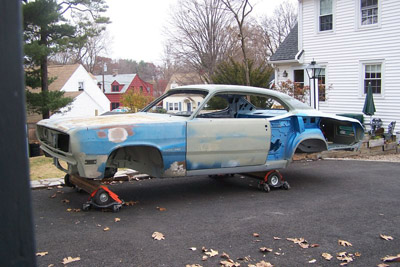

May 29, 2013
It's been a month since the last update and it occurred to me that all you guys know is that the car is back from paint. I was in a hurry to get the car situated in the garage and safe so I rushed the last update.
The body and paint came-out really, really nice. Probably the best you could ask for for a banged-up 40 year-old car.
I removed whatever masking tape and paper that was left from the shop, and gave the car a thorough cleaning inside and out, to rid it of body shop mess.
The next thing I did shortly after it came-home was to install the fuel tank and filler/vent tubes. This was a fun easy job and it was cool to see the first new part installed on the car. Then it was time to do the undercoating. The original undercoat was sprayed-on by hand by workers in the factory, so it was appropriate to be a little sloppy with it, which is why this was done after installing the fuel tank, since originally there was quite a bit of undercoat on the sides of the tank. It took some time to mask-off the exterior painted surfaces of the car but again this was a fun job. I used Raptor truck bed spray-on bed liner for this task, and it was a close match to the original Chrysler undercoat. At the time of this update I can't find the pictures of the finished product so I'll put them up next time.
Spring is a busy time of the year for people from New England because the weather is so bad here so there's always tons of stuff to do out in the yard, so finding time to work on the car has been difficult. Meanwhile my first disappointment was finding that the newly painted gas cap would not fit on the filler tube properly. This started a whole new round of hours of research as to why-not. The answer was eventually found, but as-of this writing I still do not have a gas cap/filler tube combination that works. When I do find something I will have to have the next cap painted to match the car.
My Dad came over to help me install the rear end and leaf springs. First we put the new stainless steel fuel lines, custom bent from Fine Lines, roughly into place thinking that it would be easier to do without the rear end in the way. Easy enough. Then we moved-on to the rear end stuff. This job started out badly since I could not find the bolts for the front of the leaf springs. This was very disconcerting to me because I know that I did a very thorough job of documenting and inventorying all of my parts, yet here we are ready to install the first major assembly and already I'm missing a vital piece. So, not a huge deal I thought, I'll put temporary bolts in there just to get everything in-place, then order the correct bolts and swap them out. We had a fun day working together. Big, heavy work and nobody (including the car) got hurt. This was a great day because now I had 1/2 of a rolling chassis, and even with the crummy temporary wheels installed the car was already starting to look like a car again.
It was a few days later when everything changed. I went to install the new $35.00 bolts only to find that they were the wrong size. Now the car was in a somewhat precarious position, up on blocks and jack stands, and I could not put it back together.
I ordered the new bolts on May 7,
22 days ago, and the problem (which was a lot bigger than just a wrong size bolt) was not resolved until just yesterday. This turned into another session of hours and hours of research, and ordering more wrong parts and more wrong parts for 3 weeks. To make a long story short, the bushings that I had pressed into the leaf springs 2 years ago were not correct for the car. Everything had to come out again so that I could remove the wrong bushings and re-install the right ones. The 2nd leaf spring is in the back of my regular car now after having the new bushing pressed-in, waiting to be installed.
Yeah I know, everybody says "Ya gotta expect to have some problems". Of-course, but the 1-2 punch I received (gas cap and leaf springs) this early was quite a disappointment.
The other thing that happened during all of this was I sent the K-frame (front crossmember) out to be powder coated (a different type of paint process). This is the only piece on the car that I powder coated. This was the last piece that still would have needed to be hot-tanked to clean out all of the gook inside of it, then blasted, then painted. I figured this way it would be done all in one shot. Central Connecticut Coatings in East Hartford handled this for me. He said it would be done "in about a week". Ten days later he called to say it was ready, and it looks good. Can't ask for more than that.
The next window of time for car stuff won't be until next week when all my stuff around the yard should finished, but I am again hoping to make some dramatic progress in the month of June.
There are a lot of pictures in this slide show. I realized I am missing the pictures from the car's final weeks at the body shop in it's various stages of primer and paint, so I've lumped it all together here.
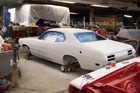
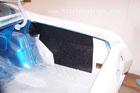
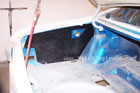
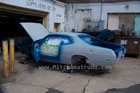

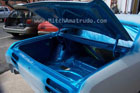
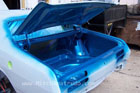
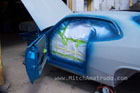


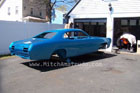
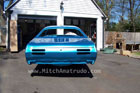
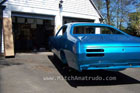
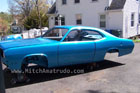
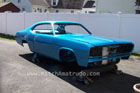
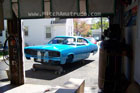

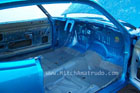
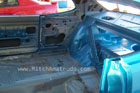

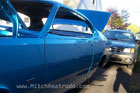
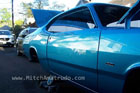
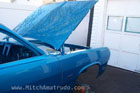
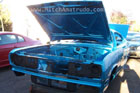
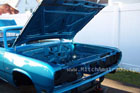
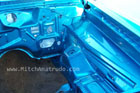
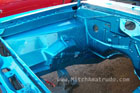
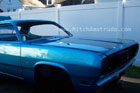
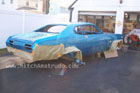
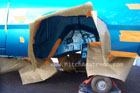
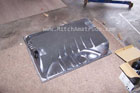
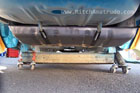

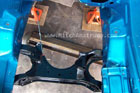

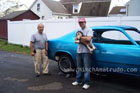
July 4, 2013
Since the last update it has rained nearly every day here in picturesque New England. Because of this it's been tough to get things done, so I've been on the "a little of this, a little of that" plan as time and weather permits. As of this writing this trend is also not anticipated to end anytime soon either.
Things are coming along good, but very slow. As I'd hoped, things are falling into place much better now than they were in the last update. Not much 'splainin' to do this month, as the pictures should tell the story.
The pictures of the undercoating are up, as well as the completed rear suspension (still waiting on washers for the rear shocks though, which are on a 2-month back-order). Fuel lines, evaporative emission lines, and brake lines are in. These are stainless steel reproductions from Fine Lines and they fit very well. Well worth having to avoid the hassle of bending them myself.
Headliner is installed. This was time-consuming project, and one of the last remaining things that I considered hiring someone to do. It is a 6-bow headliner so there are basically 7 separate sections. I did only one section per day, allowing the adhesive to dry overnight before moving on to the next section. The next day I would manipulate the previous day's section as required to get it good and tight. This is known throughout Mopar circles as the "Romero Technique". It came-out really, really nice. Pictures of the finished product are not available right now but I will try to show them next time.
The "stereo" is installed. The car came from the factory with only an AM radio. I had to break some authenticity rules in this case but ya gotta have tunes so I'm fine with it. These cars came with pre-cut holes in the rear deck for 6x9 speakers so there was no hacking involved there. I ordered a rear shelf trim panel for a car that would have been ordered from the factory with a stereo. The same as one for a non-stereo car except with the die-cut slots in it for the speakers. Installed Alpine SPR-69 speakers in the deck and a power amp as discreetly as I could in the trunk. Wiring is run from the amp to the dash area along the same route as the factory wiring harness. The "stereo" in this case is going to be an ipod which I will mount out of sight or place between the seats.
I gave it a trial run by wiring it directly to a battery and my wife's mp3 player. Me and my buddies from Trumbull have installed countless car stereos since the 70's. Some were great, some sucked. I have had multiple speaker systems, bi-amped/tri-amped systems, crossover networks, sub woofers, etc but this one trumps them all. Best stereo I've ever had. The car has no glass or interior so here I am sitting on the metal floor inside the car with the car cover on it to retain the sound and I'm cranking tunes. Priceless.
Most of the under dash stuff is installed including new insulation. Trunk mat and taillights are in. Started to install whatever I could in the engine compartment, and I am now almost finished installing the vinyl top. Another job that I was close to subbing out but decided to do myself with near-perfect results.
So....slow but steady is the theme. Things are going together very well but very slow. Still having some issues with waiting for parts but I have been able to move on to other things while waiting. The soft trim stuff has been tedious and stressful. You only get one chance to get it right, but that ship has sailed. I need another 1/2 day to finish the vinyl top and I'm done with trim. Now that the vinyl top and headliner are in, I can install the dash, windshield and back glass. Glass is the next challenge. I still might hire a glass guy to do the windshield/back glass. The good news is they come to the house and do it in an hour so there's no worries about the car being held-up another 3 years. The door glass will be tricky to get in and get right but I'm doing that and the 1/4 windows myself. I have to paint the inside of the doors before I can do the door glass though, and it's actually questionable if we will see a day without rain or humidity this summer, and I can't paint outside in this weather. Looking forward to getting all this done (top/paint/glass/dash) so that I can just turn wrenches again.
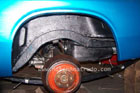
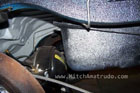
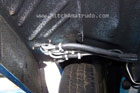
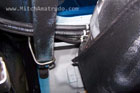
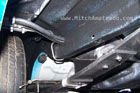
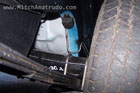
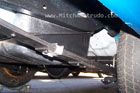
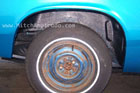
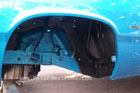


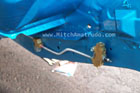
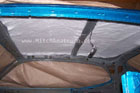
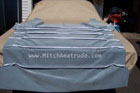
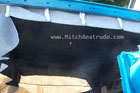
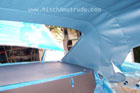
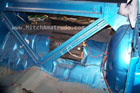
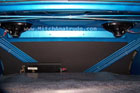
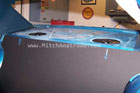
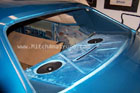

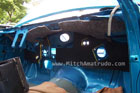
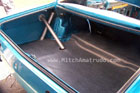
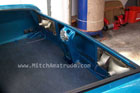
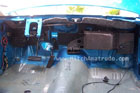
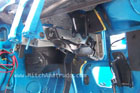
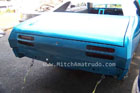
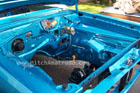
October 10, 2013
It's been 3 months since the last update. This one will start-out very negative but end on a good note. I've been hitting all kinds of delays and problems. This has kept me from keeping an accurate log of what's been going on, since I keep having to move on to the next task before the previous one is finished.
My plan for "having a guy come out to install the glass in an hour" completely backfired. It seems that all of the glass guys in this area won't get involved in anything other than a quick and easy job that they can bill 600 bucks to an insurance company for, so I was basically forced to install the NEW windshield myself. Chipped it. Gave-up. Waiting for next year to figure out another plan for the windshield and the back glass.
The new right door glass installed very nicely. The driver's door glass was, and still is, a disaster. I've got hours and hours into this but still no door glass after ruining a new glass and 2 sets of weatherstrips and buying another used door to harvest the regulator parts from it (no help). I'm afraid that I may have to actually replace the door which would mean bodywork and paint. like with the windshield, I am shelving this until next year. Even the nicely re-chromed mirror for that door was a disappointment, as it turned-out that it had the wrong remote cables on it, which created a whole new problem and a whole new parts search and mirror rebuild.
Installing and bleeding the entire brake system was time consuming and messy, but finally when I had everything firm and tight and the garage floor nice and clean again, I decided to go around and give each fitting a final torque to make sure everything was good. This only caused 2 of the brake lines to leak like the proverbial stuck pig. Ordered new stainless steel front lines, did the whole job again, and everything is fine now. For 2 months it seemed like an endless circle of "another hundred bucks and another wait for parts".
So I'll look at the pictures for this update and try to recap everything I did accomplish in no particular order...
Vinyl top is installed, trimmed-out and very nice.
Most stainless steel trim has been polished and came out real nice.
Rear 1/4 windows installed with no problems.
Interior door panels painted.
Parking lights installed. All wiring installed.
Outside door handles installed.
Dash installed....GORGEOUS !!!
Front suspension, brakes, and temporary wheels installed...Rolling chassis now.
I had a deadline of September 30 set for having the engine installed. Even in spite of all the problems I was able to get it done on October 1. My Dad and 2 friends from work came-up to help. We had the tranny hooked-up and the whole deal installed in less than 3 hours. The engine looks REALLY nice sitting in the bay where it belongs.
That's it for now. There's some other real good news but I'm waiting for the next update to share it since I have a few loose ends to tie up before I can take the photos. My door and glass problems remain for another time, but I made a really good decision to put these items aside and get some more serious stuff done.
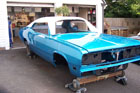
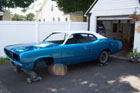
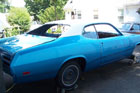
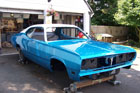
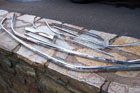
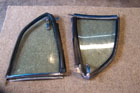
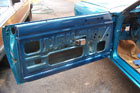
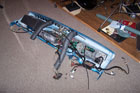
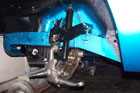
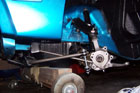
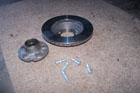
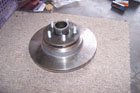
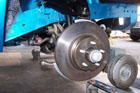
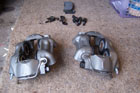
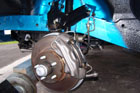
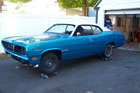
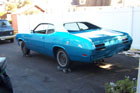
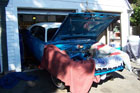
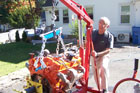
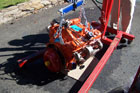
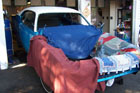
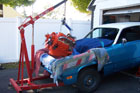
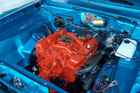
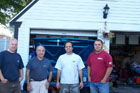
October 20, 2013
Had some good times since dropping the engine and tranny in. The engine compartment is now wired and plumbed and looks great. All that's missing is a few small details that you wouldn't be able to see in the pictures, other than getting a reproduction battery for the car. THE BATTERY SHOWN IN THE PICTURES IS TEMPORARY !!
I rebuilt the original, correctly numbered Carter AVS carburetor and cleaned it up real nice with solvents and wire brushes. Connecticut Mopar nut John Marshall
was nice-enough to provide me with the correct, hard-to-find idle solenoid for the carb at no-charge as his contribution to this project, which will be installed this week. John's '71 Duster is the November calendar girl for the 2014 Classic American Cars Calendar.
The gorgeous dash has been installed for some time but I forgot the pictures of it in the last update. The last thing I did was installed the steering column, and connected some wiring. I've got a strange problem with the brake/turn signal lights and also the gas gauge but I'll figure these out this winter. It's cool to see stuff come-alive, like the dome light and the buzzer when you open the door, and the dash and parking lights. Even better is that the car cranks by turning the key and has spark.
The trunk is now fully dressed with the correct jack, and even a correct bias-ply 6.95/14 tire that would have come on the car originally. Even the label for the jack instructions was applied appropriately crooked.
So this is probably the last time you'll hear from me until after the winter. Winter plans include installing the windshield and back glass, seats and most of the interior trim, polishing all of the stainless steel exterior trim, completing the restoration of the steering wheel, and having an exhaust system installed. Mostly, I'm ready to take a little break from the car so that I can go back to working on my forthcoming album, "Sole Survivor".
I will see you all again sometime in the Spring or early summer. Thanks for your continued support and interest after 7 years.

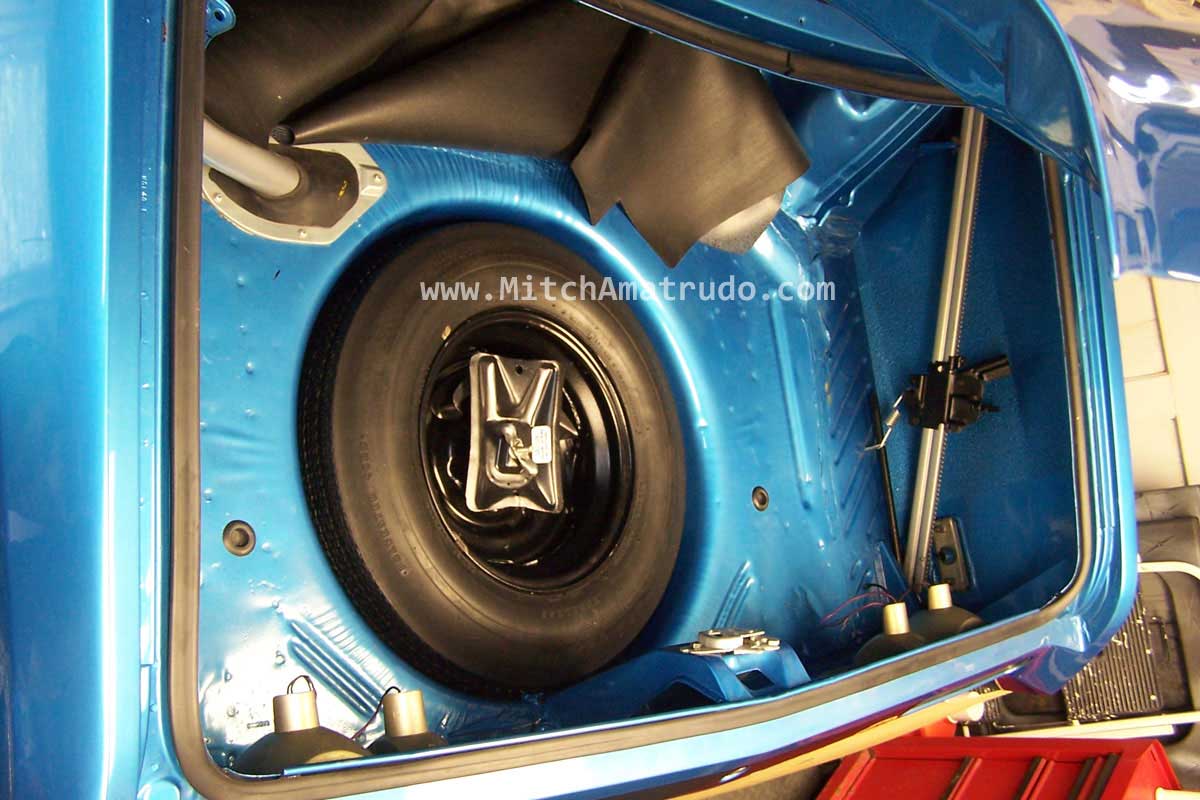
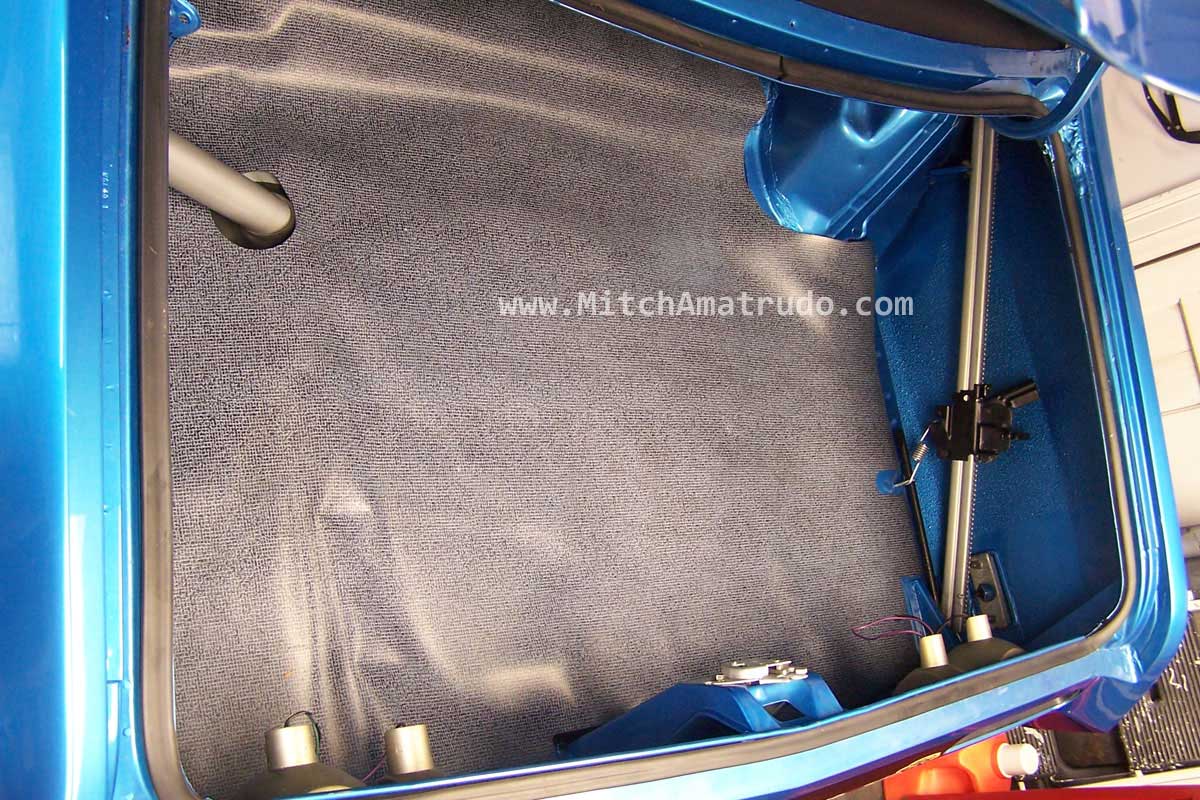

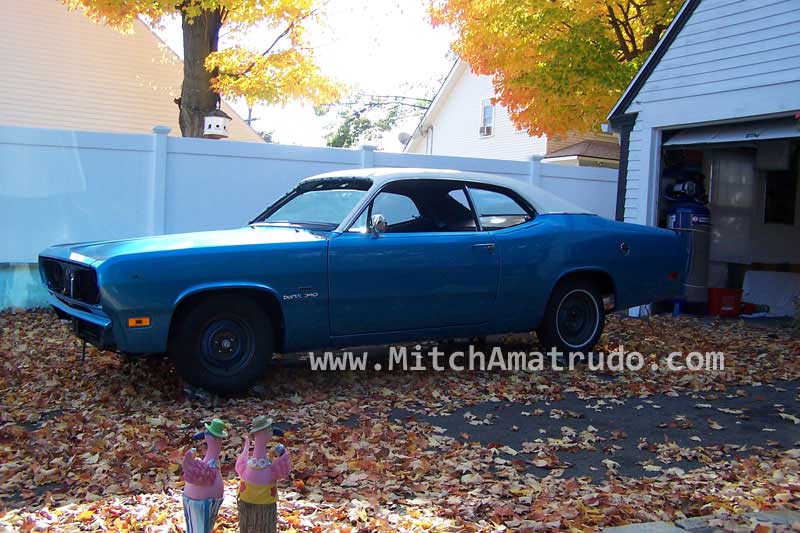
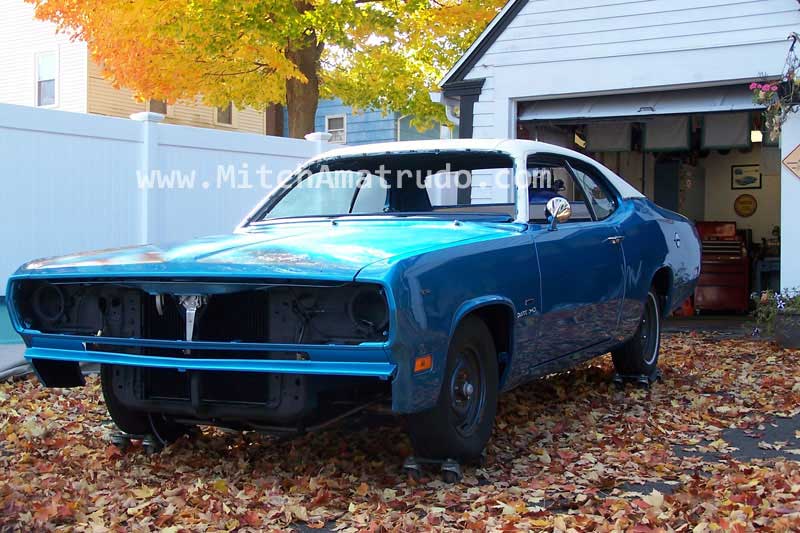
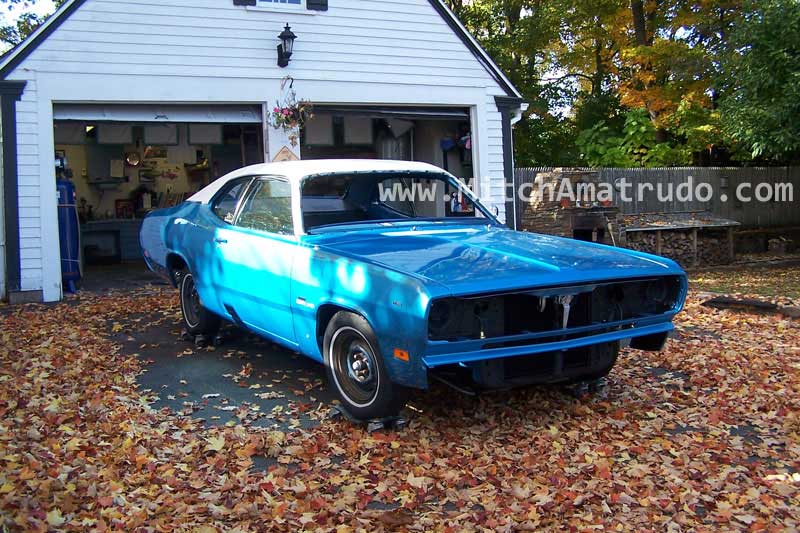
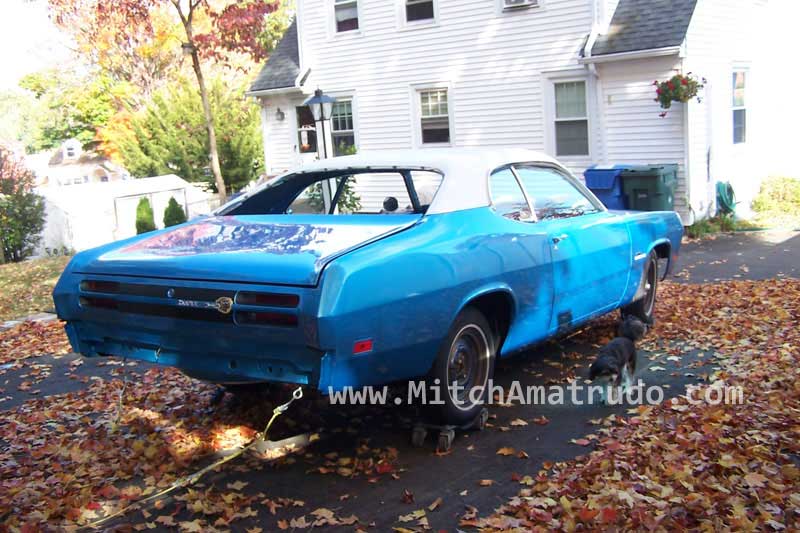
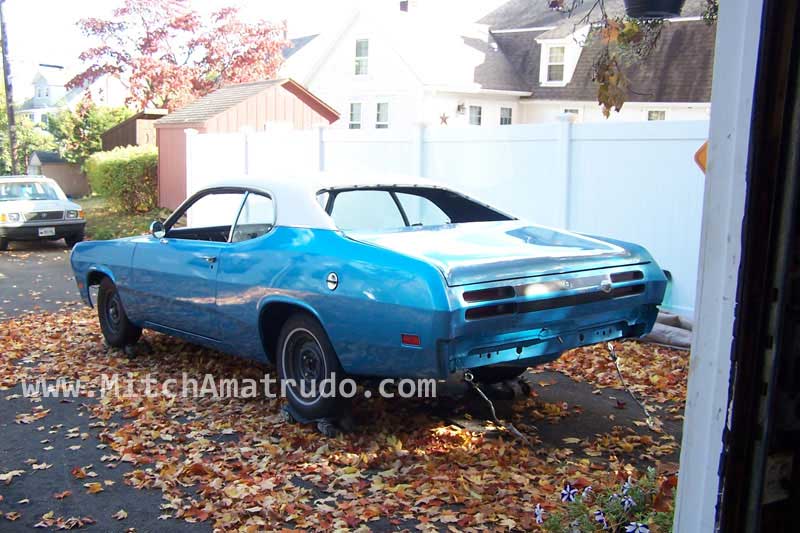
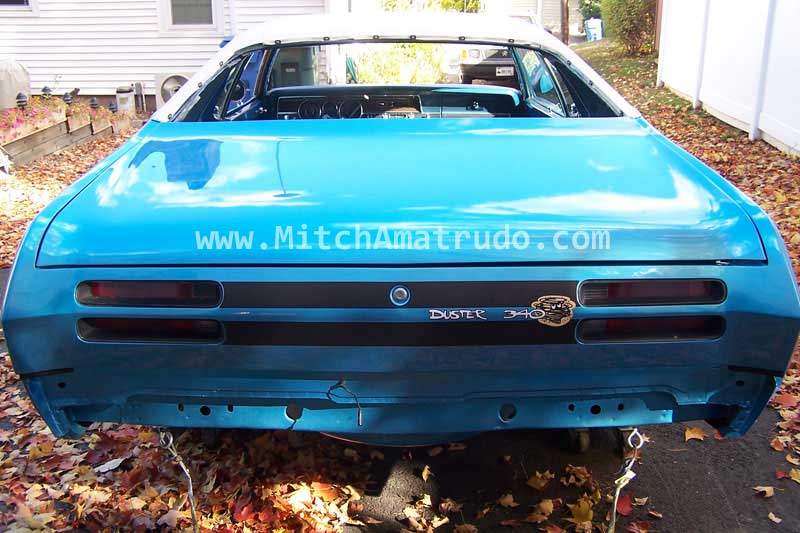
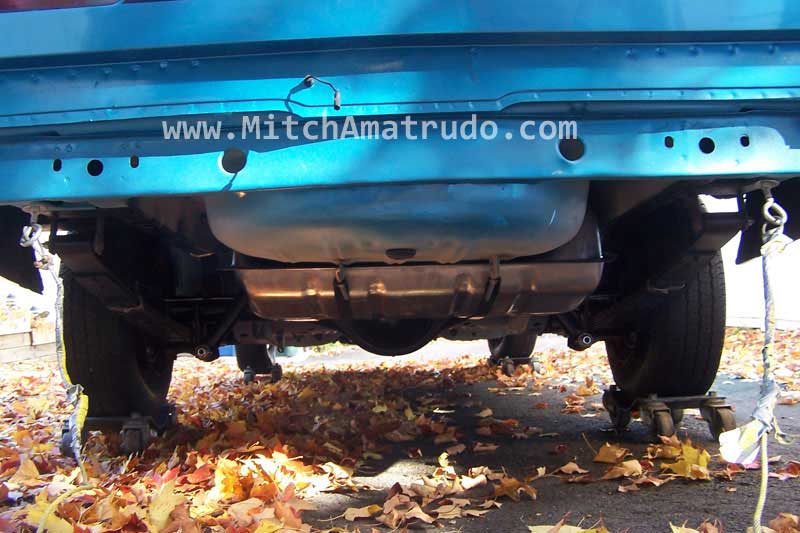
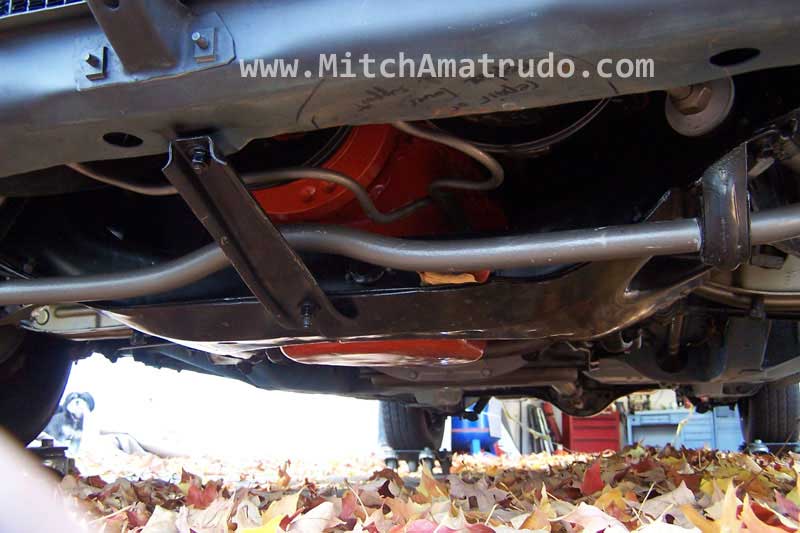
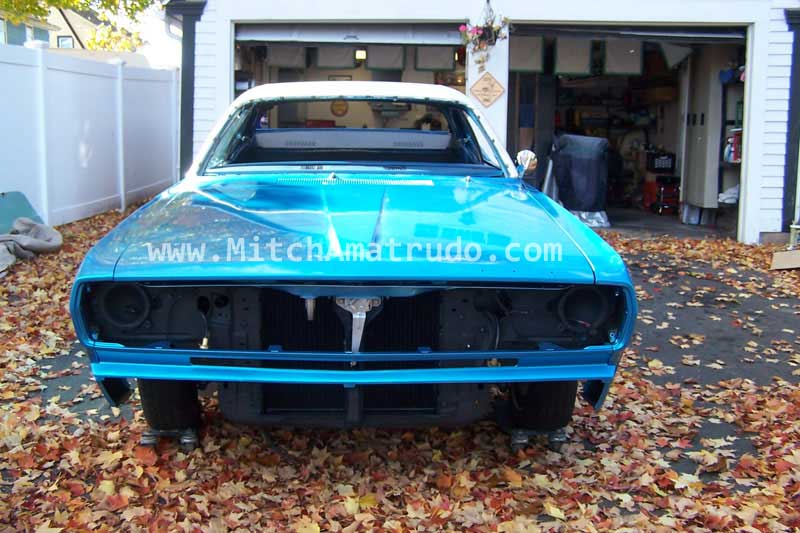
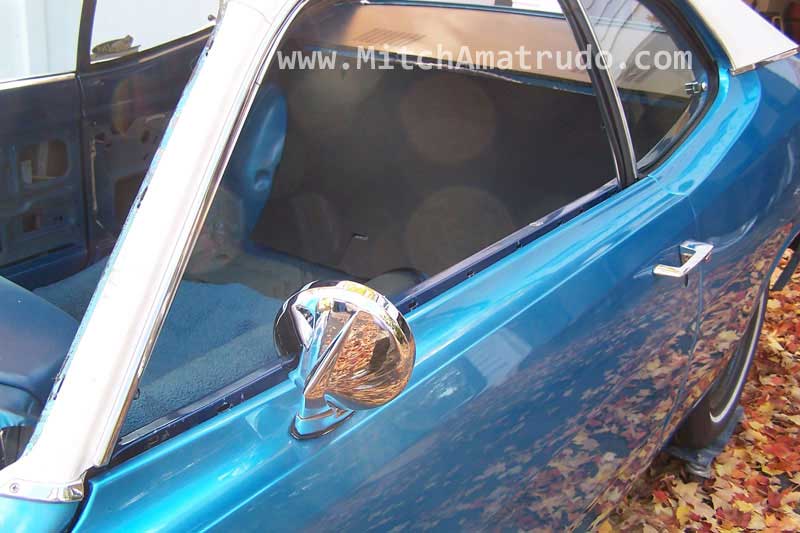
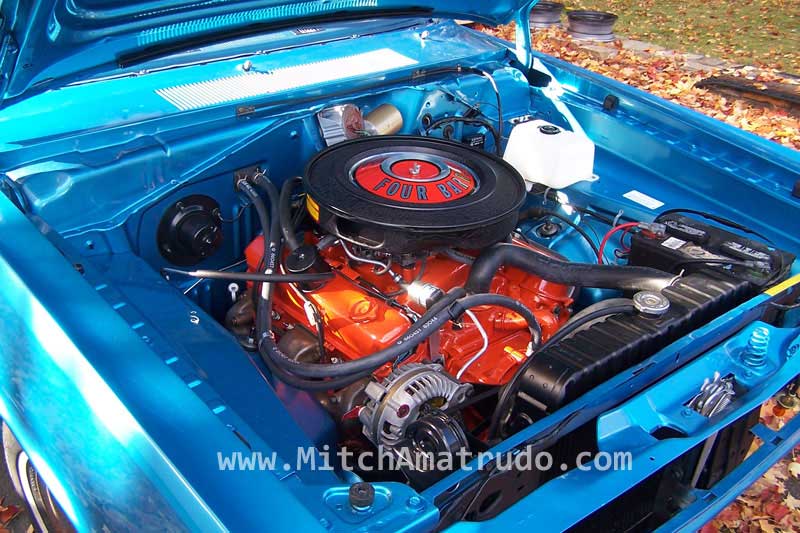
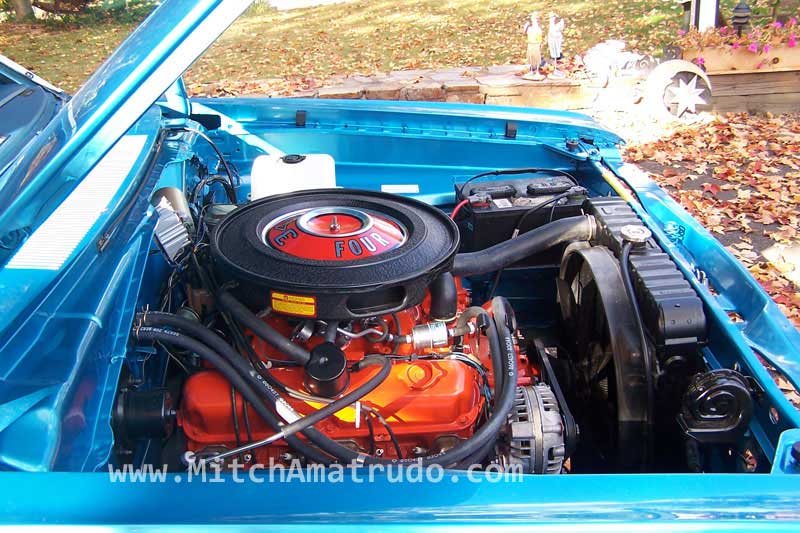
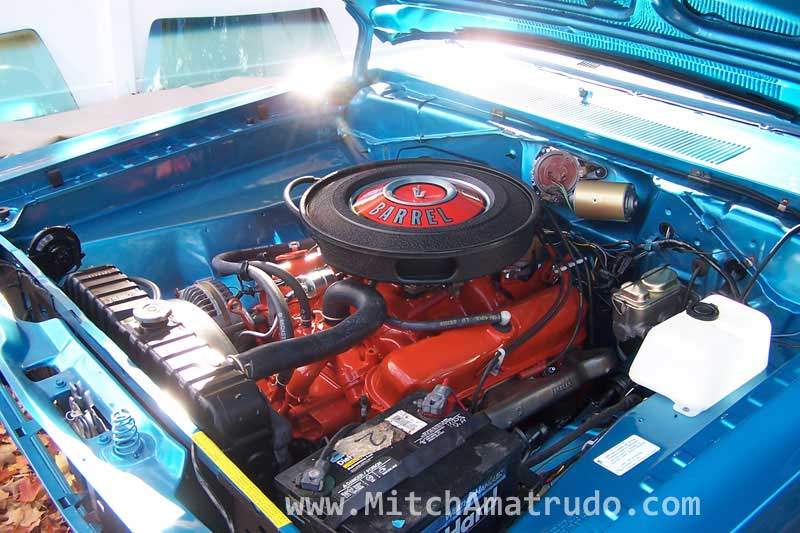
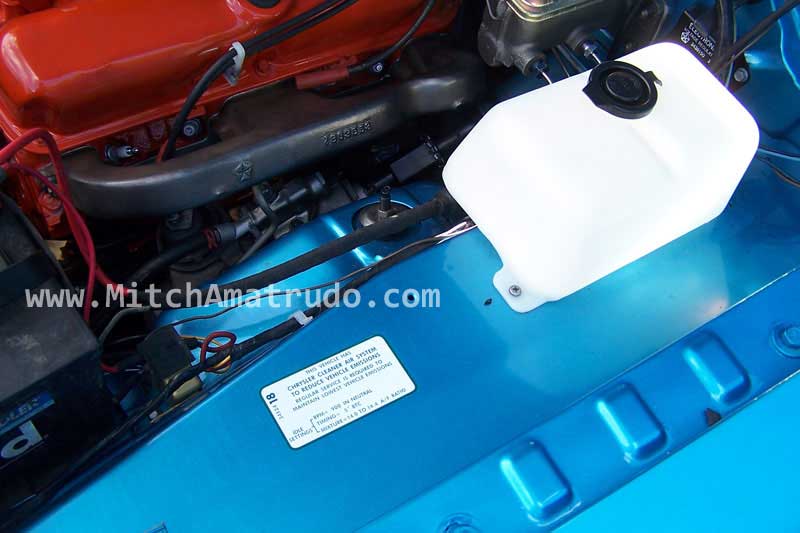
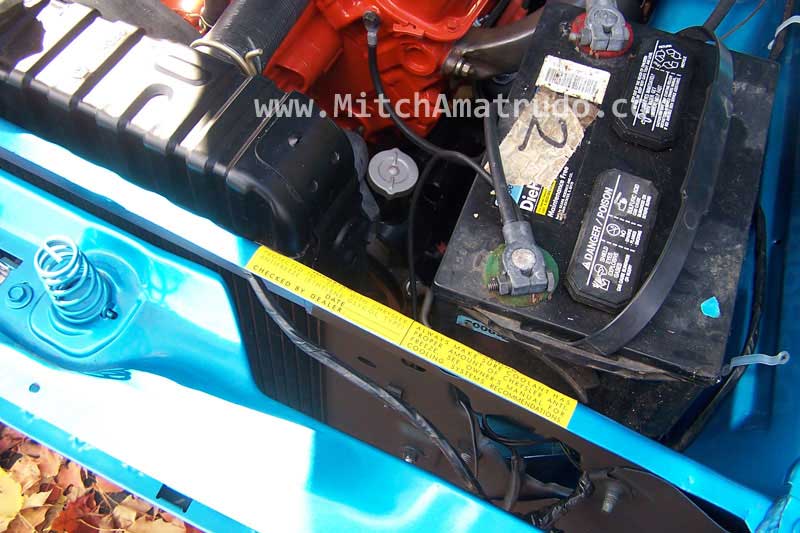
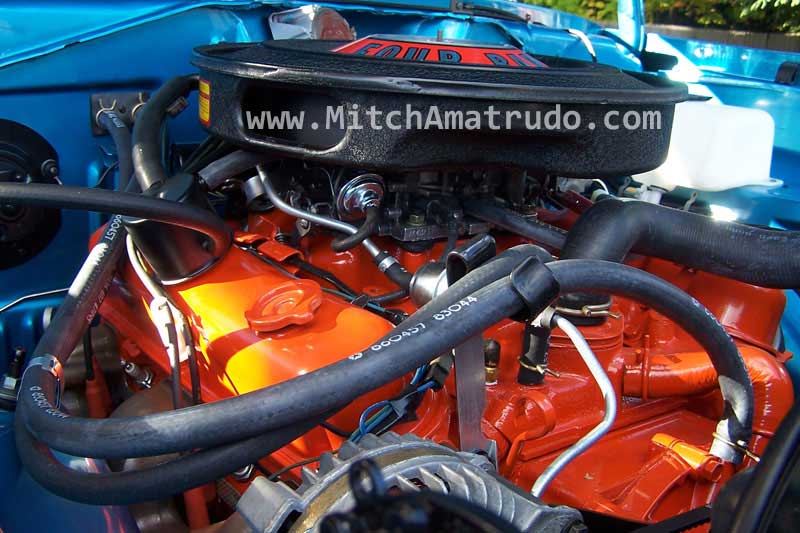
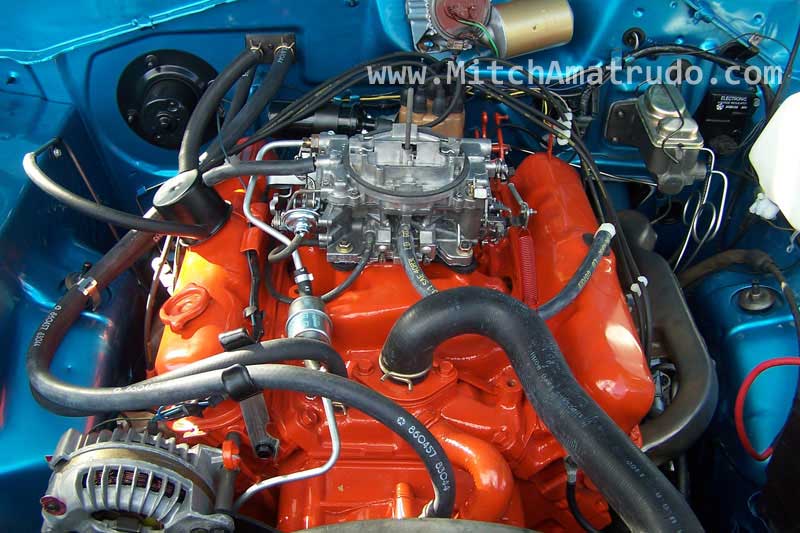
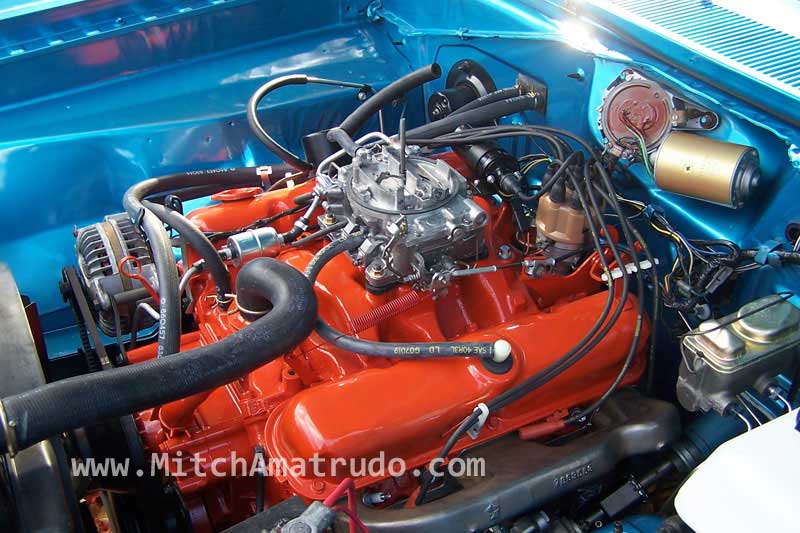
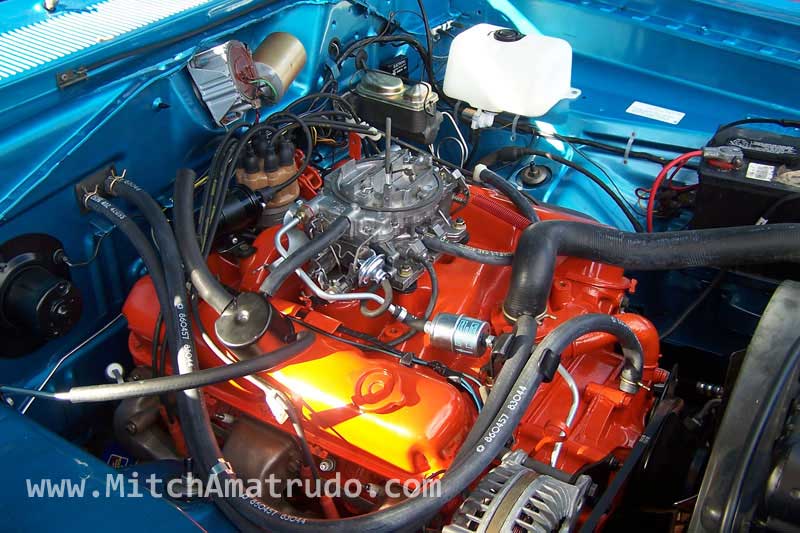

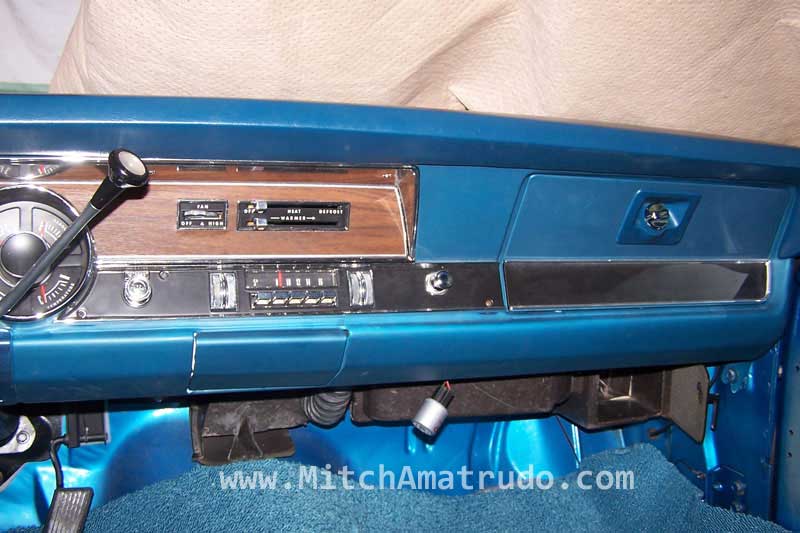
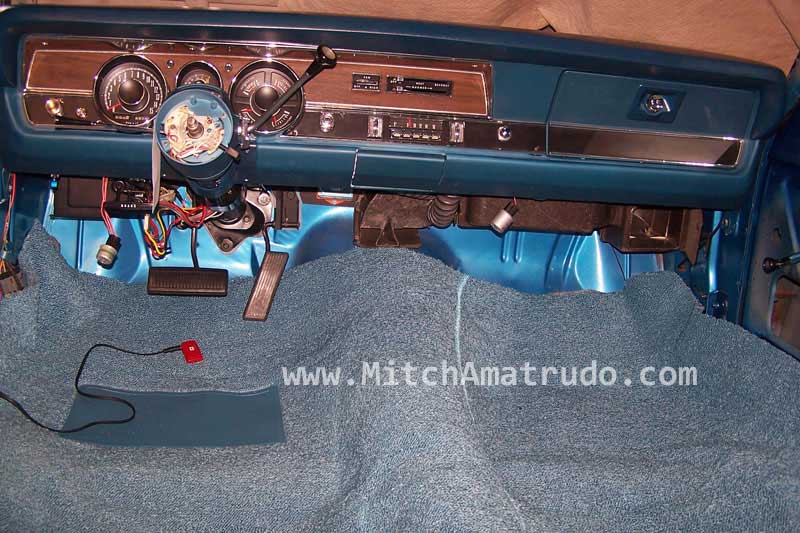
July 20, 2014
LONG UPDATE...I got nothing done over the winter and spent most of May and June doing other stuff around the house that needed to be done. The first things I did on the Duster this year were to have the reproduction Goodyear Polyglas tires mounted and balanced. Then I went through a process of restoring the center caps. These were already rechromed last year but I had to sand the painted areas and do some creative masking. The textured silver paint was from Totally Auto and is probably a close match to the original, correct finish. They came out nice and the car looks so much nicer with the original rallye wheels installed instead of the old 13" wheels that the car has been rolling around on for years.
I wanted to have a local guy do the exhaust system, but I didn't want to start the car for the first time without it, and I didn't want to get involved with having the car transported to the exhaust shop. Instead, I decided on using Accurate Exhaust. This was essentially an "exhaust system in a box" and it was a good choice. The kit had everything I needed to do the complete job and everything fit very well.
Then I moved-on to getting ready to start the engine. I had already cranked it in the fall so I knew that I had good compression and spark. I put 4 gallons of gas in the tank and cranked it over enough to get fuel pumping and to fill the carb bowls. Then I encountered my first problem of the year. The overpriced reproduction 2-piece steel fuel line set that I bought from Mancini Racing leaked. Both pieces, because of bad flare ends. This started a very time consuming and frustrating cycle of waiting for parts and re-installing stuff including having to replace the fuel pump which got damaged in the process. Part of the problem with a long-time restoration like this is that in most cases the stuff that I'm installing on the car is years old and way out of warranty before it's even installed. This was the case with these fuel lines. In the nice short note I wrote to Mancini about this problem I told them that I did not expect them to take care of the problem for me since the lines were bought 3 years ago, however some kind of a reply from them would have been appropriate yet I got nothing. Mancini is certainly not on my list of recommended vendors because of this.
Then, come to find out the wheel trim rings which I bought last year on Ebay and were said to be NOS but only used for a month, sure looked nice when I took them out of the box but unfortunately they do not fit properly. This will end-up being a loss of several hundred dollars which (believe it or not) would have been a pretty good deal for these had they not been NO GOOD !
So, now I'm pissed and decide that I need to start the car since I need something positive to happen otherwise I think I'll just put it away until next year so I decided to do it right-away without any help from other guys, which is a bad practice, but I needed to do this NOW.
I had all the required safety measures in-place. A tarp under the car to contain fluids in- case of a catastrophic leak. A wet towel for a fire extinguisher and a charged garden hose in-case the fire gets really big. Safety glasses, since who knows what loose stuff may get winged at me or what may explode. I had a jug of water ready to refill the radiator, and I installed a set of aftermarket gauges temporarily in-case the factory gauges did not work properly. Lifted the rear wheels off the ground to prevent the car from moving in-case of an issue with the transmission or linkage.
So, with my wife there for the assist I started the car for the first time. It took longer than I thought it would to get-going but it finally ran and it was great to hear. Oil pressure and temp were good and no major leaks. I did have an incident with the oil pressure gauge which you can see at about 9 minutes into the video, but my main concern was with a bad metallic sound that started right-away. I was pretty-sure it was something in the trans/torque converter area but also confident that it was not something that made me have to shut-down so I was able to get my initial cam break-in period completed. The problem was simply that the thin steel plate between the engine and trans was bent just-enough to very slightly contact the torque converter bolts but not enough to do any damage. A simple tweak with a screwdriver was all that was required to fix it. A lucky break. I was afraid as soon as the engine started that I might have to drop the transmission next.
I spent the next day messing-around trying to get the car to run good and idle but was mostly unsuccessful. I think I might have to have a good carb guy do the carb again for me. No big deal, I expected that. Then, almost on a whim I decided that I would drive the car. Why not? I invited Dad over. He sat on a recycle bin and I on a milk crate. I took it around the block at a slow speed and it all went great. Car ran/drove/steered/stopped. I even came close to my first crash because my milk crate collapsed as I was making a turn.
The one glaring problem that I noticed immediately upon starting the car was that the tach did not work. This meant that I had to remove the awesome dash cluster from the car. Like the problem with the fuel lines, this started a whole debacle of issues. The dash is something that you want to install once and leave it alone forever. There's a lot of fragile stuff back there such as wiring/circuit boards/pins/connections and all of it is 45 years old. Well, as-of the day before writing this the dash has been in and out 4 more times due to various breaks and repairs but at this time finally everything works as it should
The last issue to still resolve was the heater blower motor had a bad noise in it. Removing it requires removing the entire heater assembly from under the dash. The same dash I've been crawling around under for the last 2 weeks. I decide that before I go through all of this, let me try drilling 2 small holes in the motor from inside the engine compartment and I'll spray some stuff in-there to see if the noise will go away. First hole was a success. Cool. Second hole, the drill bit broke-off inside the motor. Awesome. Out comes the heater from under the dash. Luckily I was able to find another motor without any trouble. The paint is drying on it now and after another hour of work it should be all-set.
So, tomorrow I should be able to re-install the heater and that should get me back to where I can drive the car and continue to work-out more bugs.
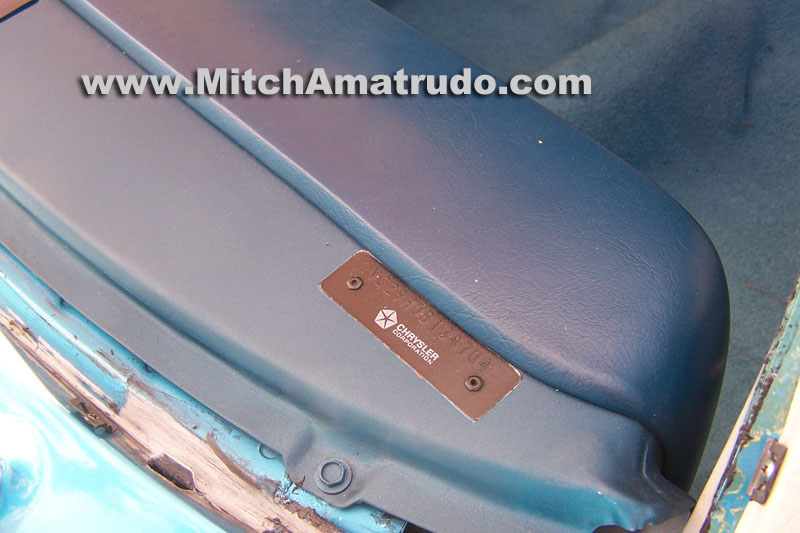
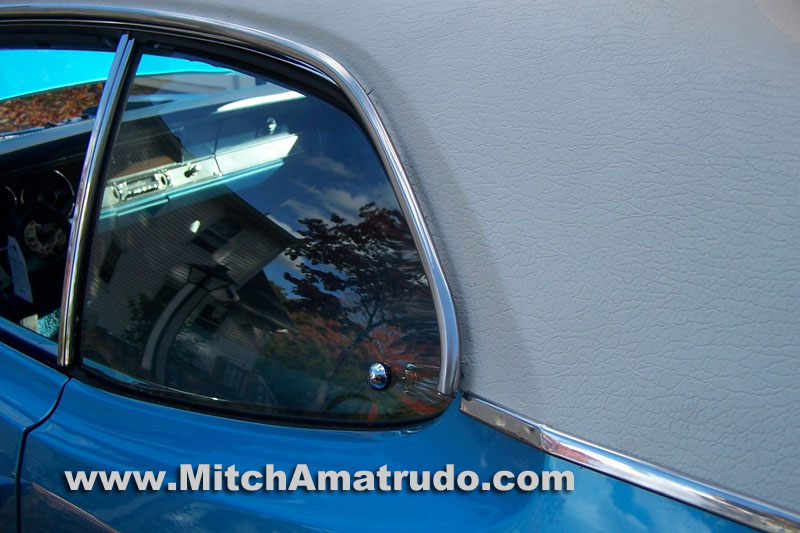
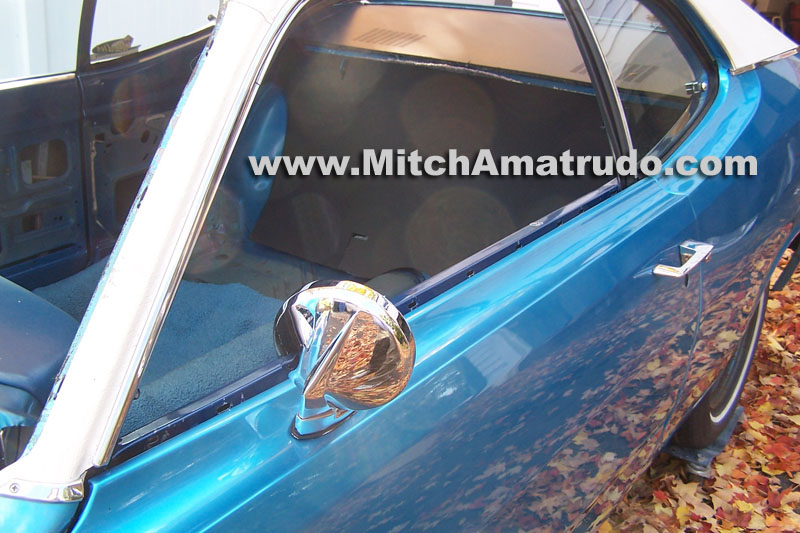
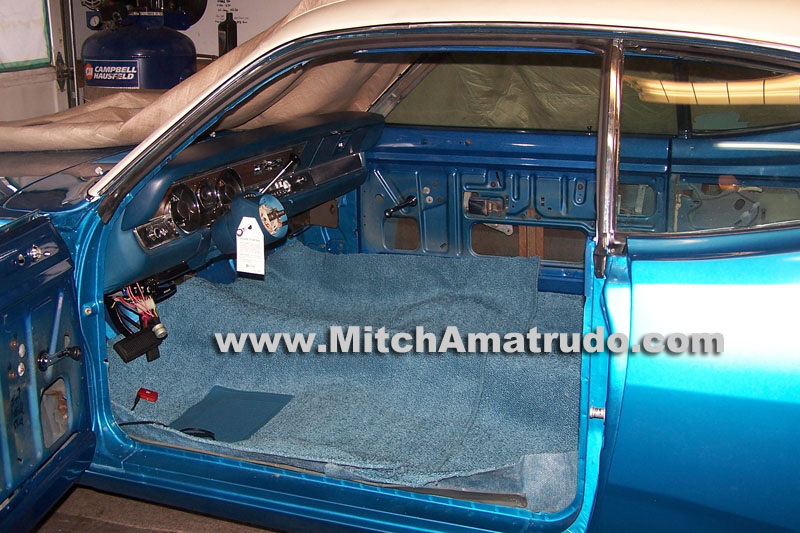
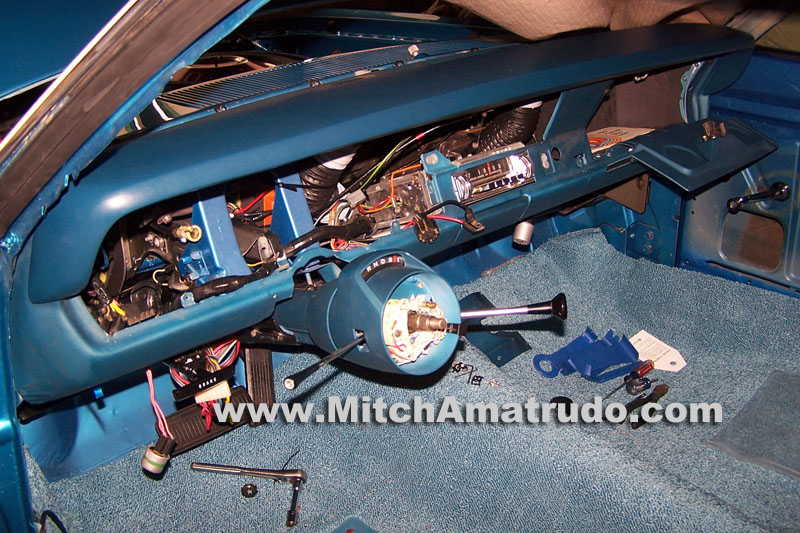
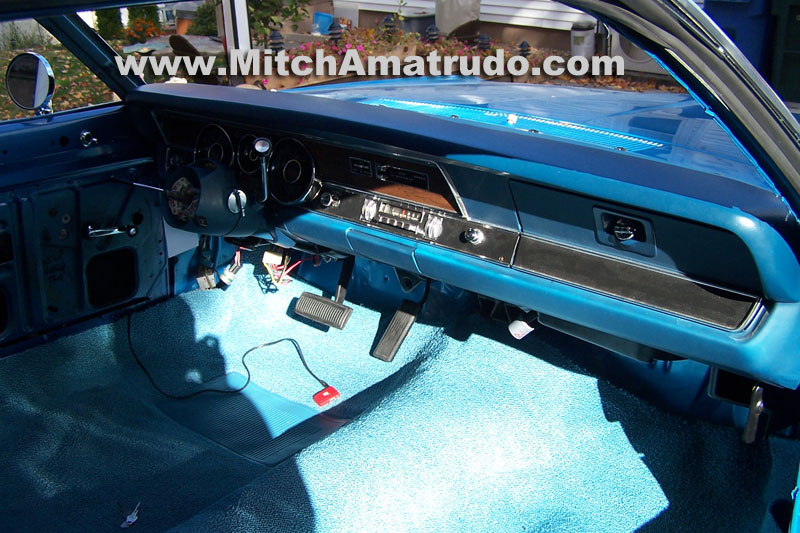
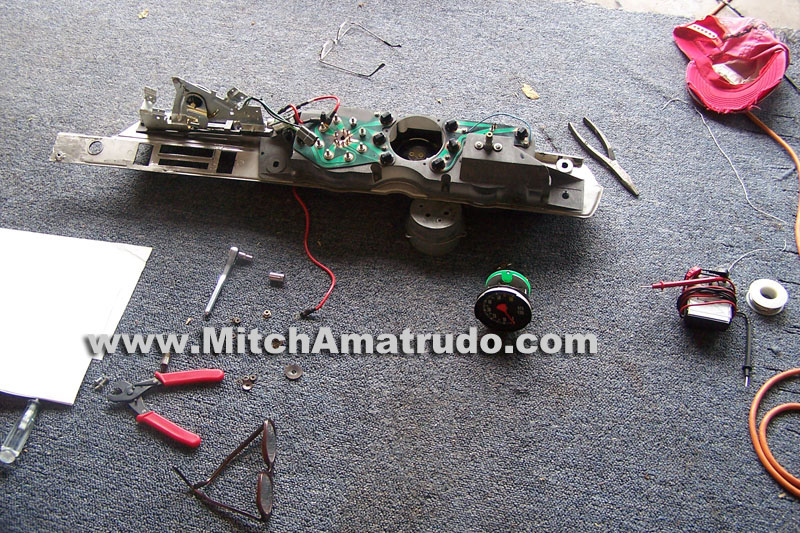
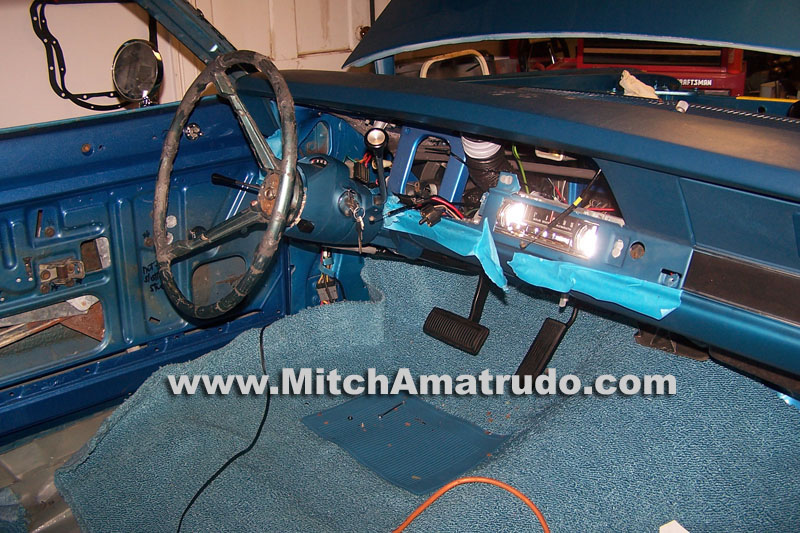
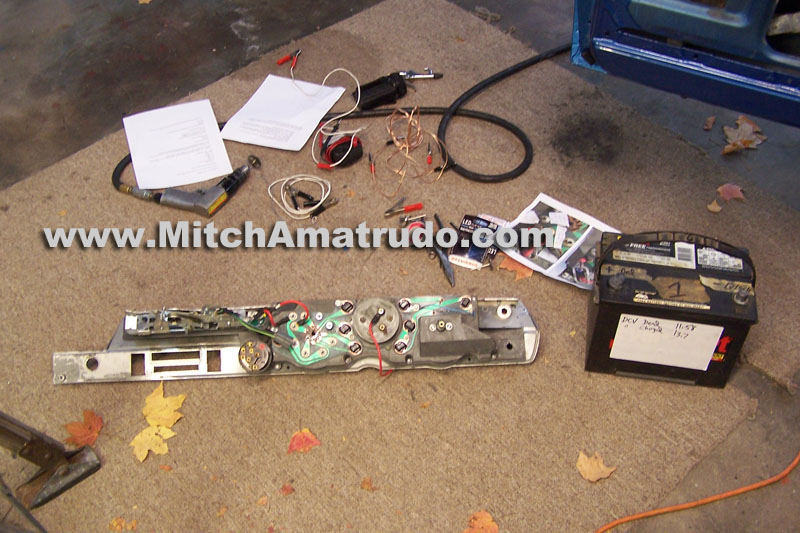

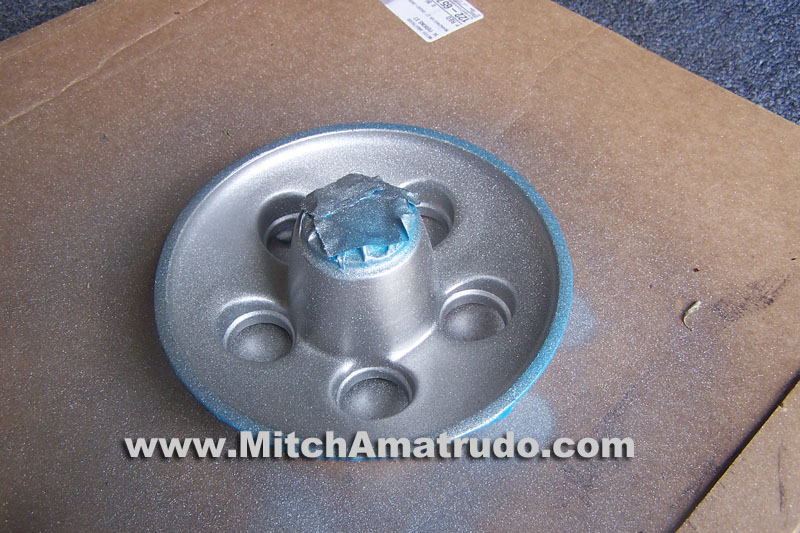
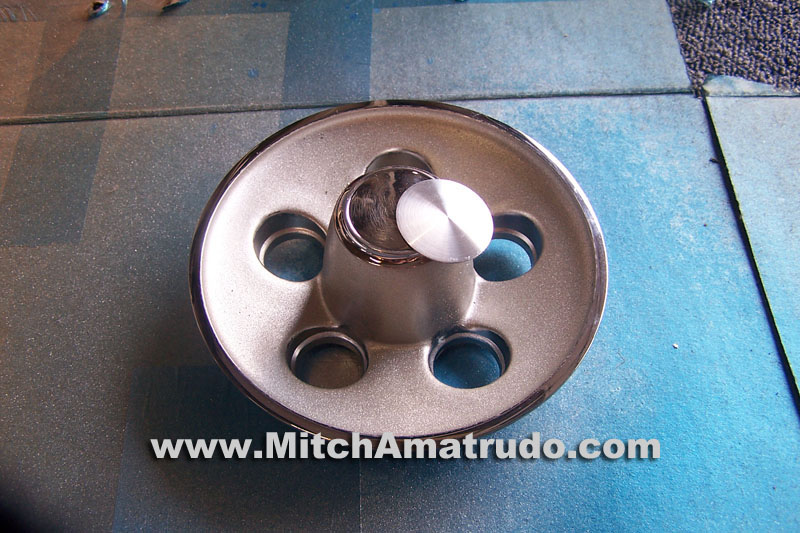
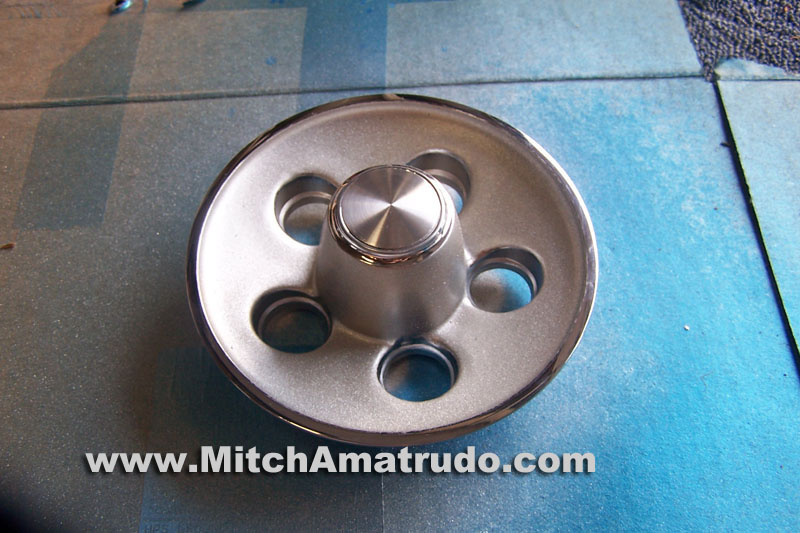
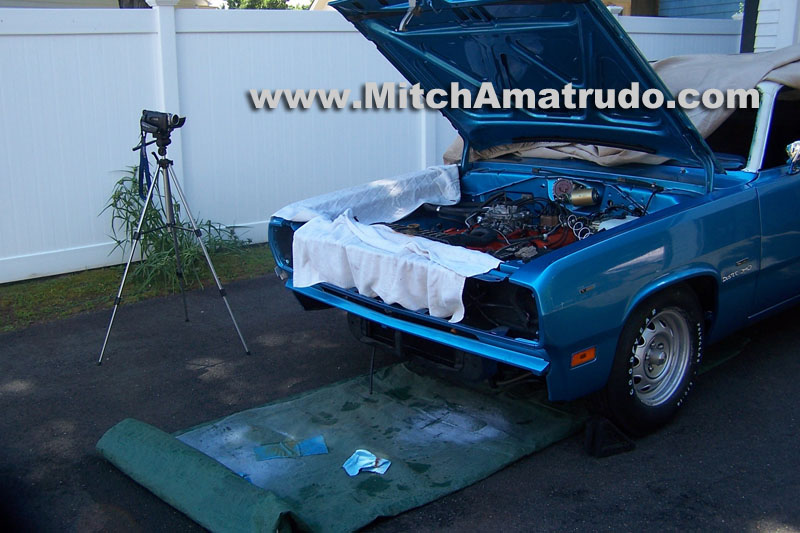
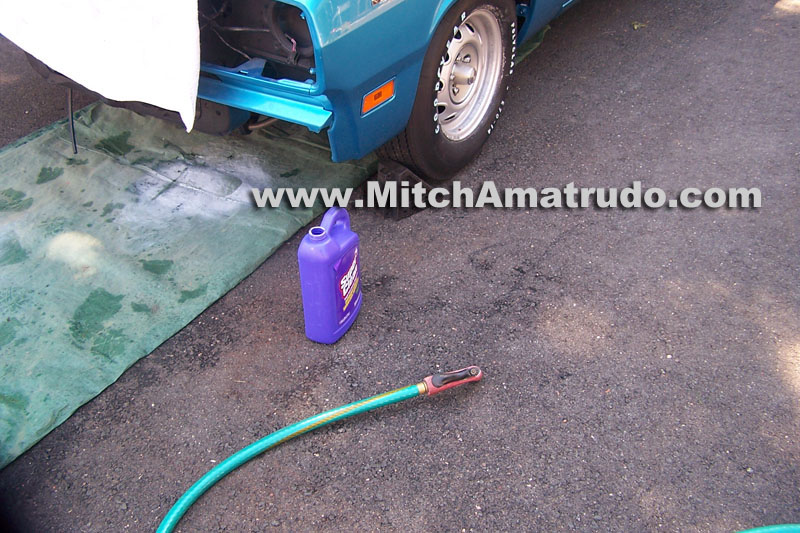
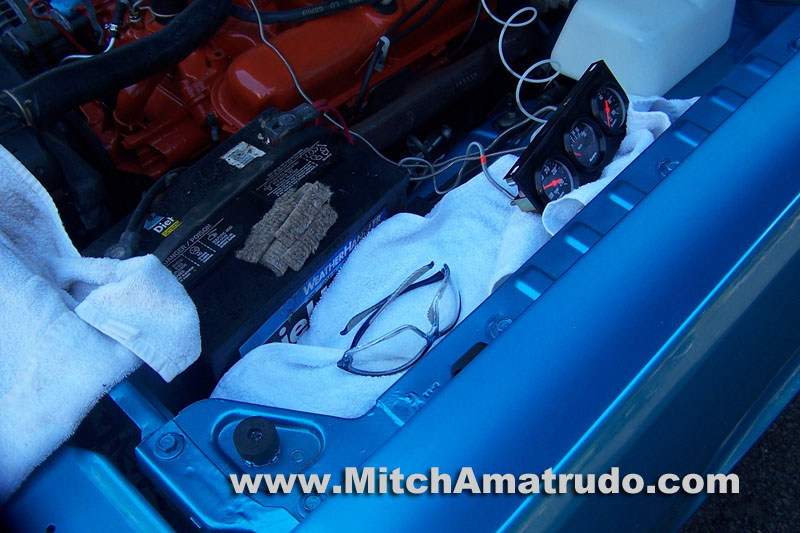
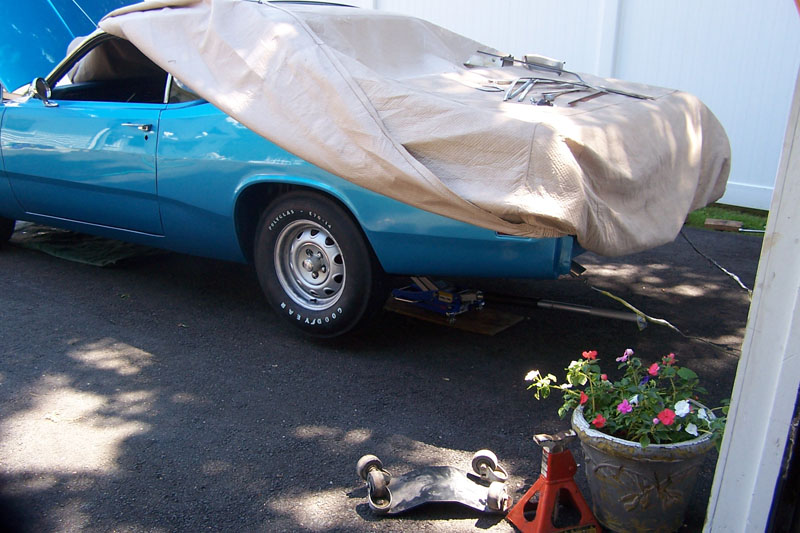
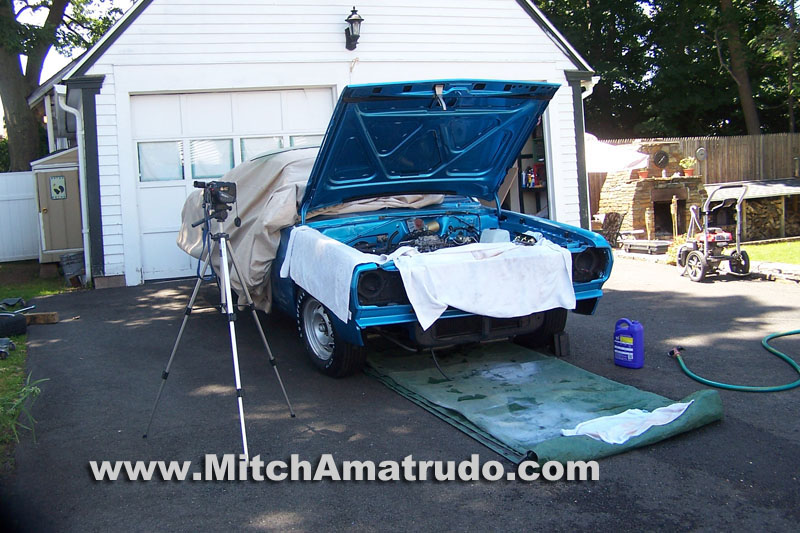
January 30, 2017
Wow, I can’t believe it’s been 2 ½ years since the last update. Folks have been asking me what’s going-on with the car so I figured it’s time to get everyone up to speed.
The heater blower motor is repaired.
The next big issue was the next time I drove it I realized that I had no 3rd gear. Fluid level was OK, throttle pressure linkage which controls the shift points was fine. I don’t remember the details now but I do remember removing and rebuilding the valve body 2 times, but never finding any problem with it. Other troubleshooting that I did still pointed to the valve body as being the problem though, so before dropping the tranny to overhaul it again I decided to try a different valve body from Cope Racing Transmissions, since I was happy with his service previously. This did the trick. I’ll never know what was wrong with the other one but on the first test drive I had 1-2 shift and a 2-3 shift perfectly.
Now the car is registered and mobile enough to drive around the block, so I entered it in its first car show, the “Cruisin’ Main” show in my home town Manchester, CT. What a great feeling to be able to get the car out in public after 8 years of work.
After the car show I sent the carburetor to Scott at Harm’s Auto in Washington state, who has a good reputation for restoring carbs. Not only does he rebuild your carb, he also re-plates everything so-that when it is returned to you it appears brand new. He returned the carb to me in the time frame that he promised and it looked great. He returned all of the old parts that he replaced and included a note that said the carb had the wrong jets and the wrong idle mixture screws in it. This would explain why the engine had no response when the mixture screws were turned, and why it would not idle. I could have rebuilt the carb 13 more times myself and never figured out that problem so it was money well-spent, since the car now sits idling beautifully at 800 rpm’s.
The steering was really sloppy and seemed almost as if someone was grabbing the wheel from my hands and turning it. Not good, so instead of trying to rebuild it myself again I got a firm feel replacement from Steer & Gear in Ohio, another vendor with a good reputation. This made a big improvement in the car’s handling. I also performed a DIY front-end alignment using a Fasttrax tool.
Right around the time I was working on the steering box, I thought I heard a slight rod knock, which mostly due to denial I dismissed as being “nothing”, until I knew I had to investigate further and found that my awesome oil pressure would start to drop after running for 5 minutes, until it dropped to next-to-nothing and caused the knock. Motor’s gotta come out. This was fall of 2014. When I pulled the oil pan I found the crankshaft and the bearings to be wiped-out real bad. I considered just installing a new crank kit but decided I better pull the heads as-well. Good thing, because 3 cylinders had major damage in them. Deep gouges in the cylinder walls. This was not a pleasant sight.. Nobody that I asked, including my machine shop guy, could really explain how this could have happened. Off to the machine shop went the block and most of the internal engine parts for repair, which included re-sleeving of 3 cylinders. As usual with machine shop guys and body men, it was nearly a full year before the job was done, so the car sat untouched for a year.
July of 2015 when everything was done started a huge dirty process of stripping and repainting everything before assembling and installing the engine. I didn’t want to see even one bolt with chipped paint that would remind me of this whole thing so I was real careful to be thorough and detailed. I-think it was spring of 2016 before I was able to start the “new” motor. It cranked right-up and sounded really good.
As I write this in January of 2017 the car is in the garage. It starts right-up (by 1970 standards with just the right finesse on the gas pedal). After a short warm-up it will sit there idling beautifully at 800 rpms with a great Mopar rumble in the exhaust. I only drove it a couple of times. The last time was to put more gas in it for the winter and I got 2 nice compliments on the car from strangers. The oil pressure is consistent and there are no fluid leaks, all is well so-far.
The most nagging issue now is the repair on the driver’s door glass. If I can get that knocked-out in the spring without having to repaint the side of the car, the rest of the restoration should be all relatively easy stuff. My Dad passed-away in January of 2016 and I have taken possession of his 1922 Reo Speedwagon fire truck, and this is now another semi-restoration project that I will be working on along with getting the Duster finished. My goal is to have BOTH vehicles in the Manchester car show next August.
July, 2021
Loooong time, no see, but believe it or not I'm probably not too far behind with providing updates. There has been little or no progress on the driver's door window problem. This whole deal got me discouraged enough that I lost interest in this project for a long time. This along with major changes in my life caused the Duster to have to sit untouched for a very long time.