Edward B. Amatrudo's
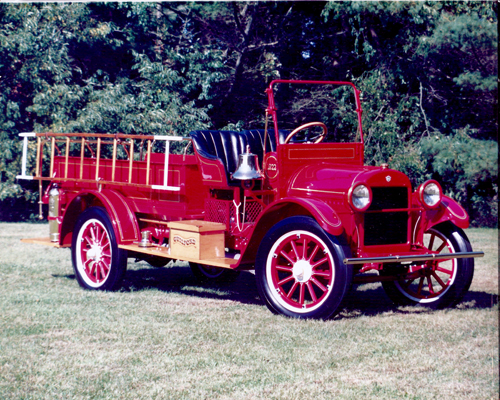
Ed Amatrudo committed nearly 70 years of his life to the Connecticut fire service. His priorities in life were God, family, the fire service, and the Reo. In the early 60’s his wife Arlene bought Ed the truck for Father’s day. It would soon become his pride and joy. For 20 years the Reo made appearances at countless parades, picnics, weddings, and school sporting events. It was a popular attraction for children as well as adults.
In 1984, Ed and his fellow firefighters from the Nichols FD (Trumbull, CT) and others performed a total restoration of the vehicle. It went-on to win numerous awards and trophies including “best appearing antique” at the statewide firemen’s convention. The Reo also appeared at the Frank Marotta’s Auto Show” at the former New Haven Coliseum. The truck would strike fear in the hearts of other competitors as they saw it arrive at shows on it’s rusty yellow trailer. Over the next few decades, the truck’s luster faded somewhat.
“Chief Ed” passed-away in January, 2016. As a tribute to him, the Reo was quickly returned to parade condition for his funeral services by many of the same cast of characters from the Nichols Fire Department who performed the original restoration over 30 years ago.
I am honored to now be in possession of Dad's Reo, yet challenged with the responsibility of returning it to 100% of its former glory and keeping it that way.
This web page will chronicle my progress of the Reo’s refurb from this point forward. If you wish to be included in a mailing list whenever this page is update let me know.
Any questions, comments, information, tips, IT problems, etc. are welcome by contacting me at mitch@mitchamatrudo.com
-Lt. Mitch Amatrudo
I'll start with an album of stuff from the early 60's right up to today to give you a better idea of this vehicle's exciting history. Click on the arrows at each side of the images to advance or rewind through the photos.


Next is a photo album of nice pictures that were taken circa 2005 in Noank, CT. The truck was long past it's prime at this time but still looked great.


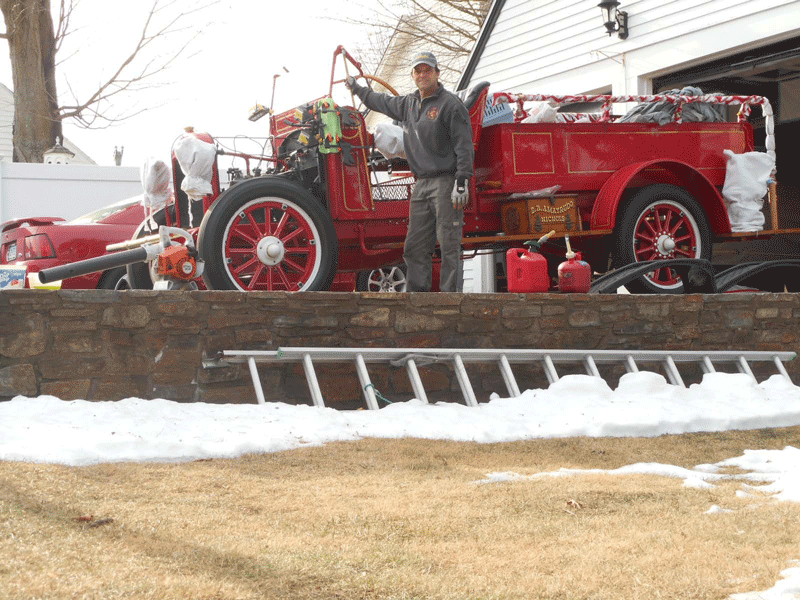
After Dad's services in January 2016, the Reo resided in Mystic, CT for some months before being transported to my home in Manchester. Then it was prepped for another funeral service. This time for Commissioner Ron Butz of the Nichols CT (Trumbull) Fire Department, the same FD responsible for the Reo's major restoration in the 1980's. It was then transported back to Manchester, which is now it's new home base. It's final showing was at the "Cruisin' Main" show in Manchester, CT.


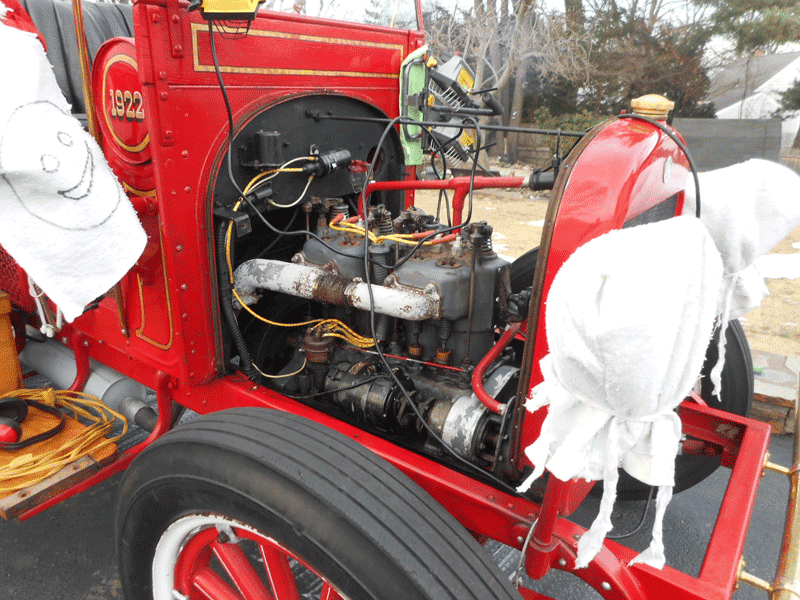
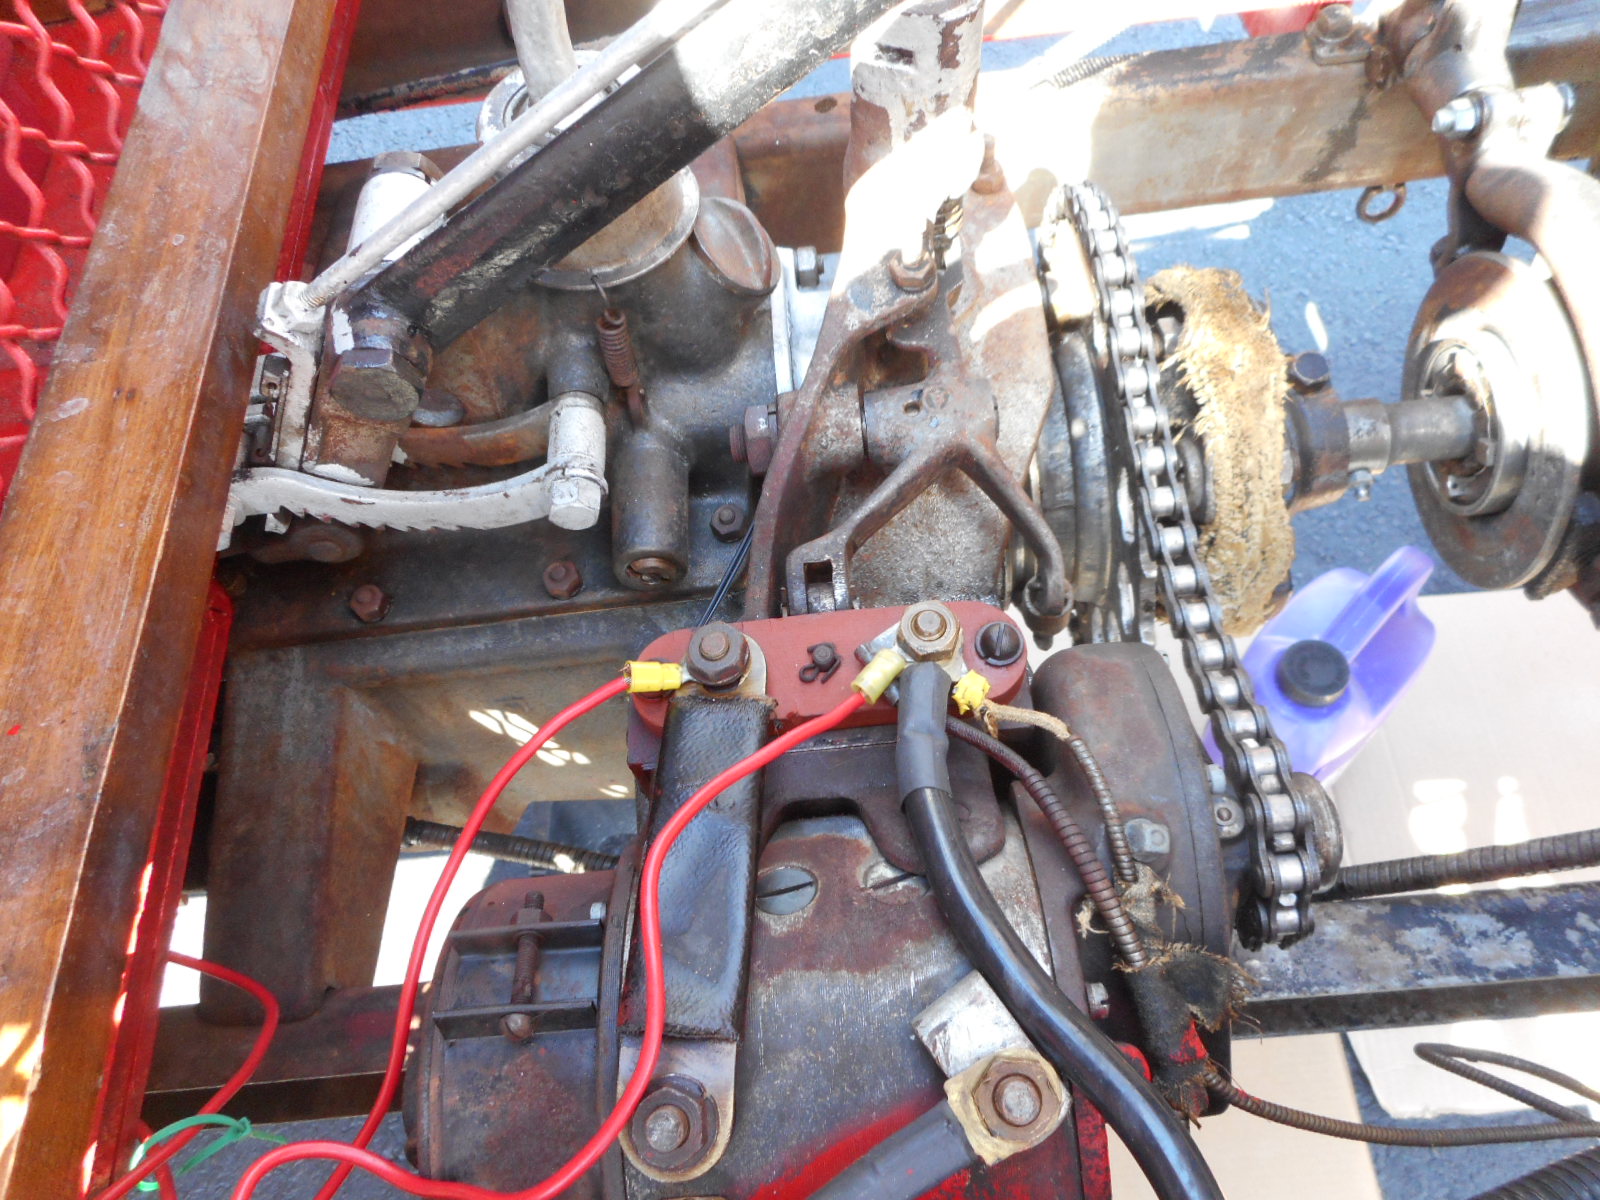
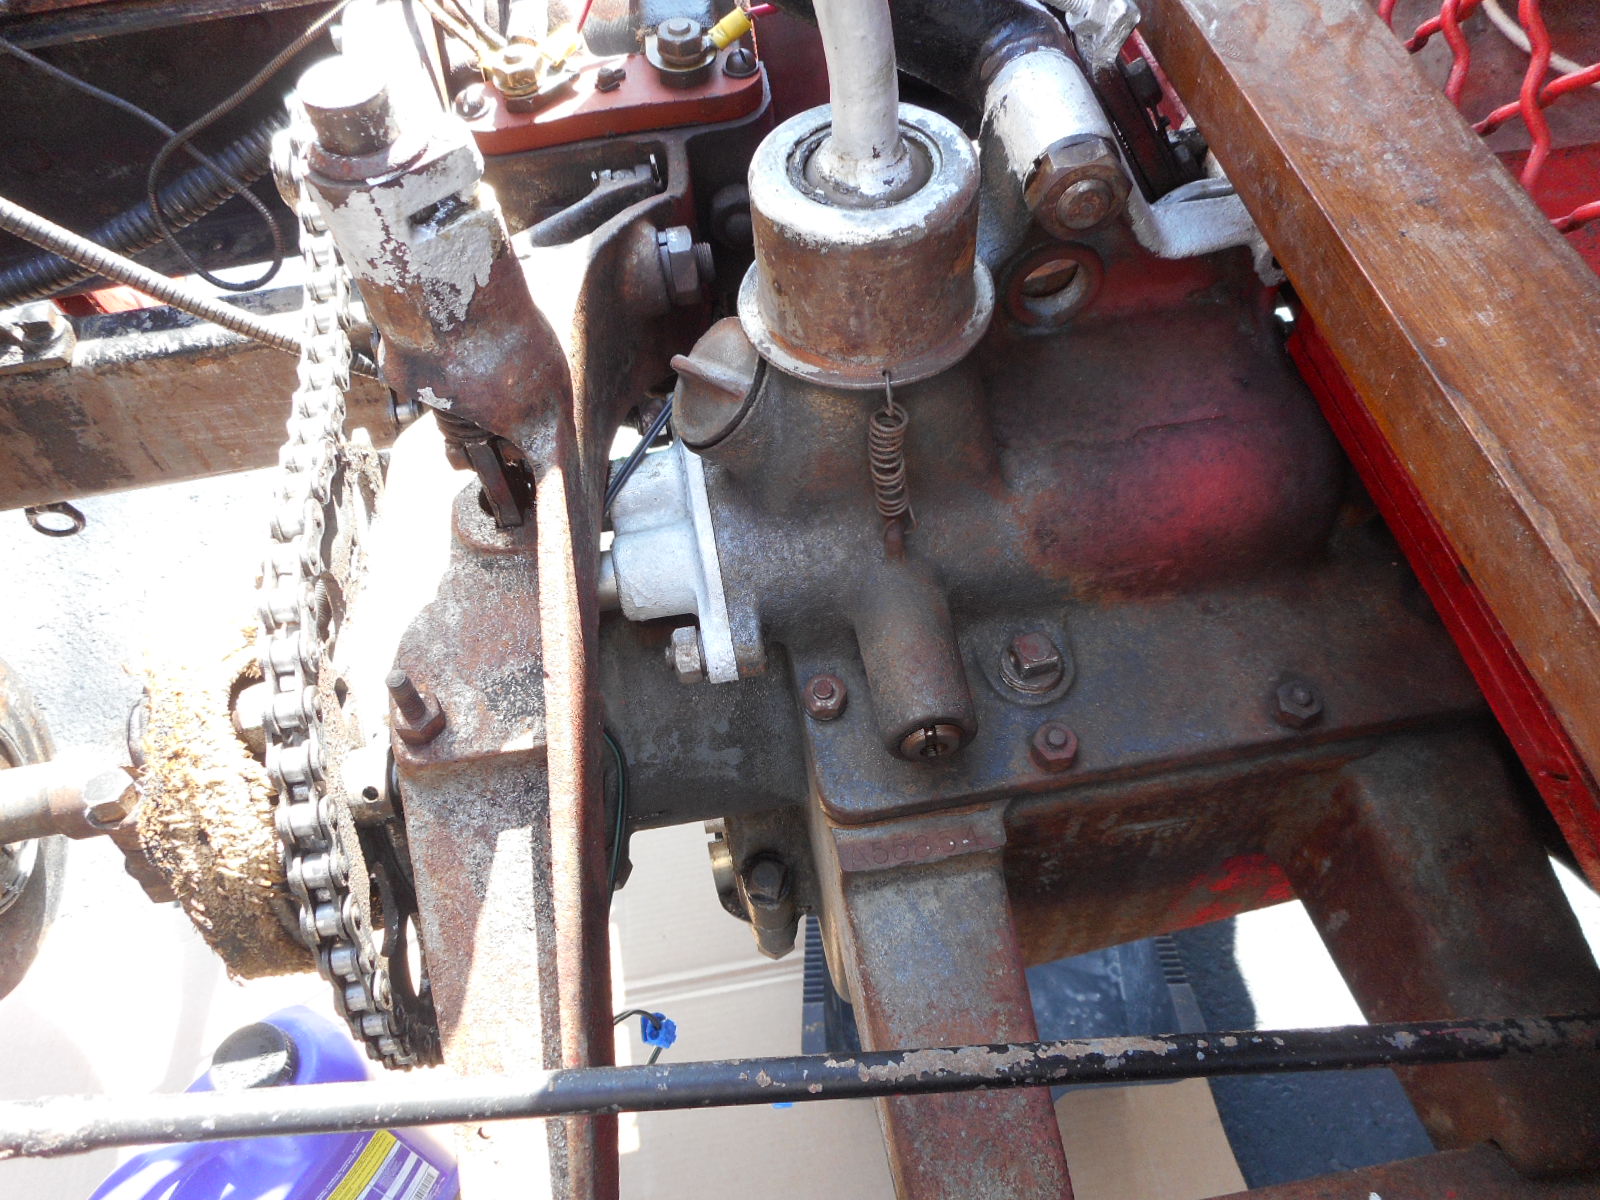
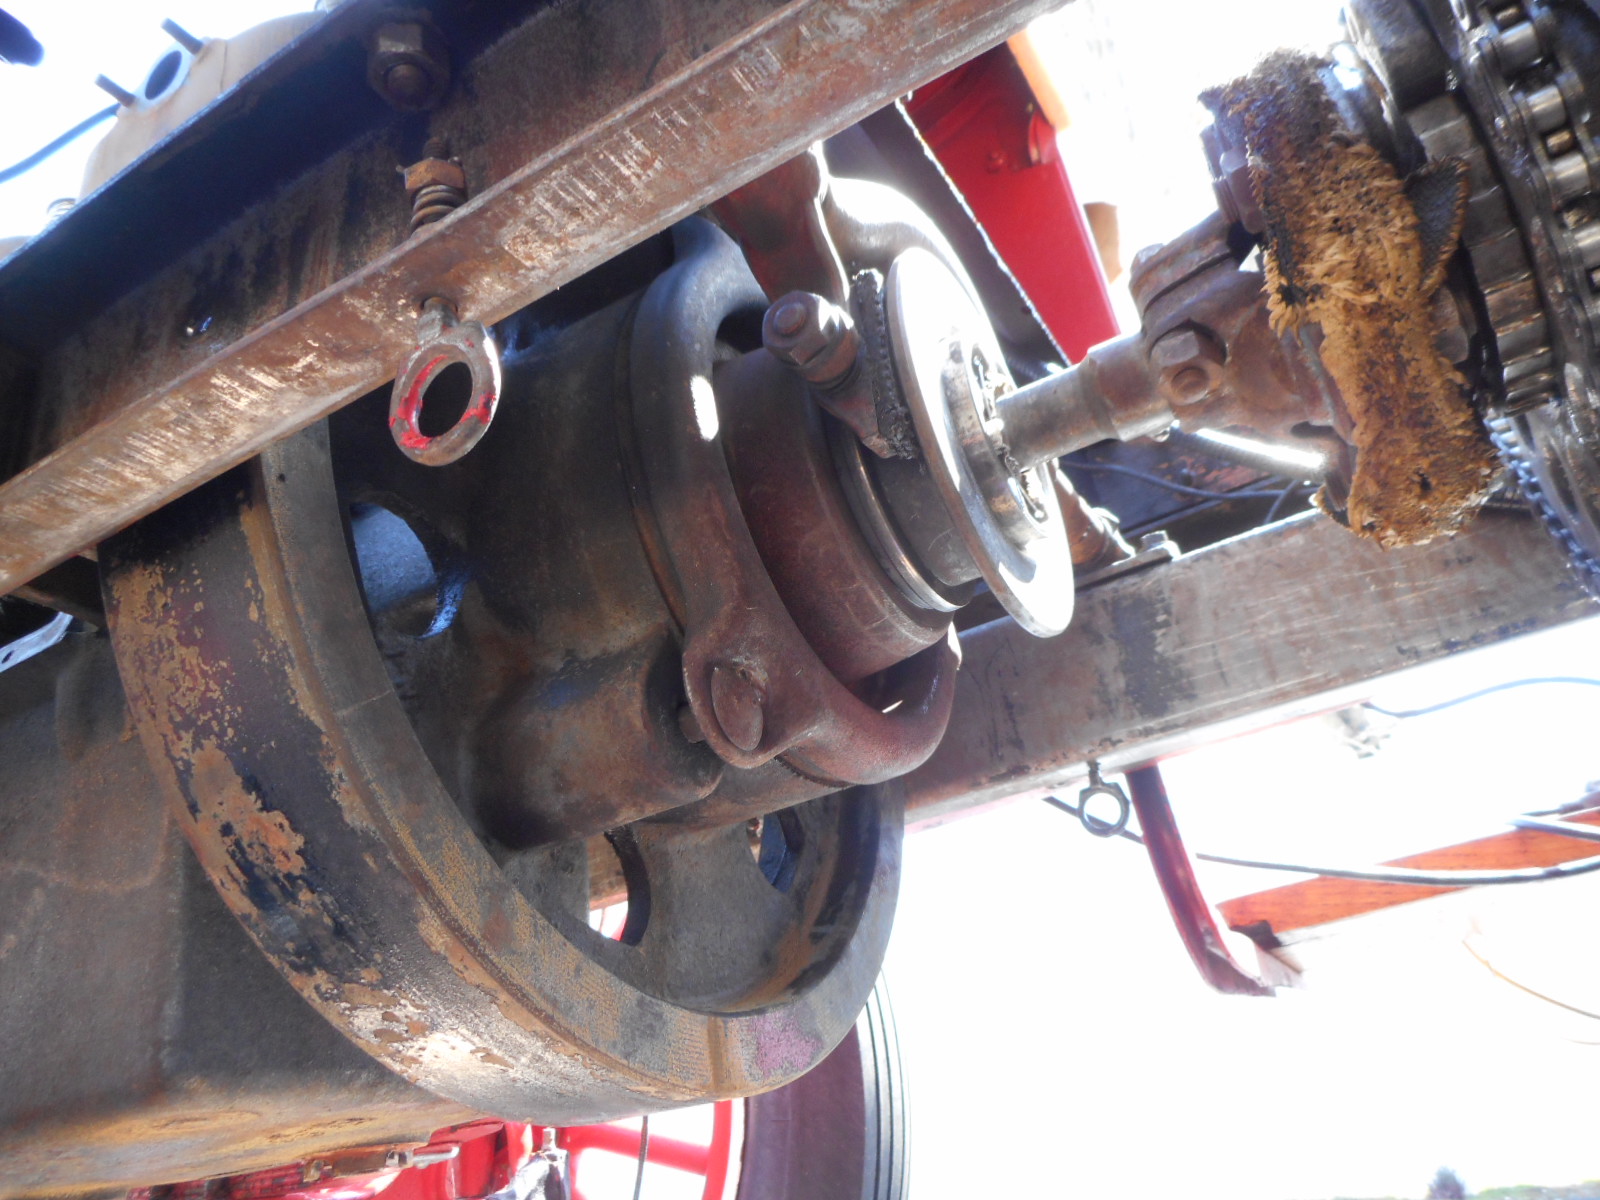
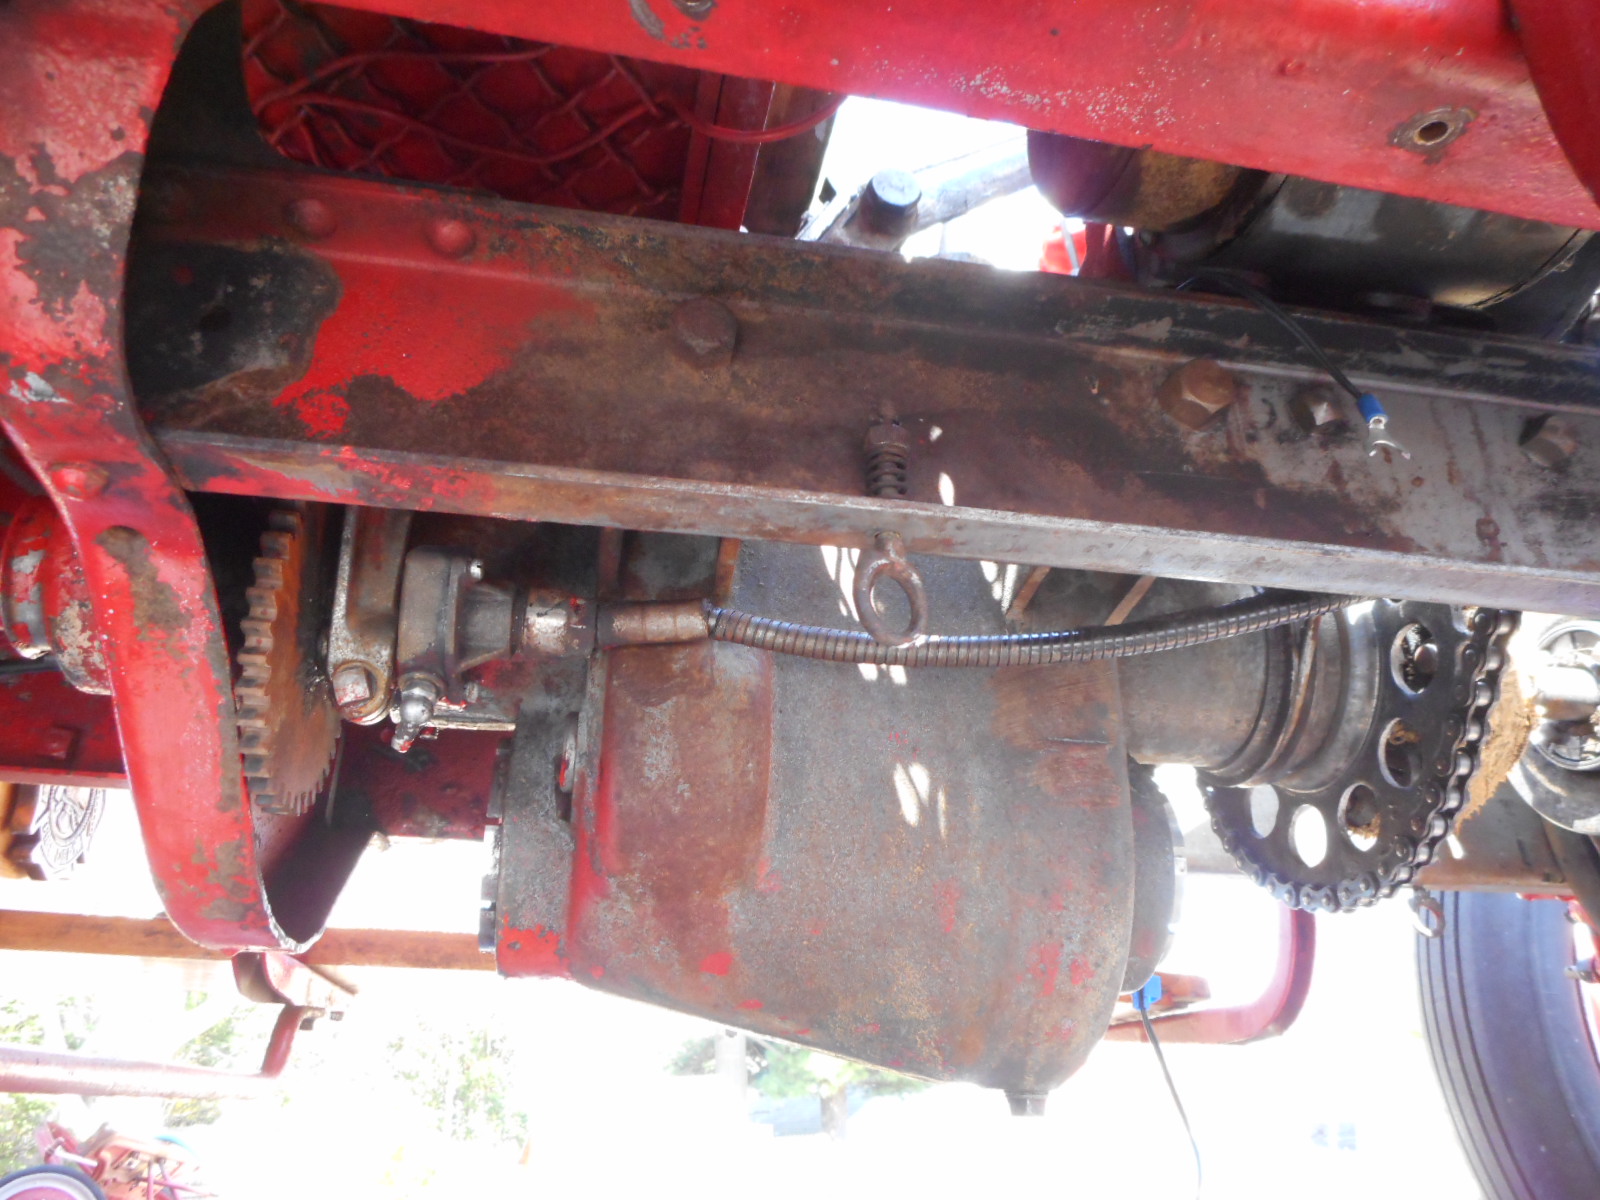
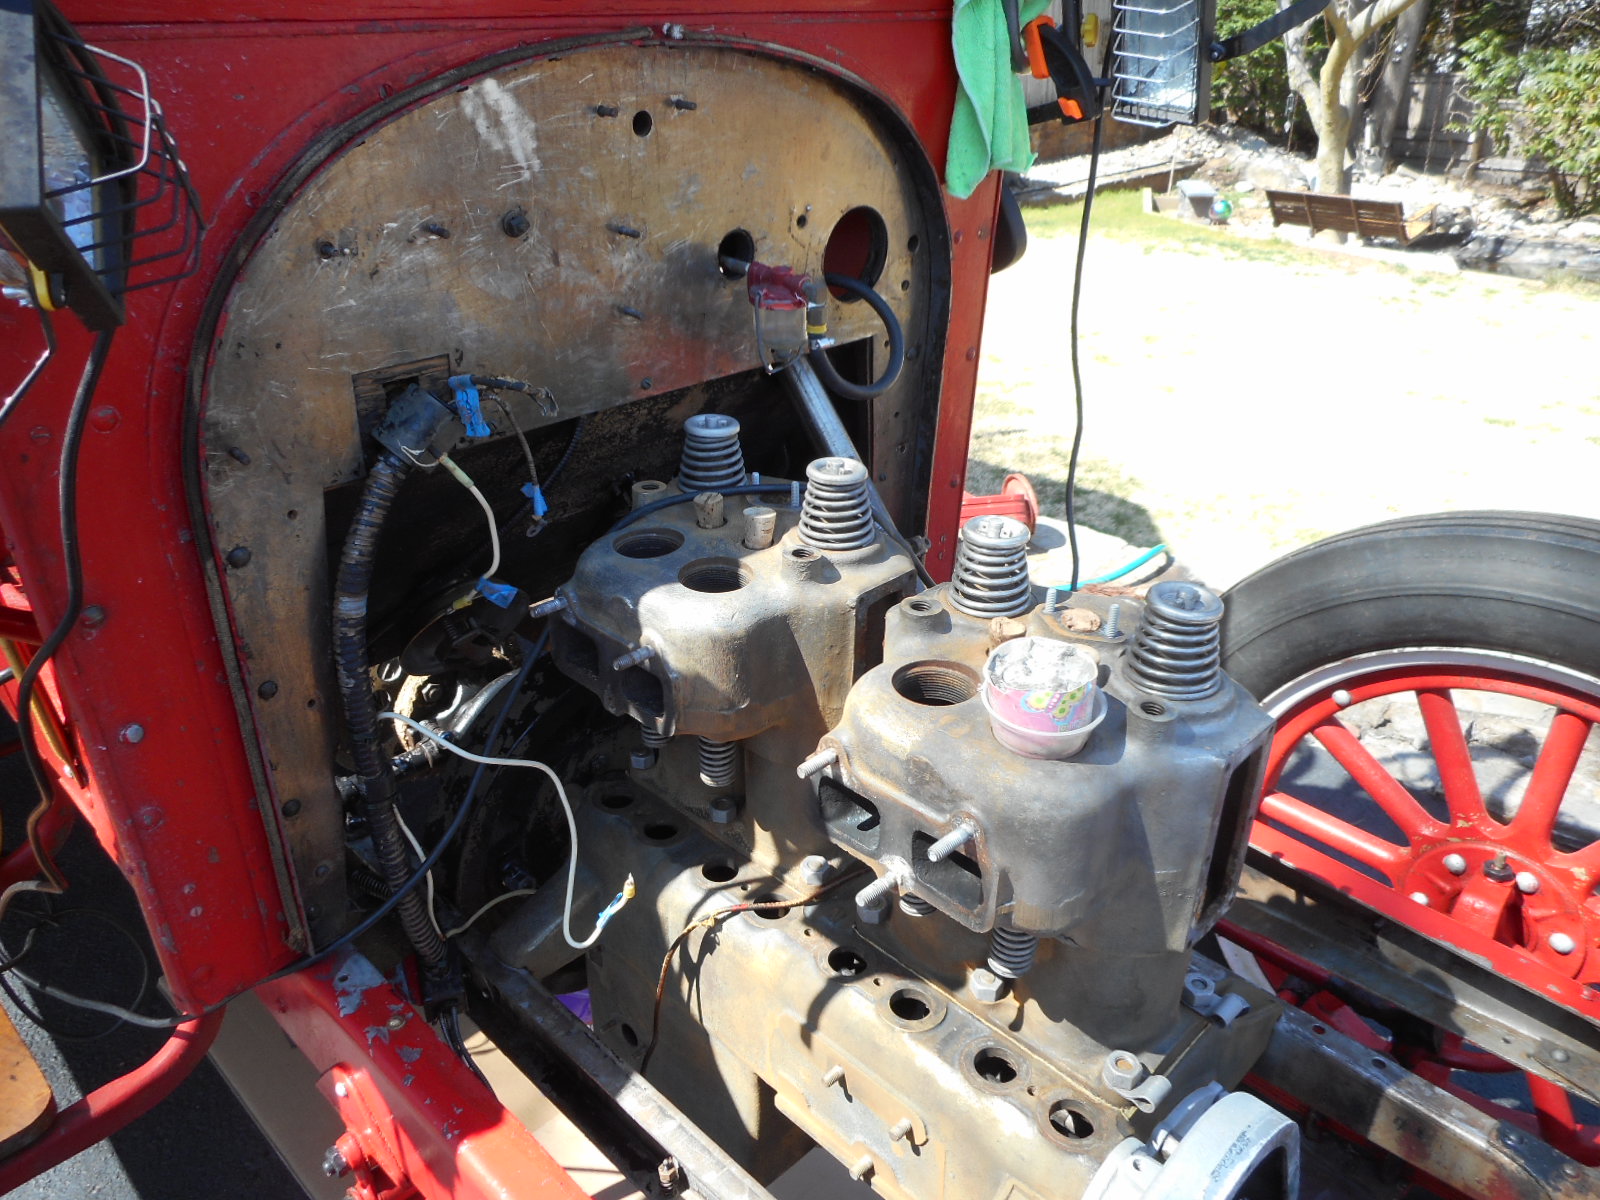
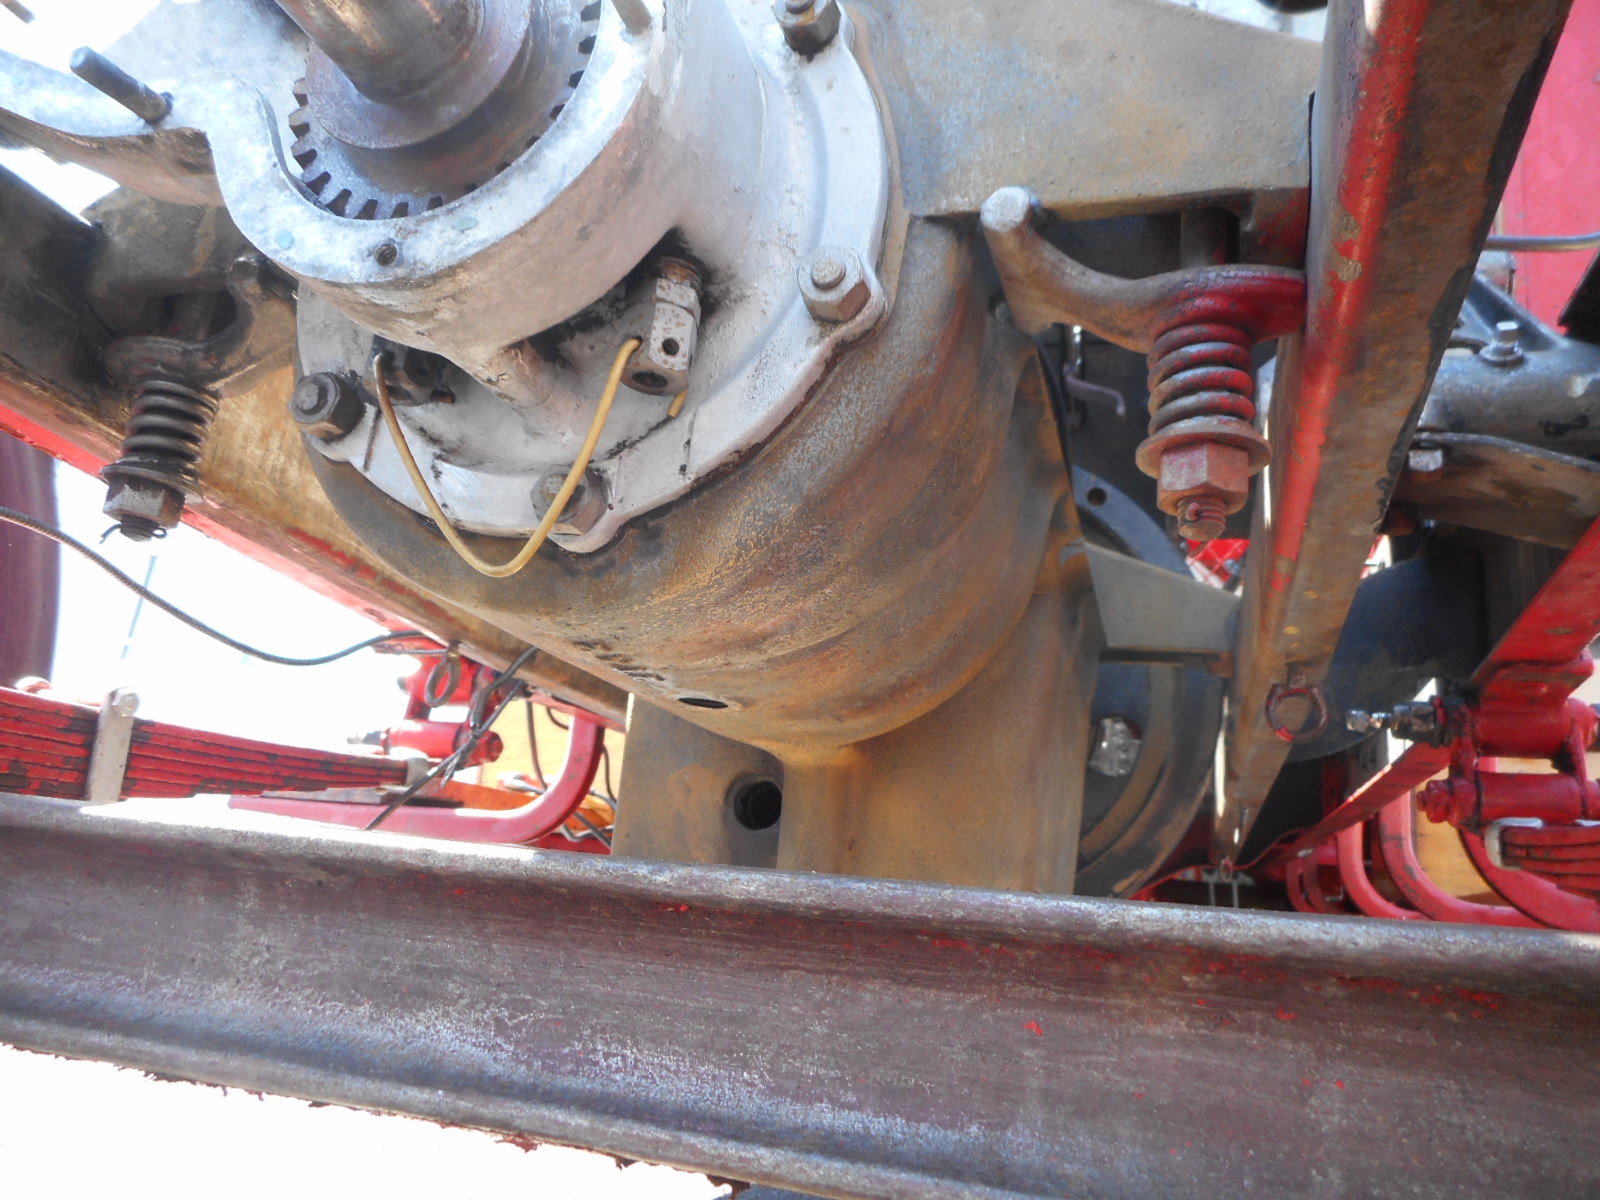
This is a large collection of photos of the engine compartment, the restoration of which will be my first objective in this latest refurb. I included these at this time since other Reo or antique auto enthusiasts might be interested in seeing them. These are the photos that will serve as my reference for when the time comes to put everything back together again.


 1
1 2
2 3
3 4
4 5
5 6
6 7
7 8
8 9
9 10
10 11
11 12
12 13
13 14
14 15
15 16
16 17
17 18
18 19
19 20
20 21
21 22
22 23
23 24
24 25
25 26
26 27
27 28
28 29
29 30
30 31
31 32
322017 REO REFURB RECORD !
DECEMBER 2016
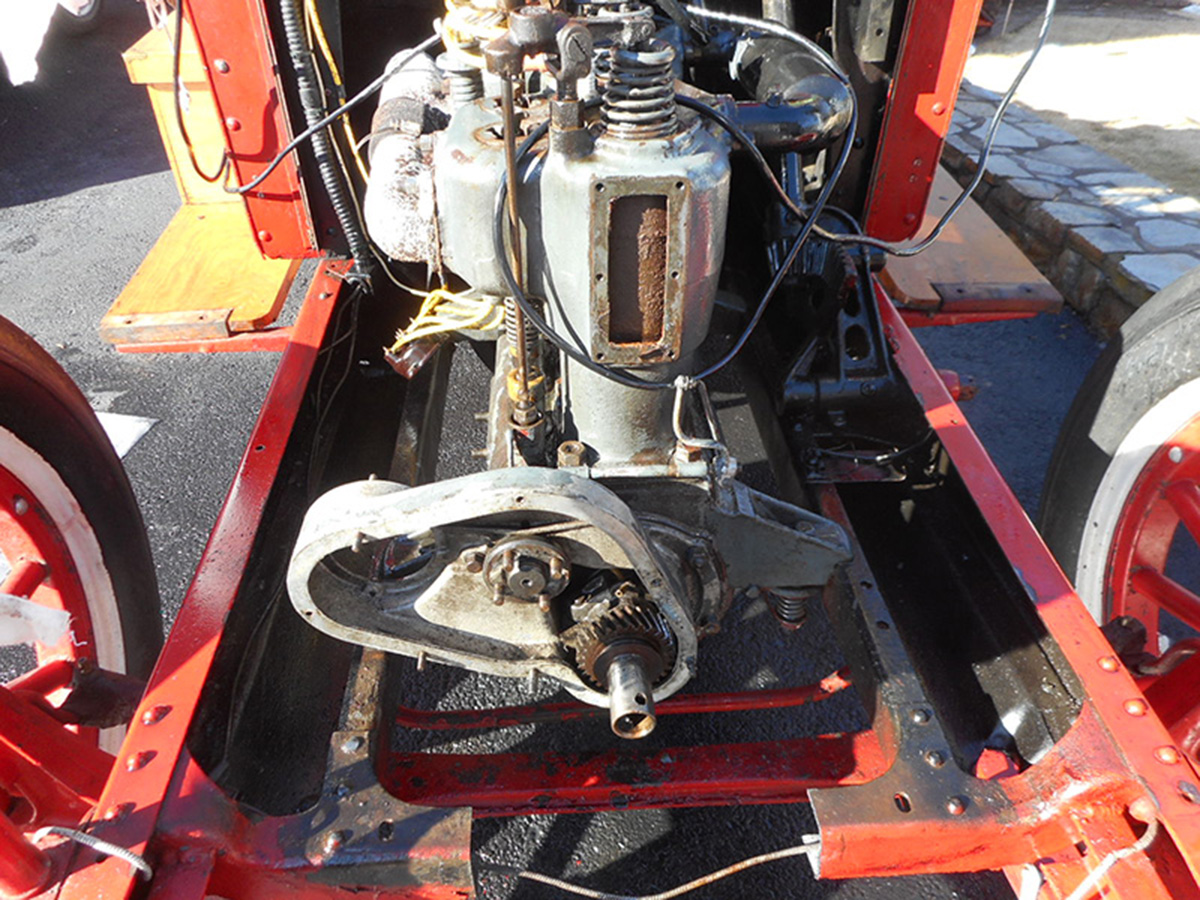
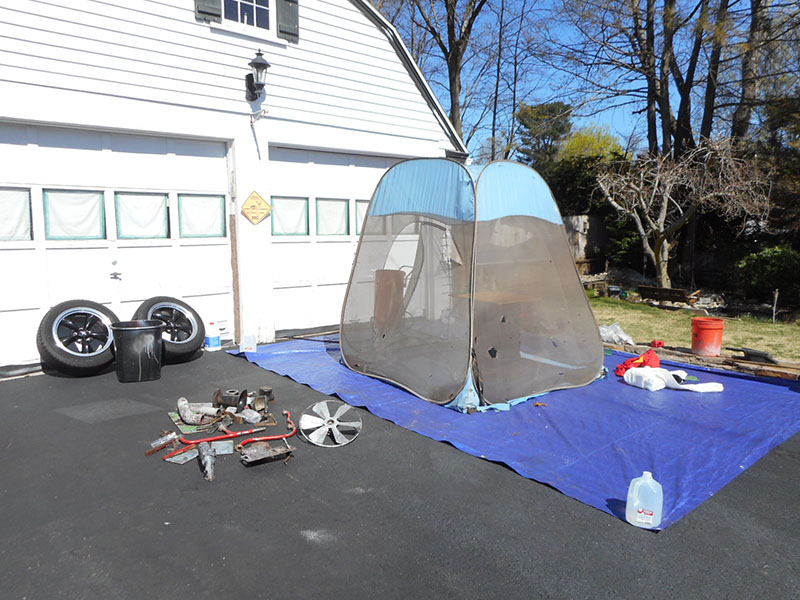
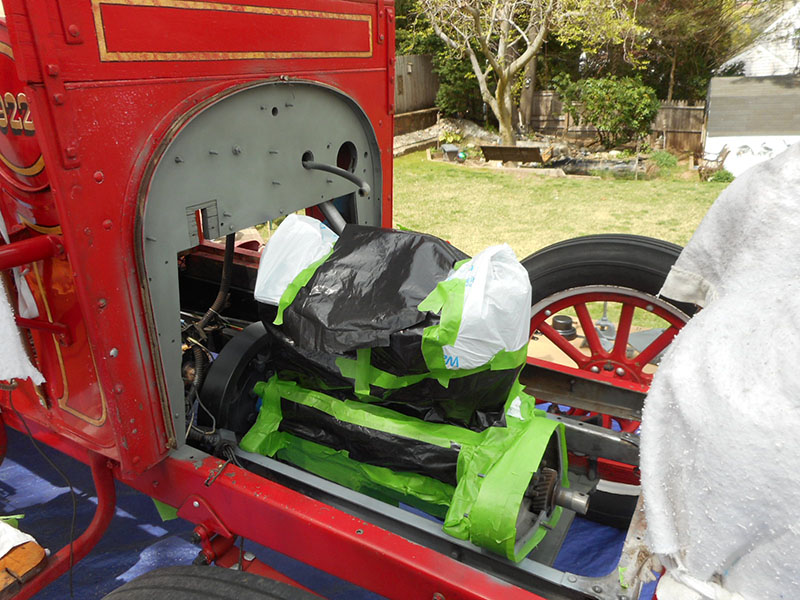
My first project is to try to restore as much of the engine compartment as I can during the winter. It gets warm enough in my garage with my wall-mounted heater, but blasting / stripping / cleaning parts could be challenging during the winter, since that's all best done outside. I mounted an electric winch on the back wall of the garage that works great for hauling the truck in and out of the garage when it is not under it's own power.
In-addition to the cosmetic work I have planned, at this time the status of the engine is not good. It's running worse than it has in years. There is a bad exhaust leak. There are several minor coolant leaks, and much seepage of oil.
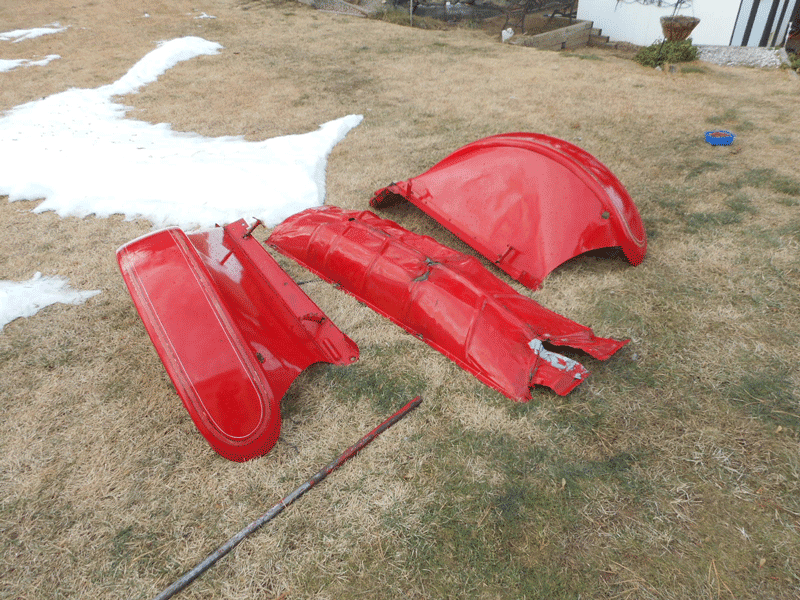
I started by removing the front fenders. This will make it much easier for me to work on the engine, and the fenders will need to be refinished in the summer anyhow. Also removed the headlight support rod (had to remove it to get the fenders off) and the belly pan. The belly pan will need to be repaired and refinished.
January 2017
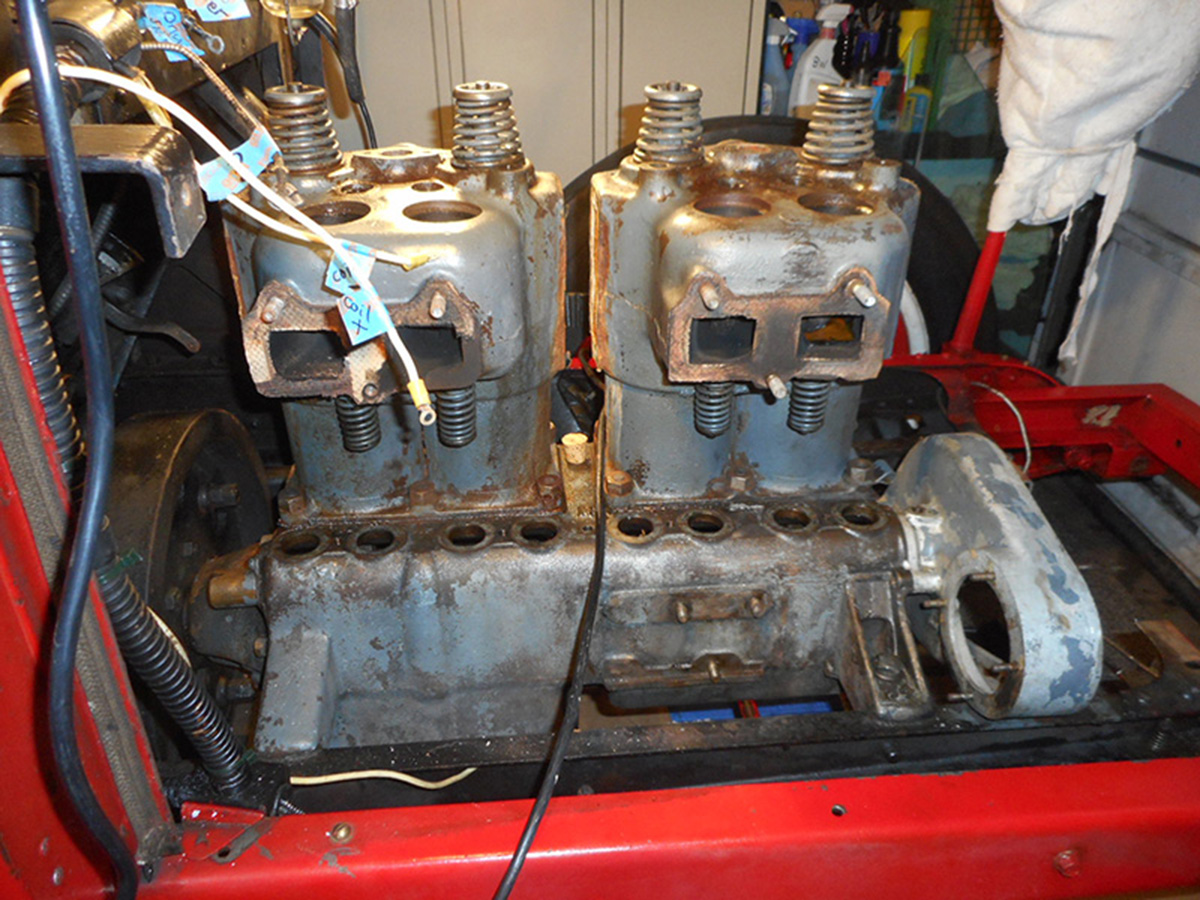
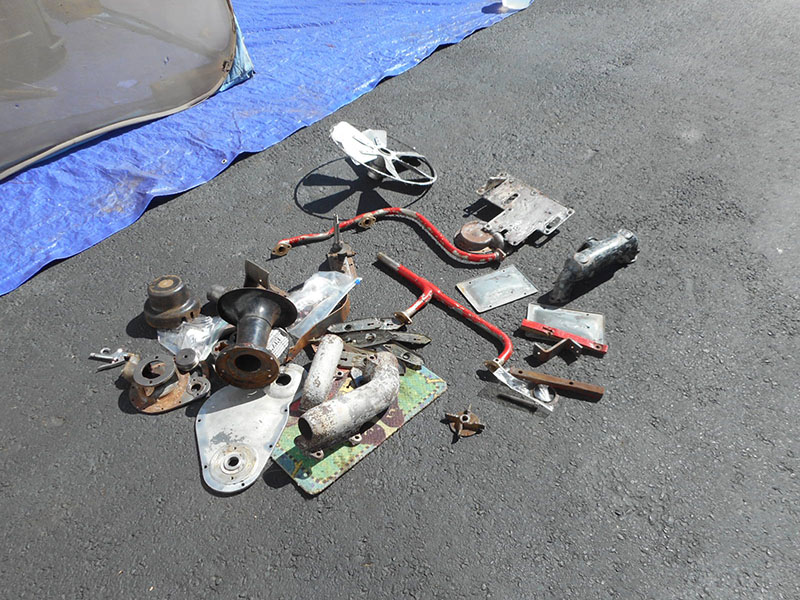
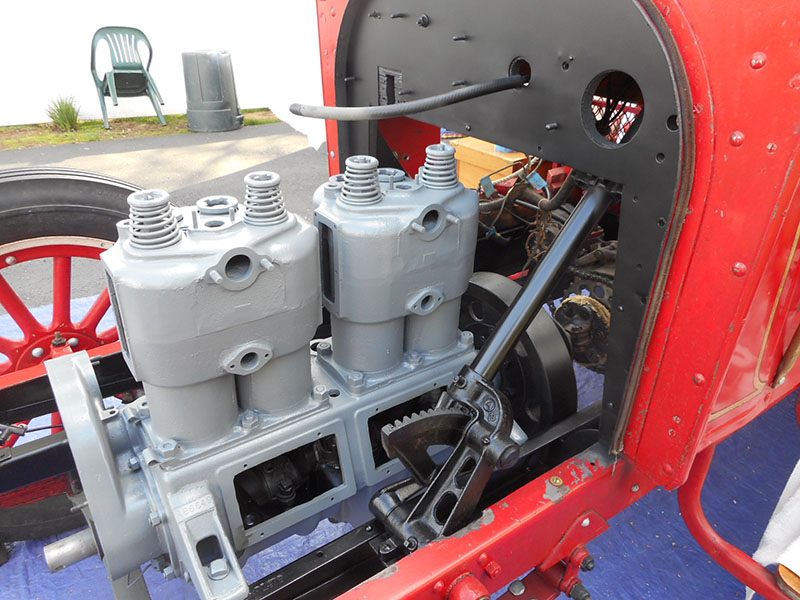
Disassembly of the engine took about 2 weeks. Some stuff was real hard to remove and I had to be really careful, since anything that I break in the process would likely not be replaceable. In some cases I decided to cut things that could be welded back together in order to avoid hammering, chiseling, or otherwise forcing other things apart. Long story, but sort of like robbing Peter to pay Paul.
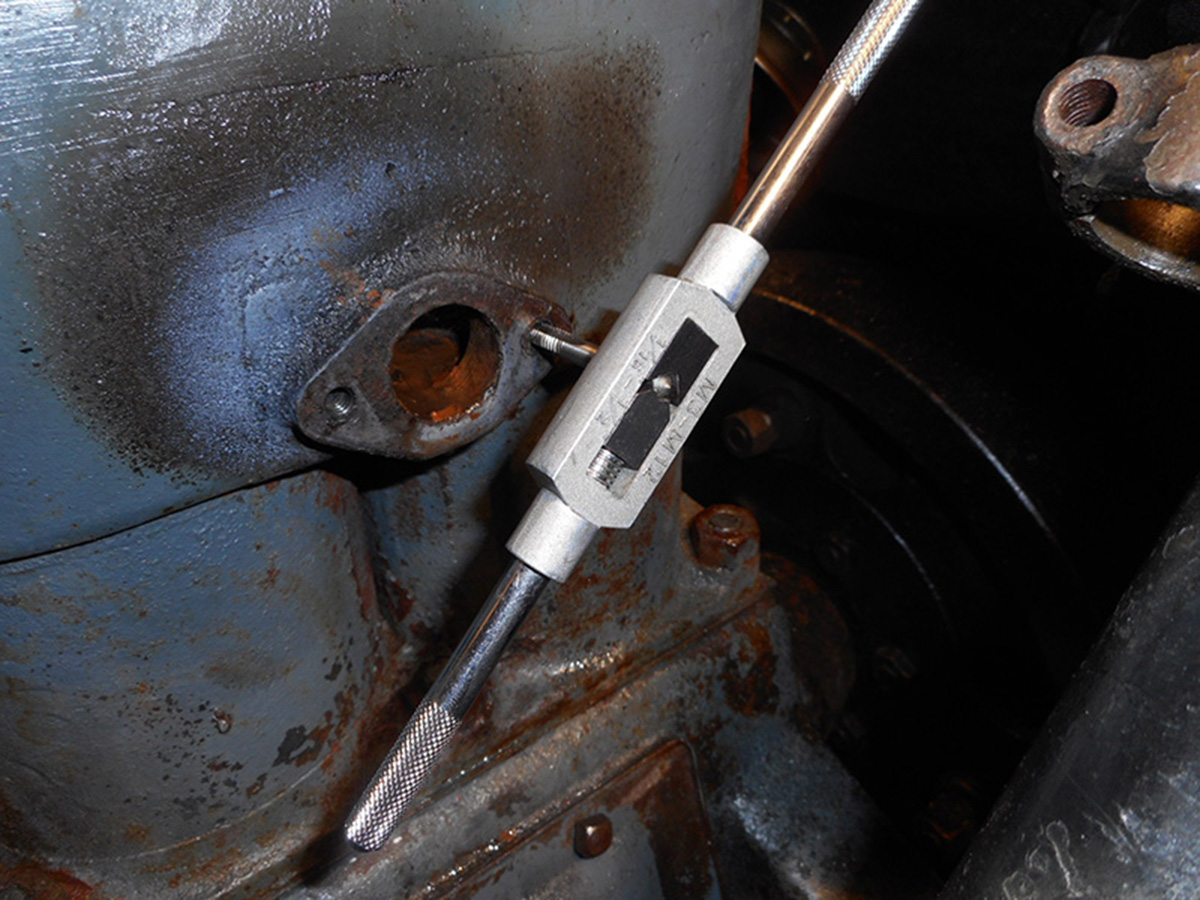
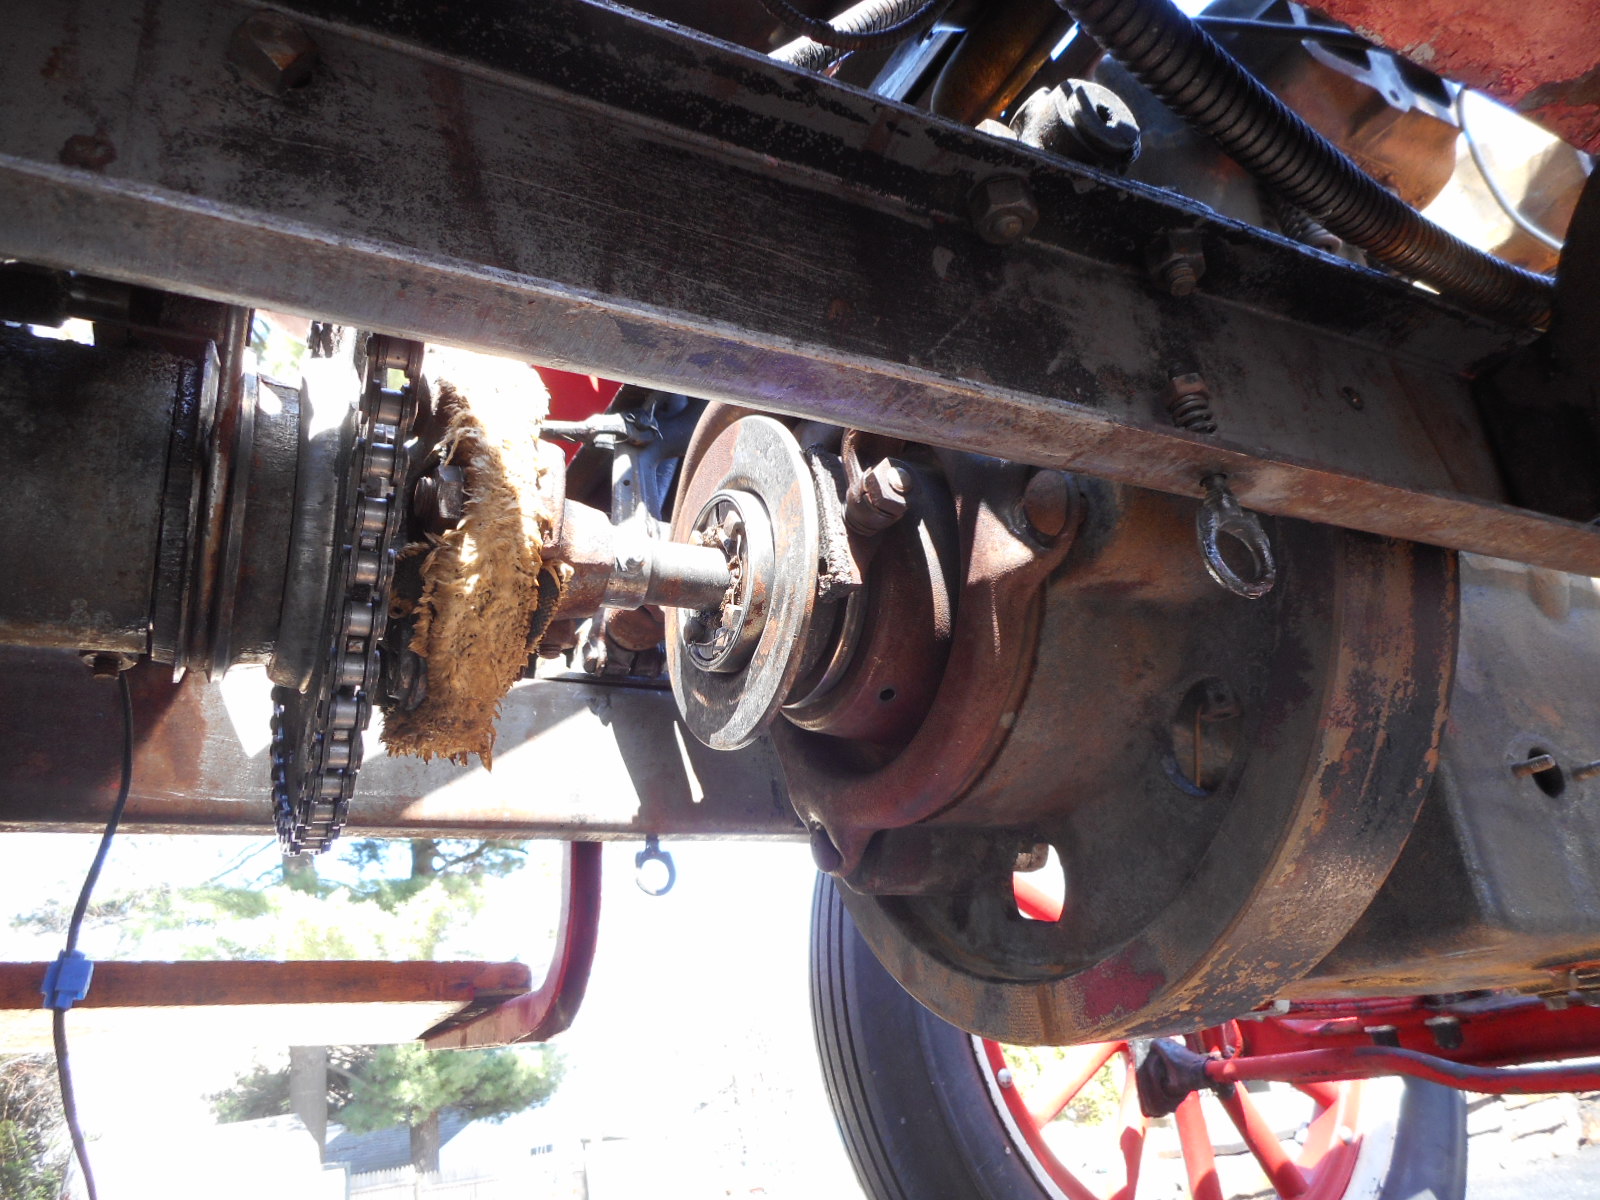
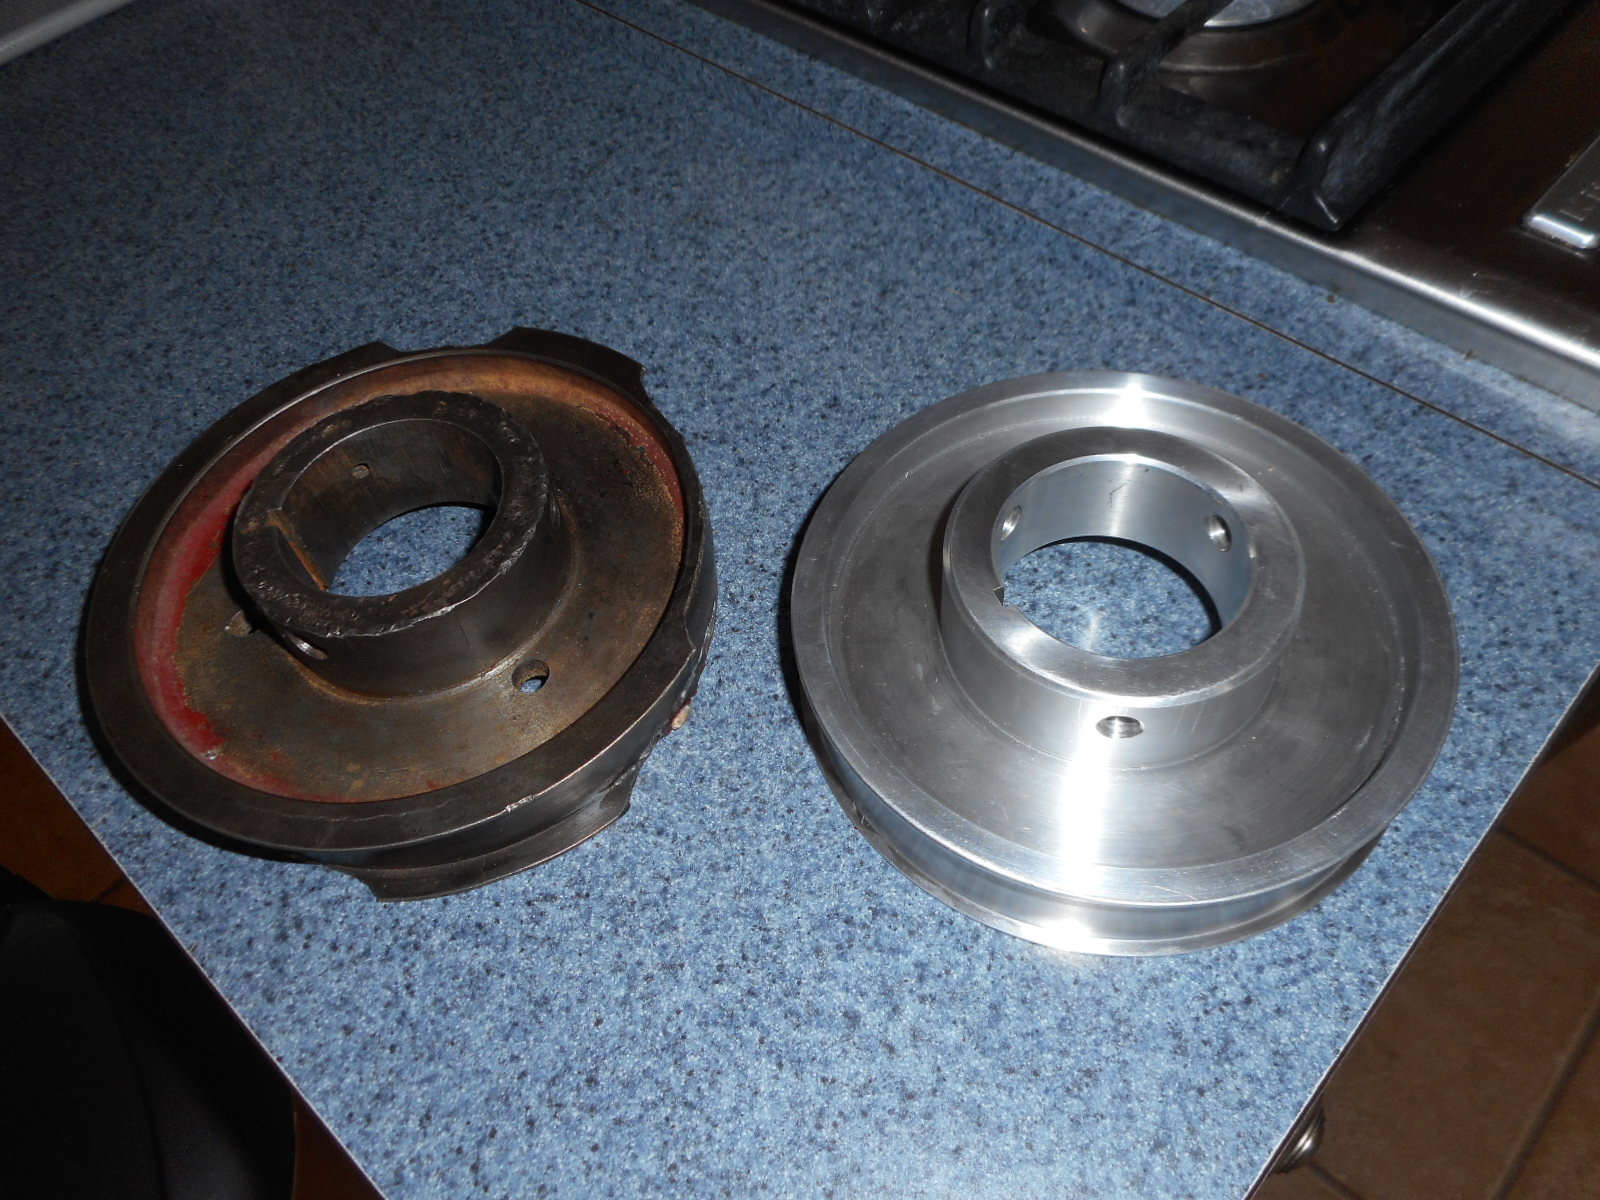
Most troublesome was removing the crankshaft pulley. It was already broken in some spots around the edges so I know someone else struggled with it before. I was determined to remove it since I really wanted to remove the timing cover, which is behind it . I also knew that this is a piece that I can have repaired if it suffers further damage. I ended-up cutting a section of the frame rail away from it for better access, and fabricated a makeshift system for removing it with my big jaw puller, along with a lot of heat. More of the edges and even a portion of the belt surface broke in the process, but I’m confident it can be repaired.
Most everything else was basic mechanics, but with a lot of torch heat used to assist removal of some stuff. There were some broken studs in the process but all have been drilled and tapped without incident.
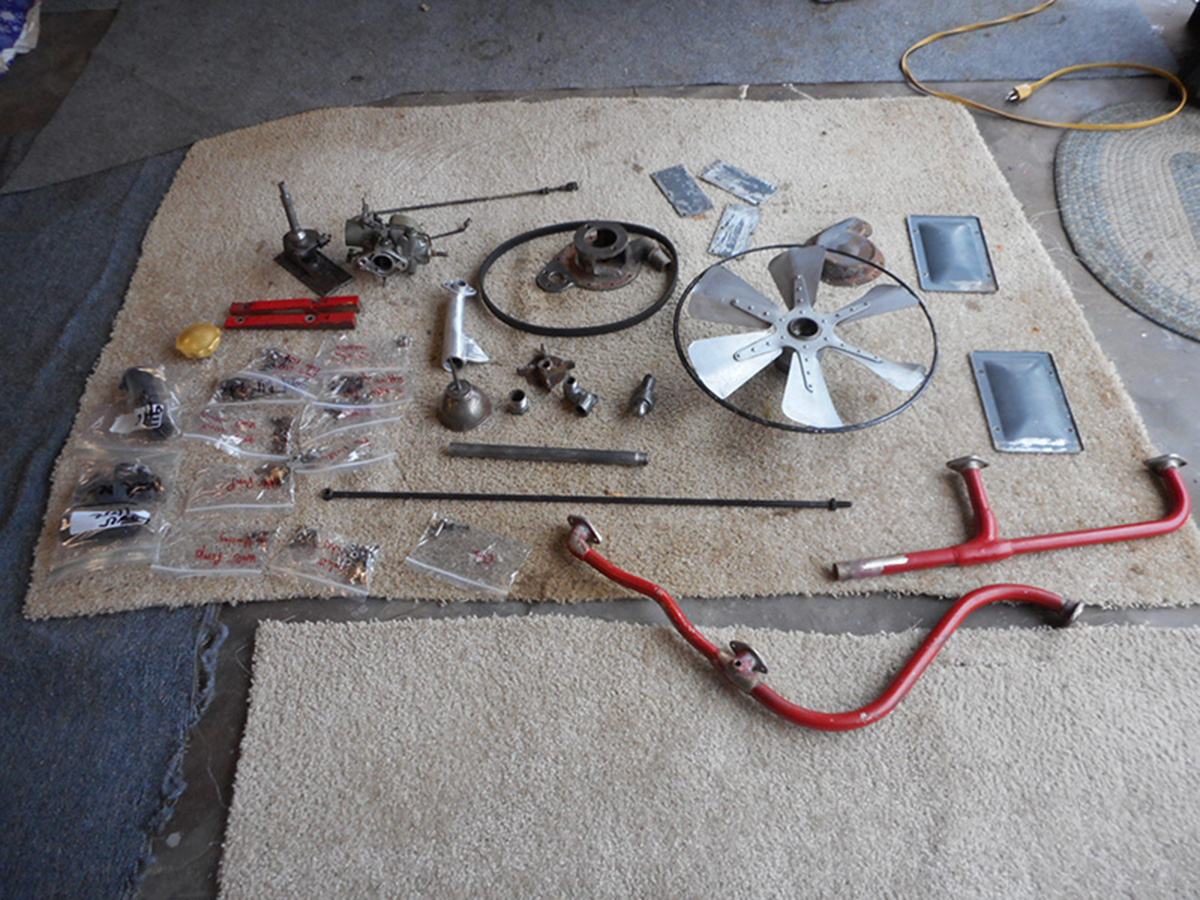
Meanwhile there’s been an ongoing system of degreasing, cleaning, wire-wheeling everything that’s been removed, and a large list being assembled of stuff that I’ll need for re-assembly. I also winched the truck outside and gave what’s left of the engine compartment another good cleaning and degreasing.
CLICK ON THUMBNAILS FOR LARGE IMAGES !
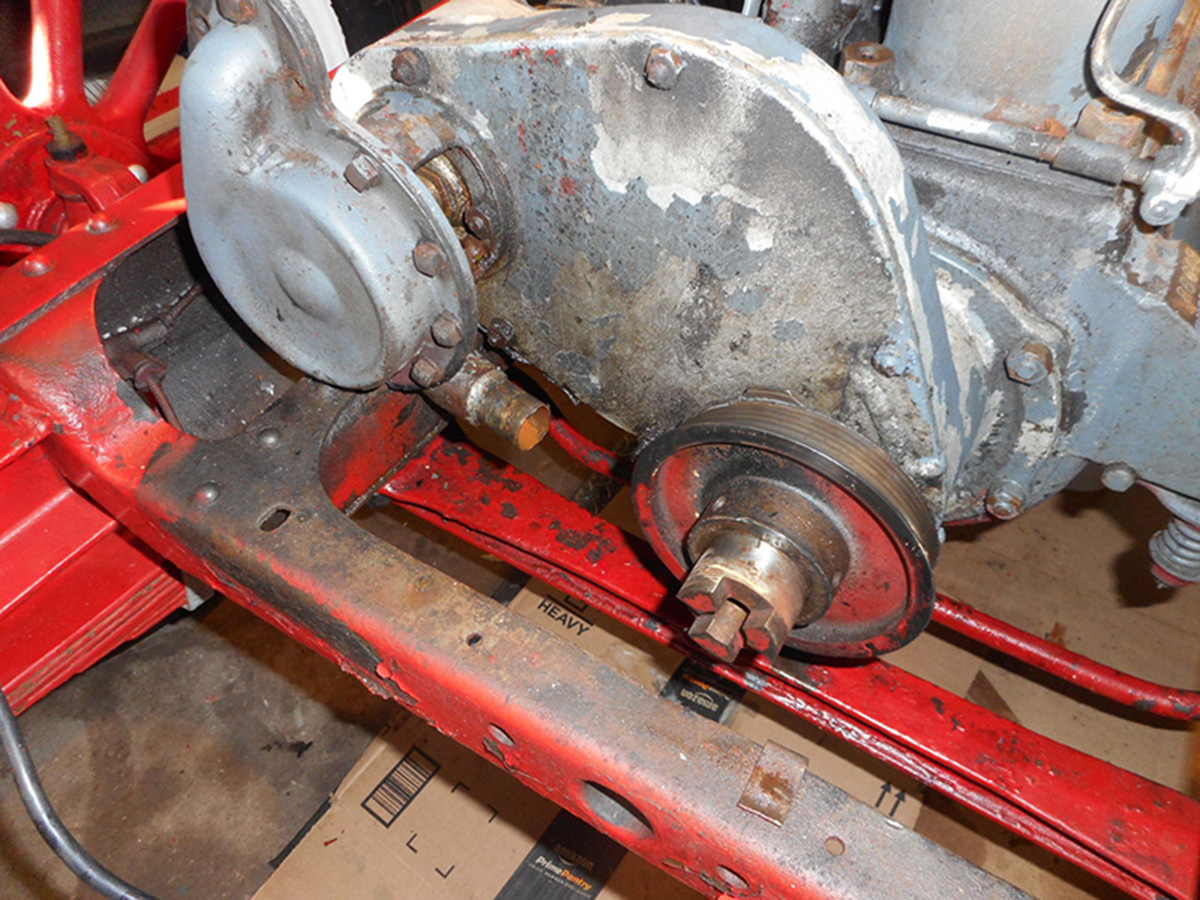

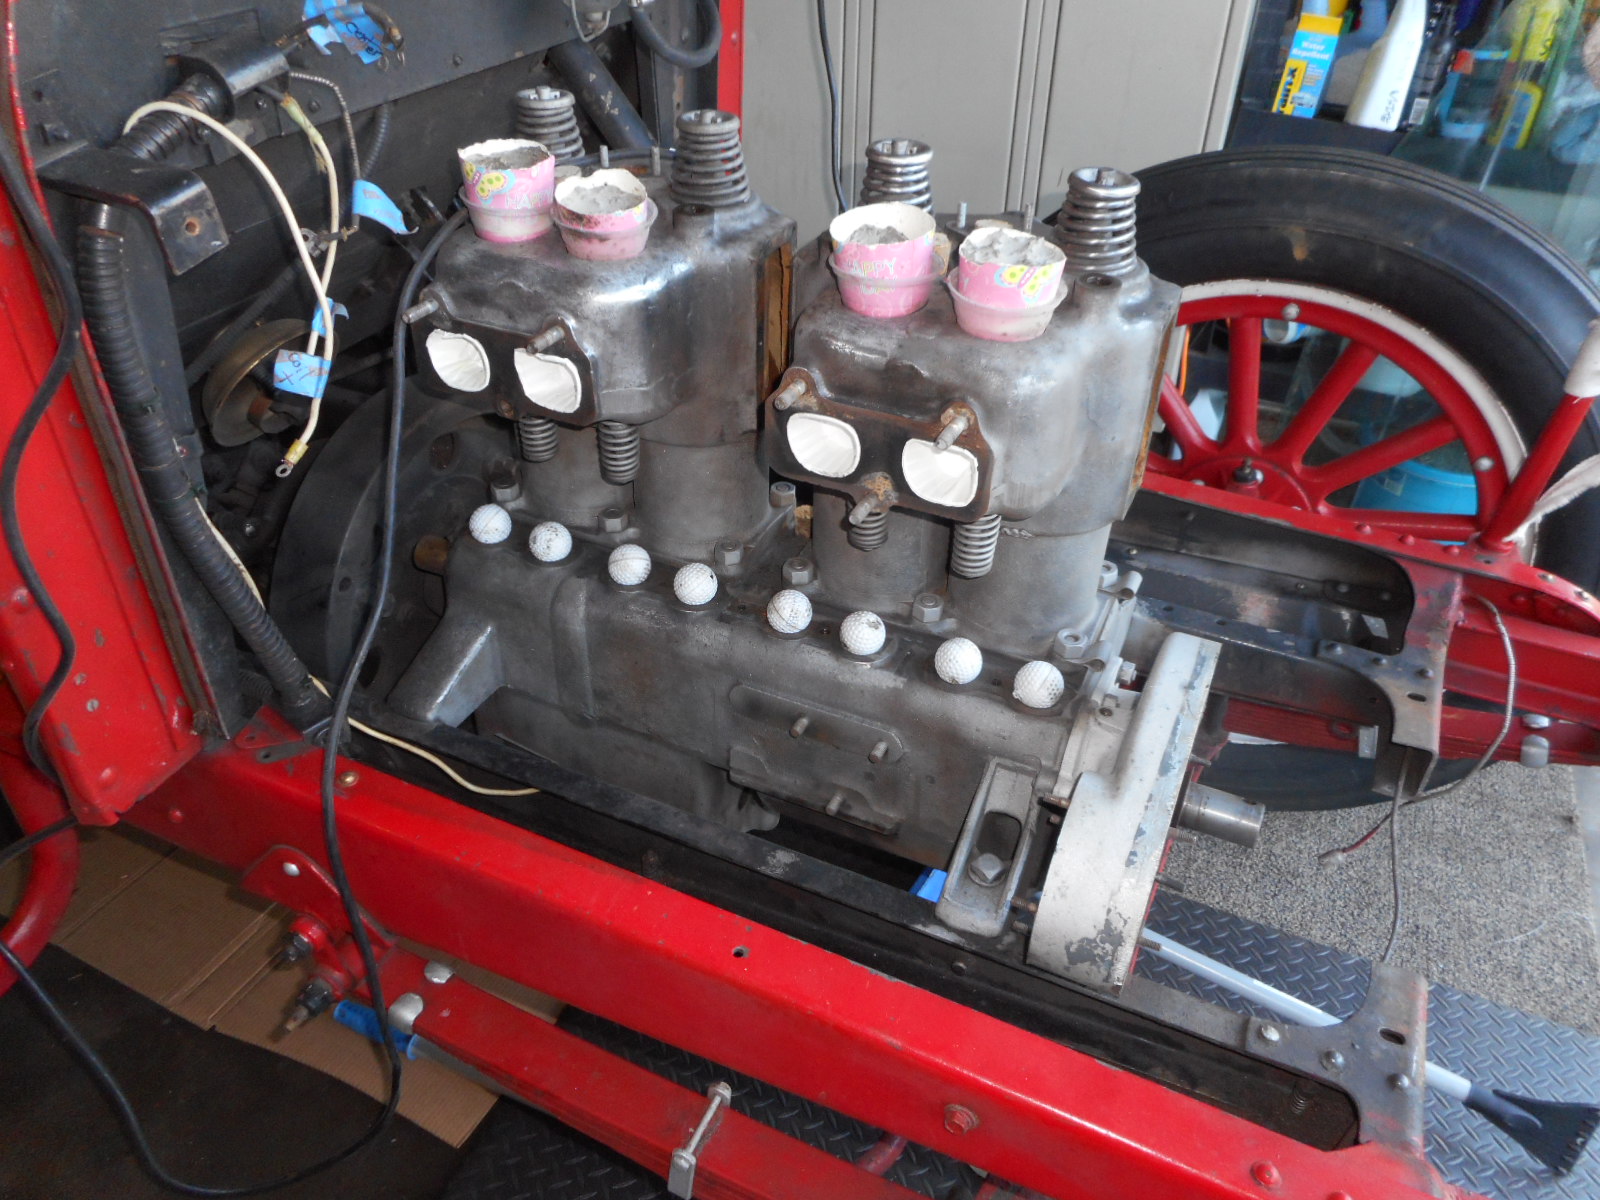
Water pump, timing cover, crank pulley, front view of disassembly at this point
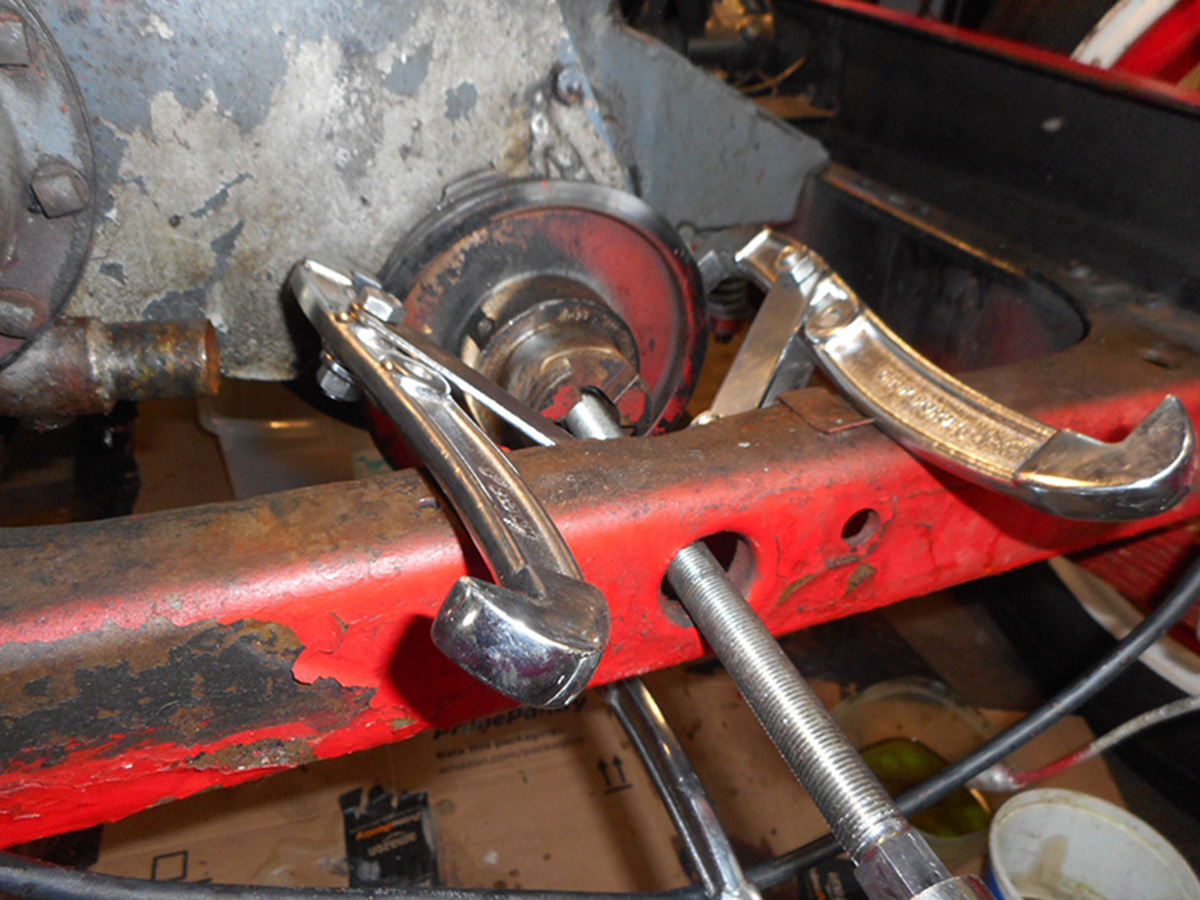
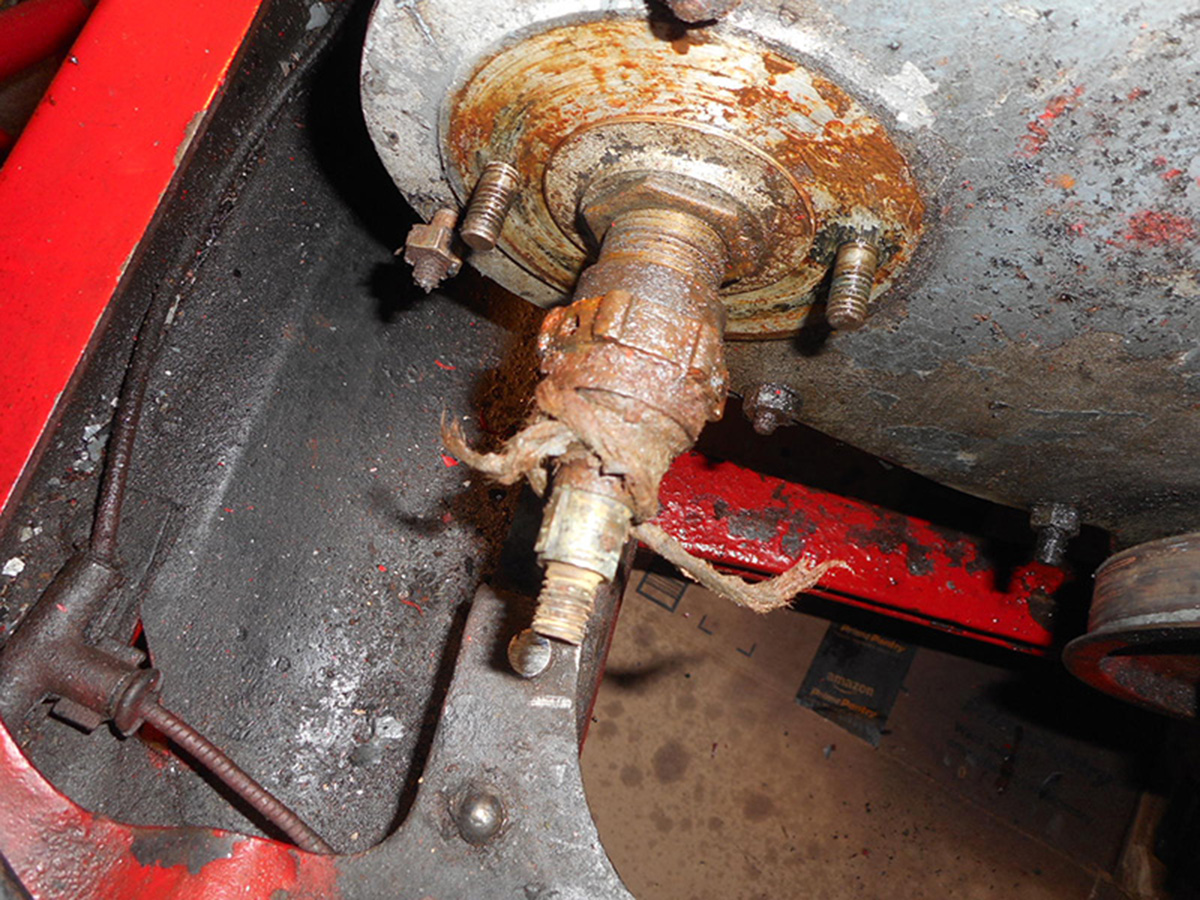
1st attempt at crank pulley removal, water pump packing nut and old packing string
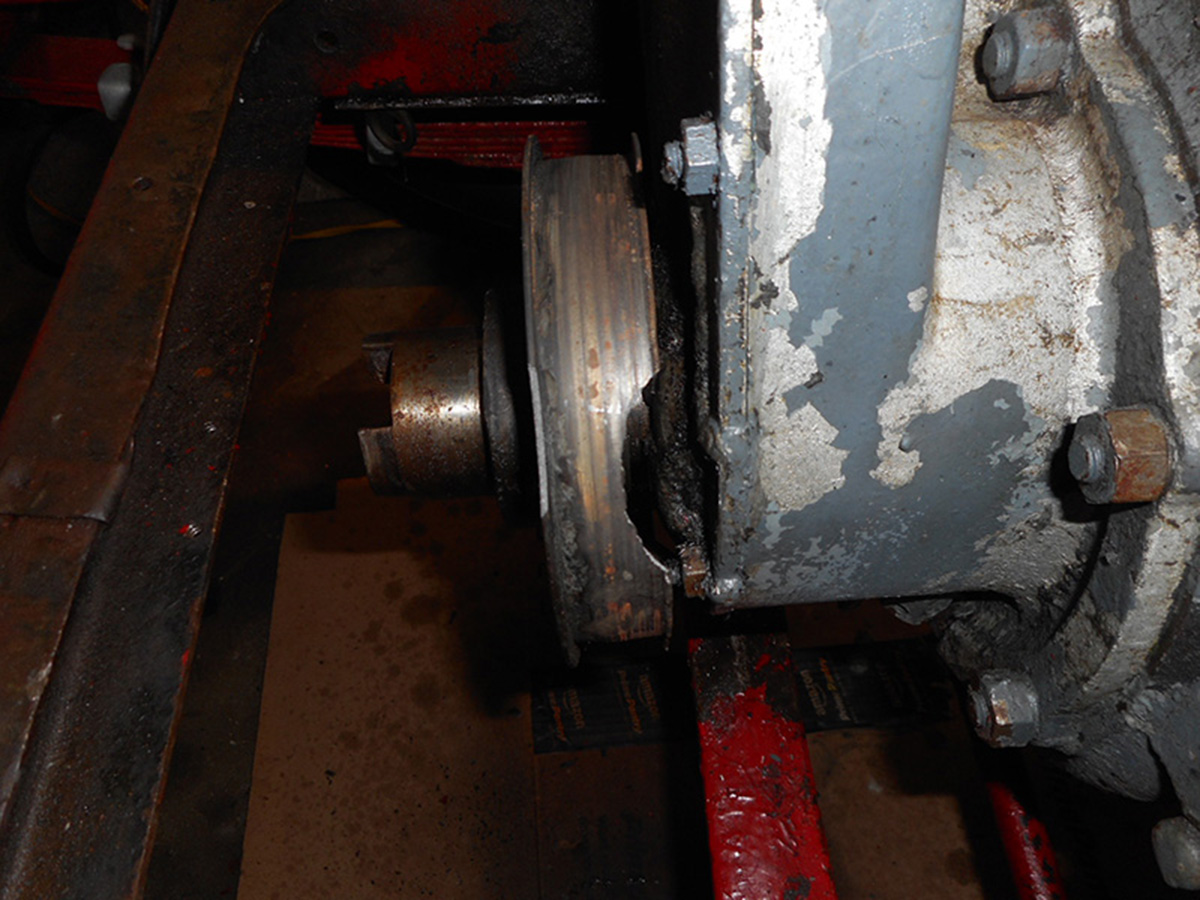
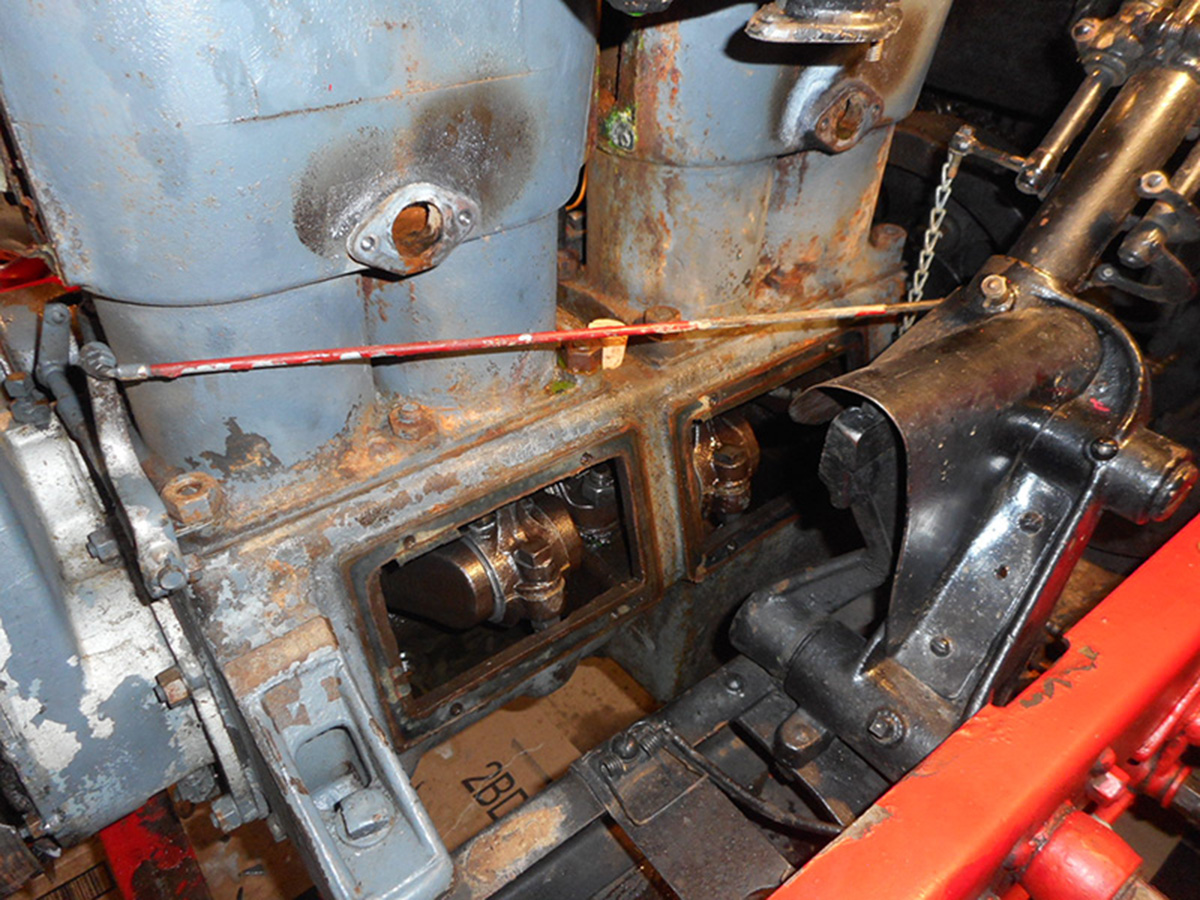
Damaged crank pulley, left side of engine with connecting rod covers removed

Parts removed so-far, front frame rail cut off to access crank pulley
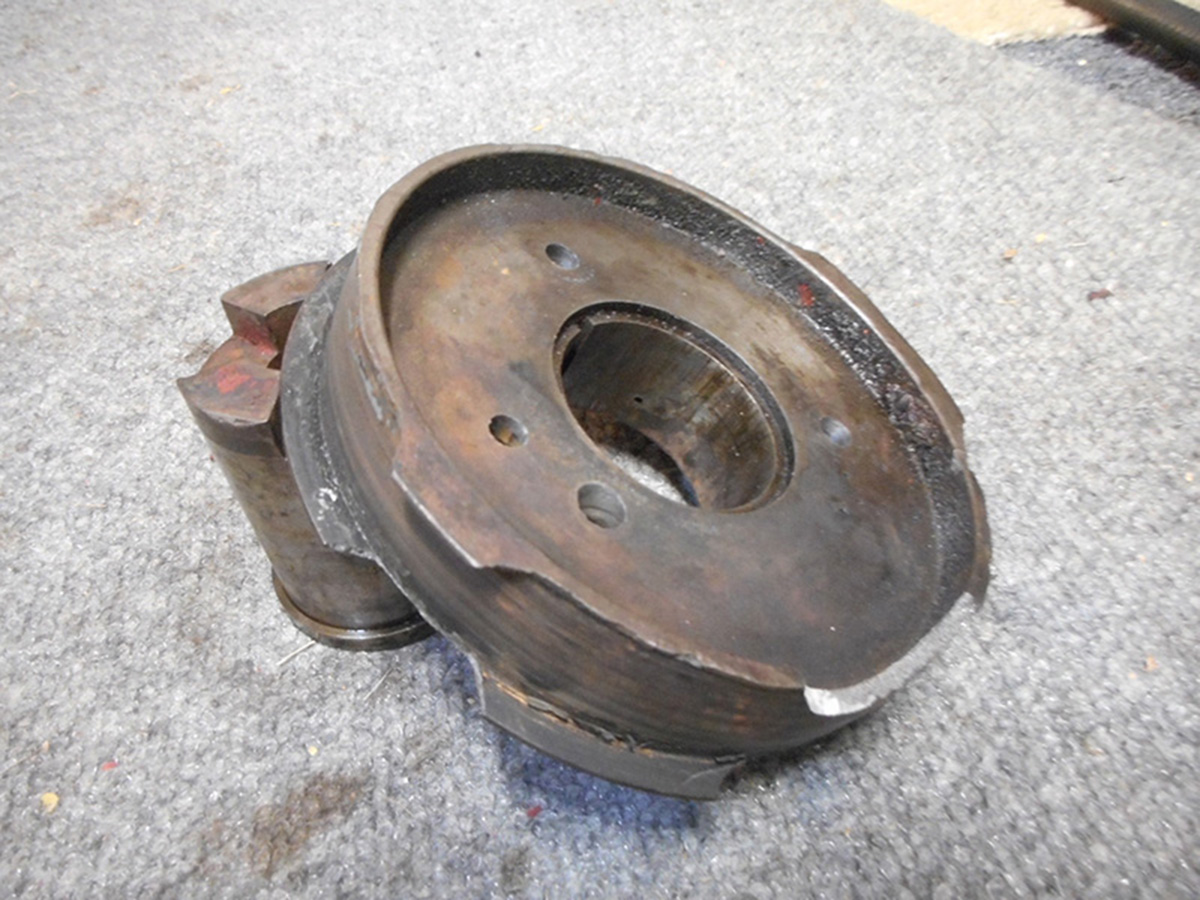
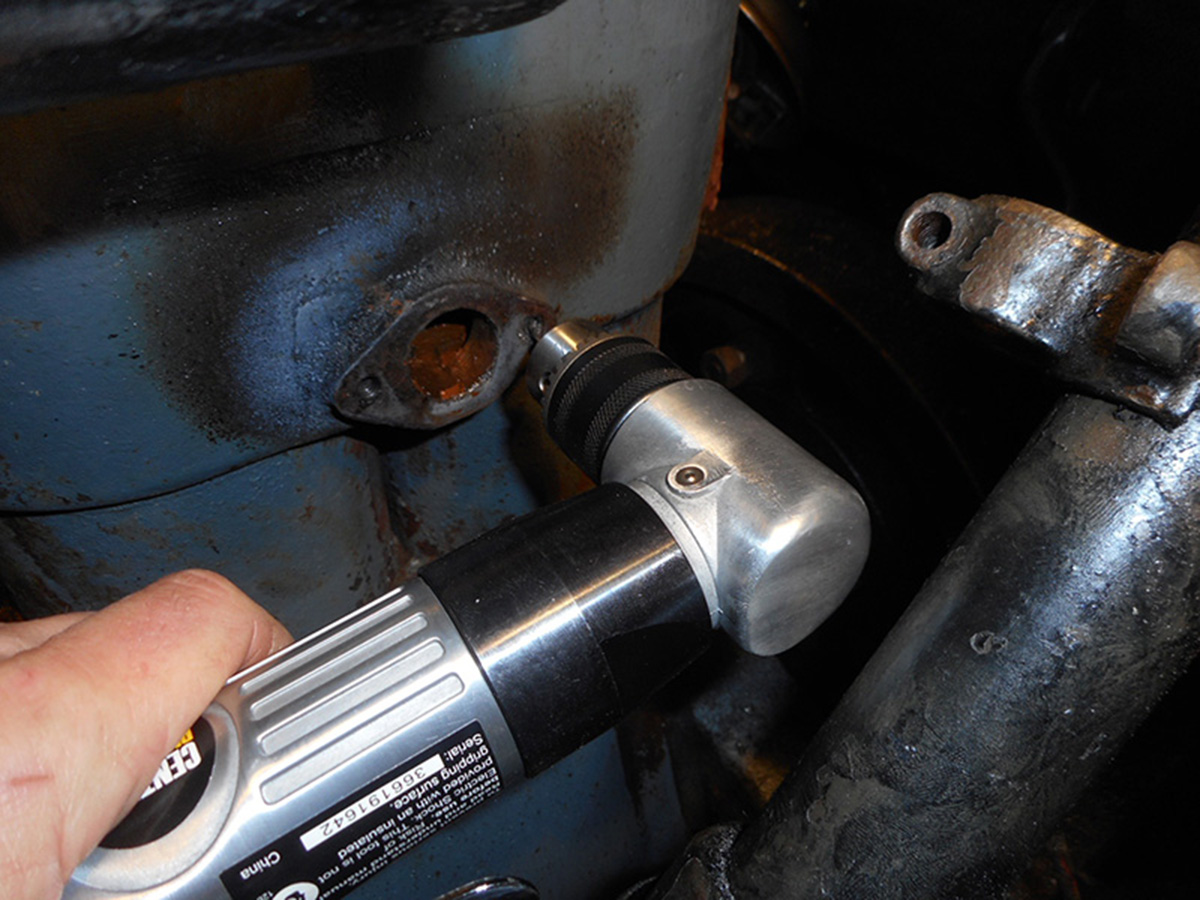
Damaged crank pulley, drilling-out broken water tube stud with right-angle drill

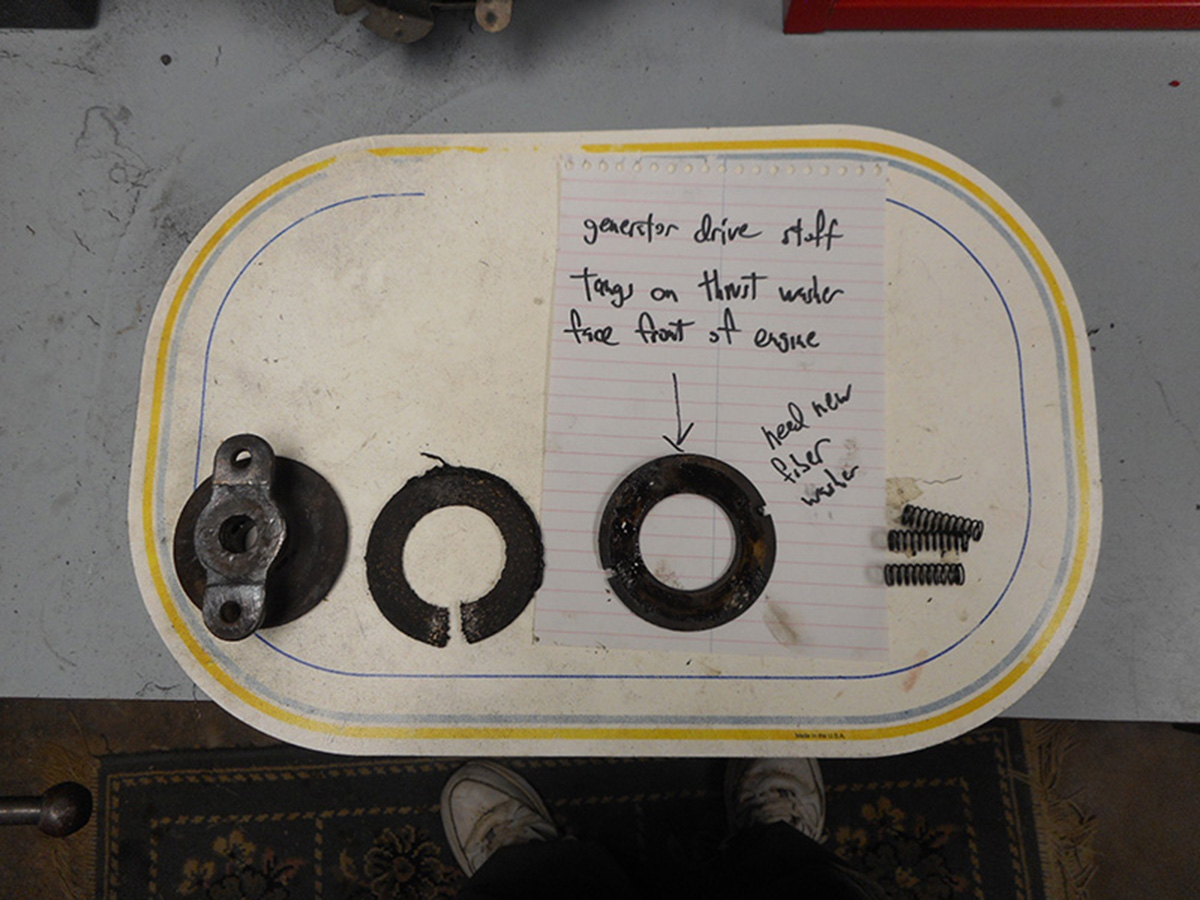
Tapping threads for drilled stud, heating spark lever to remove it from rod. This lever since broke
in-half
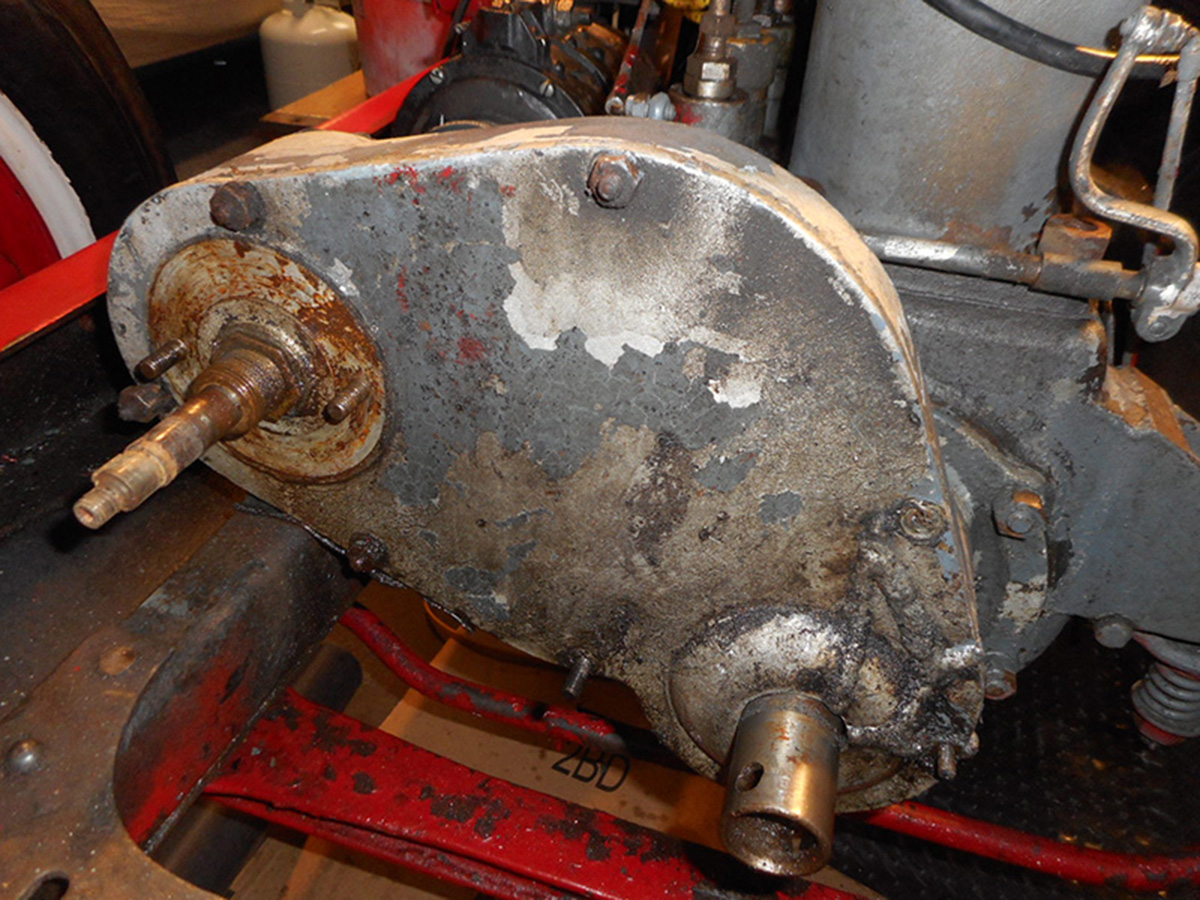
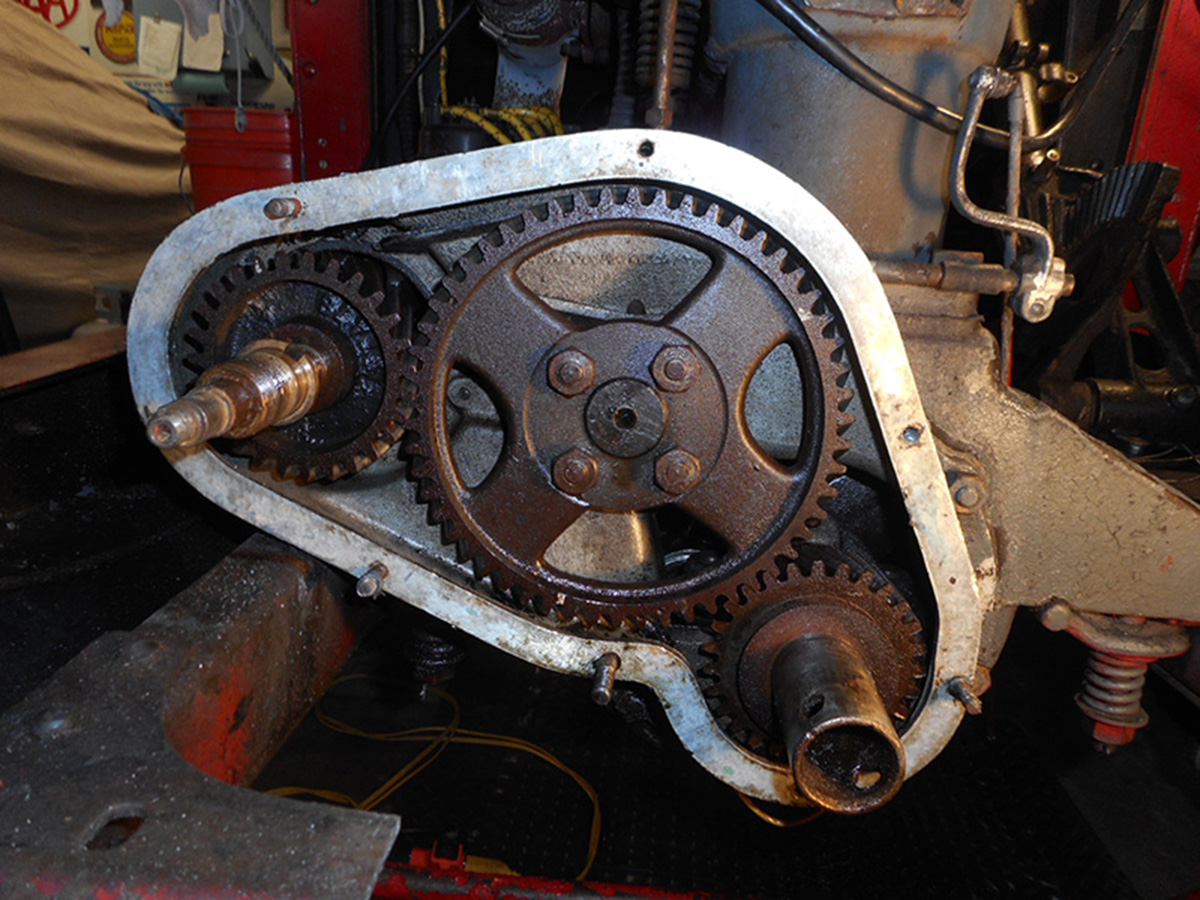
timing cover, water pump shaft with crank pulley removed, inside of timing cover
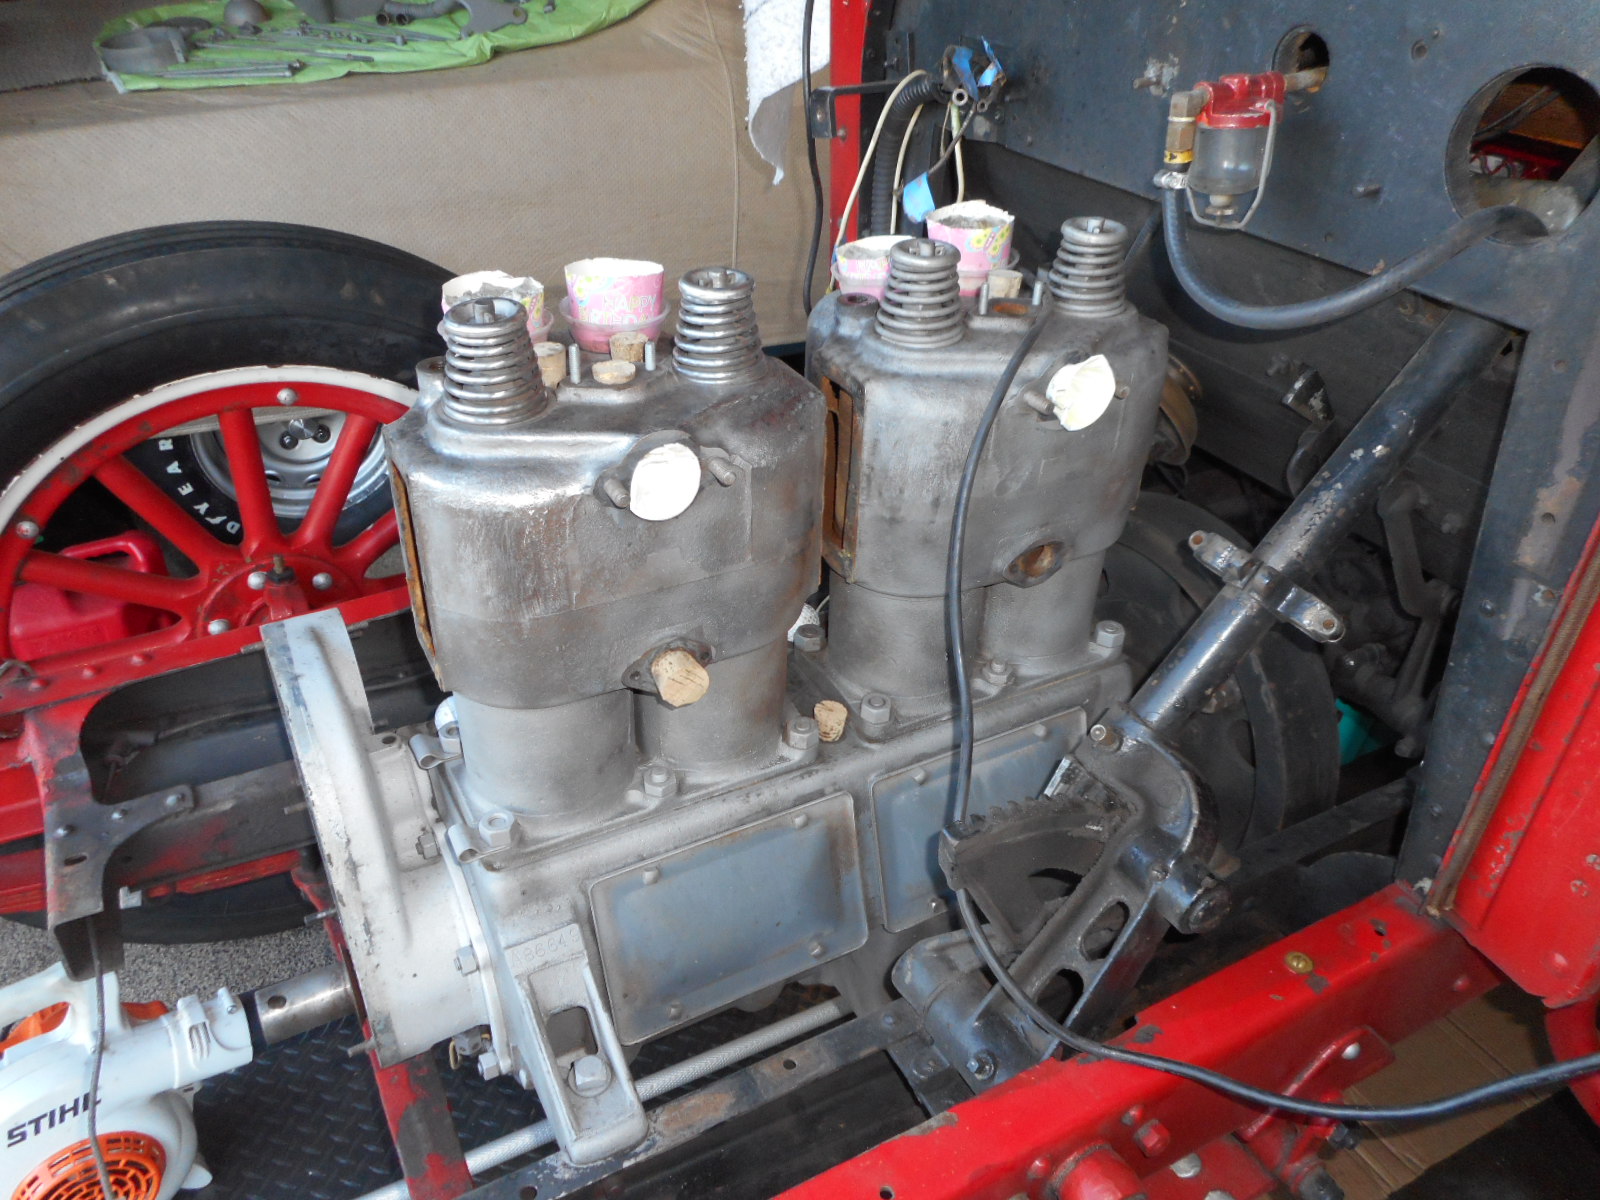
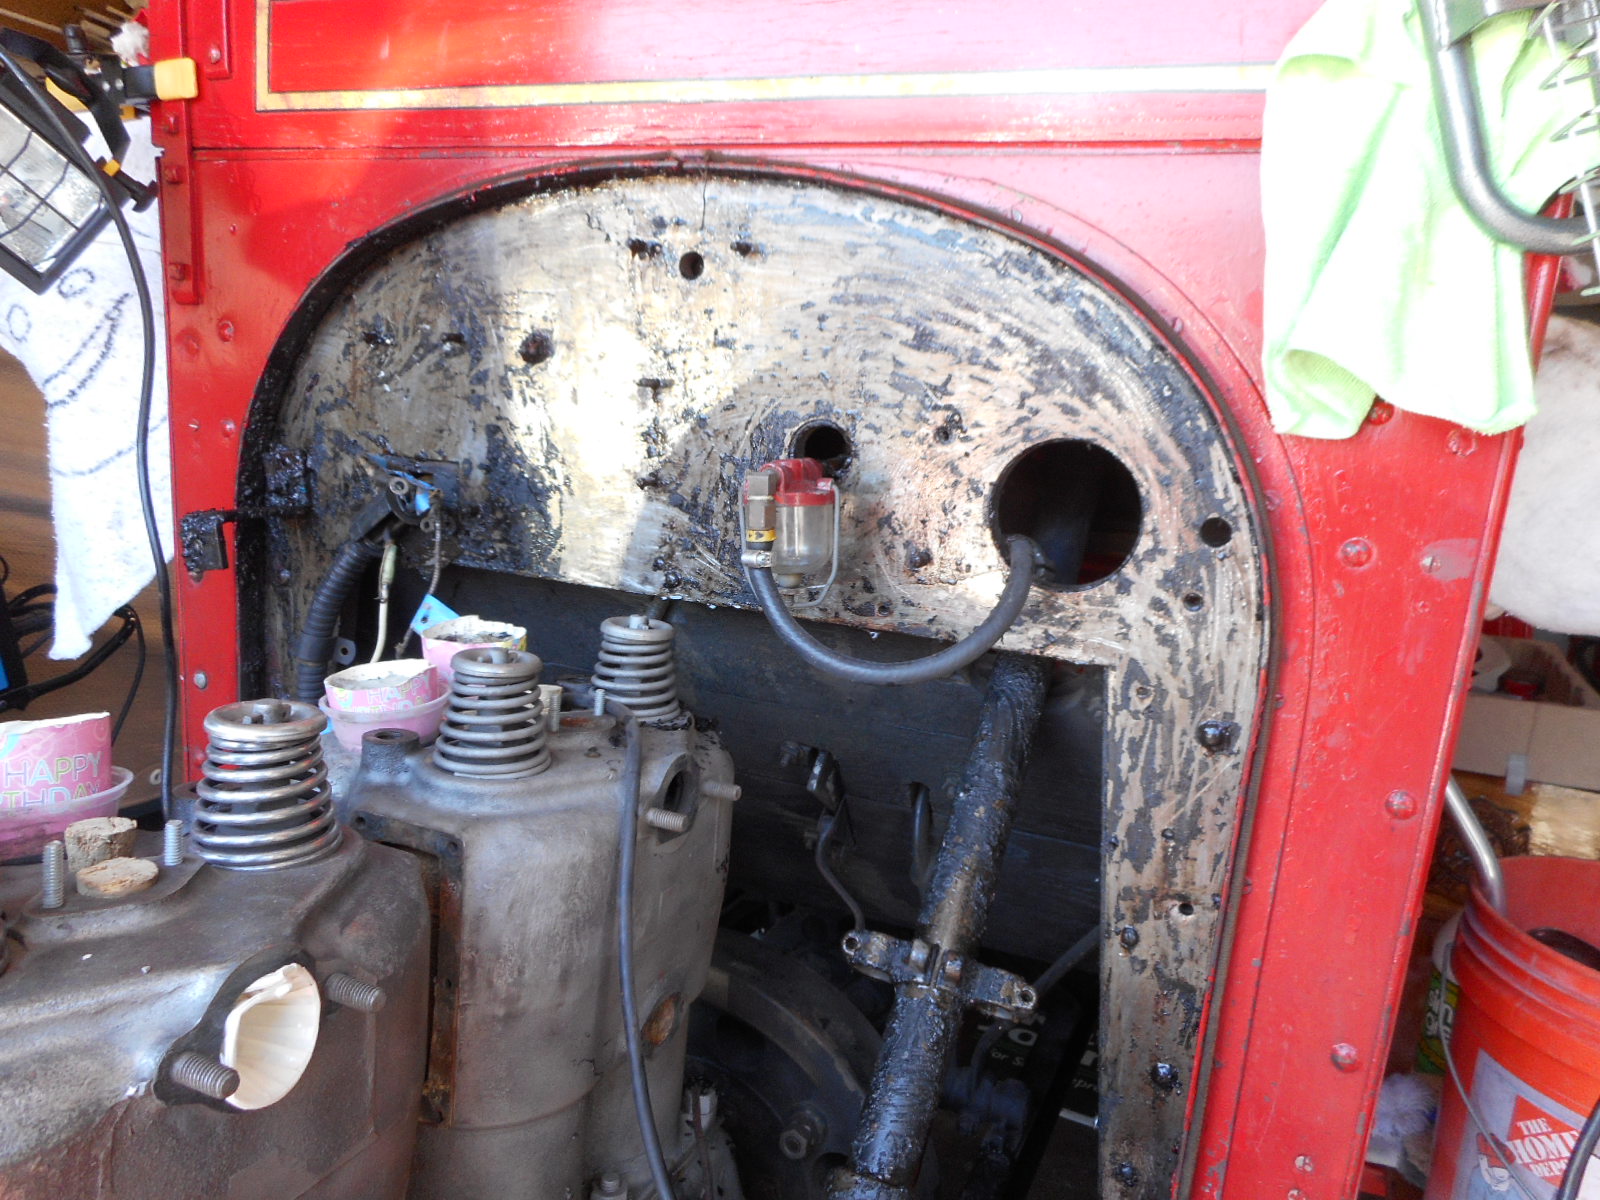
Taking lots of pictures and making a lot of notes, front view of final disassembly

Right side view of final disassembly, and left side view
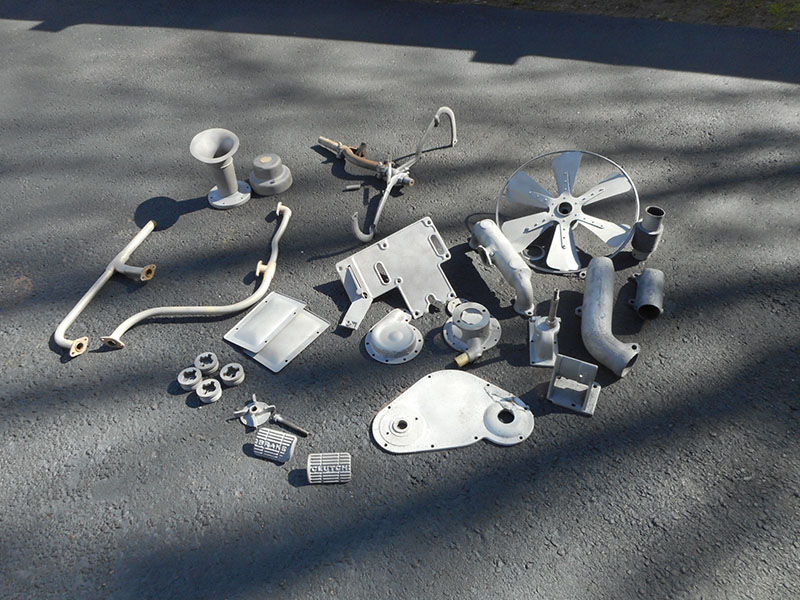
February 5, 2017
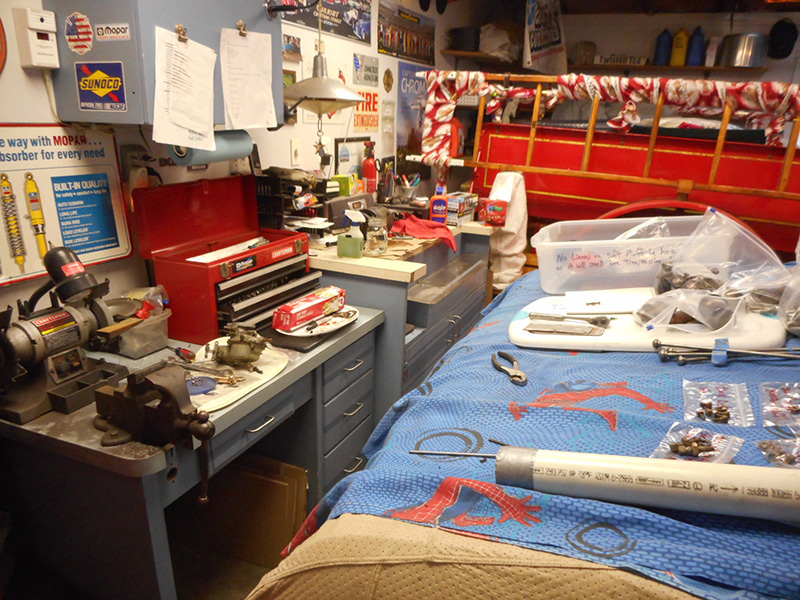
Been spending more time mostly stripping and cleaning parts, and lots of time hunting-down materials and hardware that I'll need for re-assembly. Buying anything for special interest vehicles can be VERY costly, but so-far for the Reo I've been able to find standard stuff and hardware that will work perfectly and all at reasonable cost. Great example is the bearings for the radiator fan were shot. This was something that surely would be huge bucks if I could even find anything at-all, but some clever googling revealed that bicycles use similar bearings in the handlebars and pedals. I had to guess and order 3 different ones before coming up with the correct size, but the 3rd set was perfect, and all for less than 30 bucks.
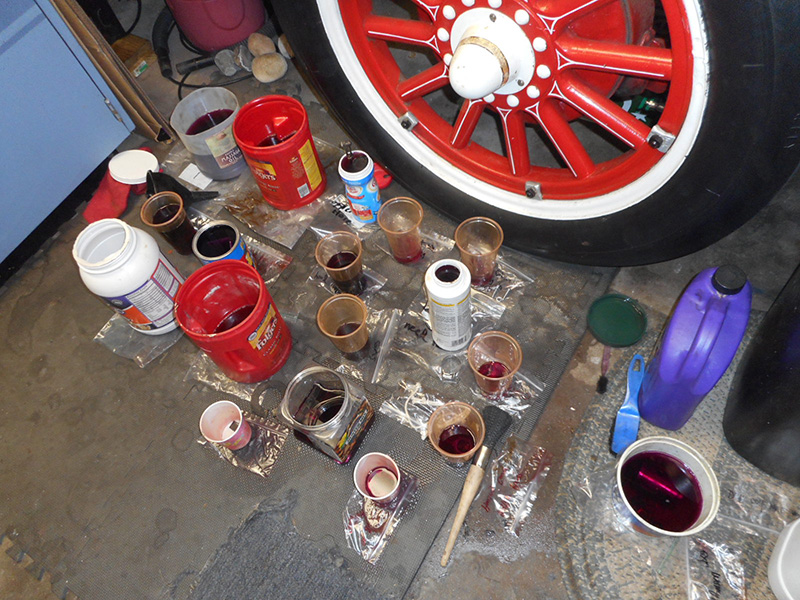
I formulated a plan for what I wanted to send out for chrome plating. I was quite apprehensive about this since chrome plating is also VERY expensive so I was worried that
it might not be within my budget. Went to the local chrome plating guy that I always used for stuff for my Duster only to find the business closed permanently. I'm very reluctant to ship these items anywhere, since if they get lost it would pretty-much be the end of the world, but I decided to try one vendor located in Nashville. I figured I'd ship it all to my brother who lives there and have him hand deliver the parts so that at least there would be some kind of personal interaction involved. Problem is they never replied to my inquiry. Another of the many reasons why I do everything myself. So, the logical next step is to do it myself. I am gathering the materials needed to do copper and nickel plating at home and will certainly report back with more info on this.
Another cool DIY task that I completed in the last weeks was making my own gaskets using a Cricut arts & crafts machine. This took a lot of time to accomplish but was a complete success ! Be sure to see the youtube video shown below.
It's been a little too cold to work outside lately so I'm waiting for a 50 degree, dry day to go outside and sandblast all of the removed parts. This is also recommended as prep work for the nickel plating so I cannot proceed on that either, until the blasting is done. More to come !

Parts cleaning process, and fabricating new engine end plates
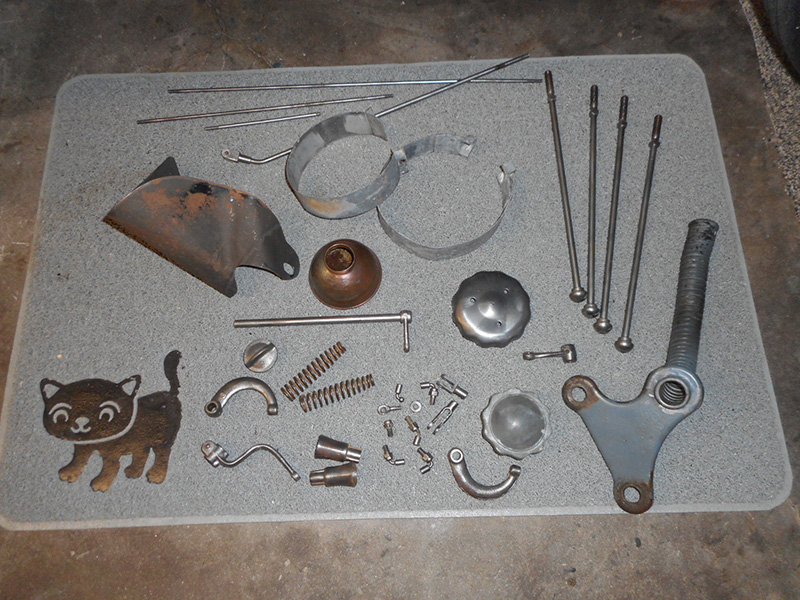
Chaos in the garage,
Parts slated for electroplating
April 25, 2017
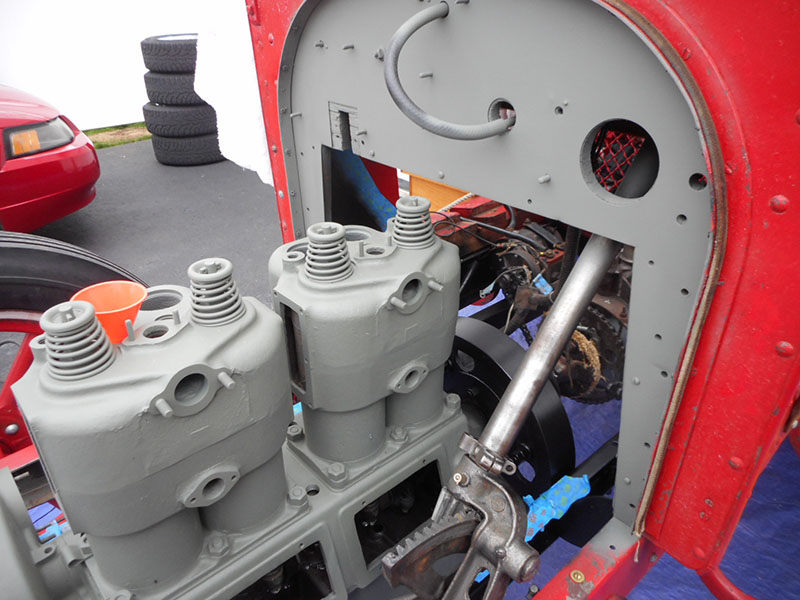
Lots of really dirty work in the last couple of months. After completing disassembly of the engine and compartment, I removed as much paint as I could from the engine by sanding and wire-brushing, but since I was unable to get into lots of of tight spaces, I decided to media-blast. This works great but makes a terrible mess, so there was a lot of time spent blowing the aluminum oxide blast media from all of the places that it ended-up, including having to ensure that the inside of the engine was free of any debris.
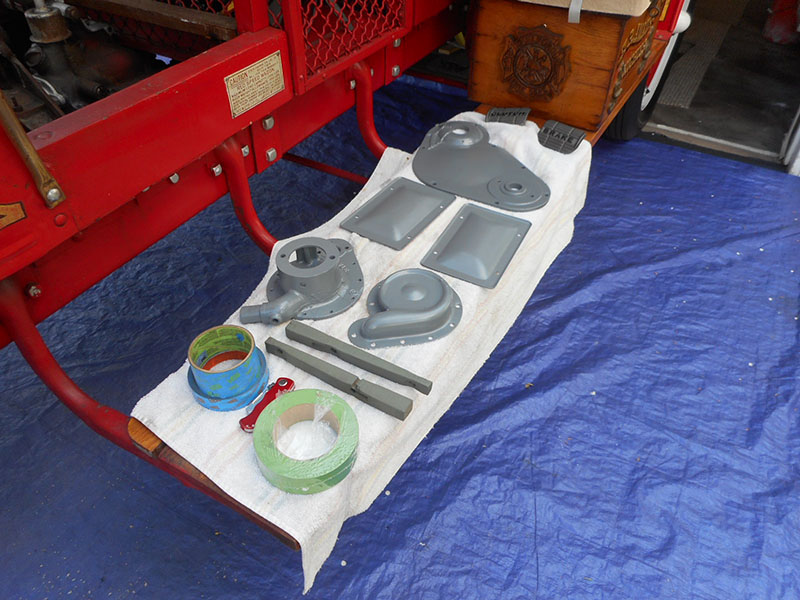
Next there was a long process of degreasing and cleaning the engine, compartment, and transmission area. This involved degreaser, brushes, power washing, scrubbing, rinsing, and had to be done several times before I was satisfied. This also caused the engine to become covered with light surface rust, which all had to be sanded and wire-brushed again. I used chemical paint stripper on the firewall and any nooks and crannys that did not get stripped during the previous processes. More rinsing, drying, and sanding. All of this was outside work and the weather's been bad the usual 5 out of 7 days a week so things are moving very slowly because of this. To be able to achieve my stripping/degreasing goals I had to remove some more stuff from the vehicle including the clutch and brake pedals and linkage. Meanwhile I had to set up shop in the basement for cleaning and painting small parts. I also took this time to rebuild the carburetor, and cosmetically restore the generator/distributor assembly.
I sent the broken crankshaft pulley to Smoothflow Pulleys in Minnesota, and in only a few days he did a beautiful job machining me a new one. At the time of this update I'm satisfied that all disassembly, stripping, and degreasing is complete. I've started priming the engine and lots of small parts have been painted and are ready to re-install. Waiting now for weather that is dry and warm enough to paint the engine and compartment, and also to blast the pile of engine parts, but it's nearly May 1 now and it's been raining and under 50 degrees daily so it's going to be a struggle. The pictures for this update show the various stages of stripping and cleaning the engine and transmission areas, and the new pulley.

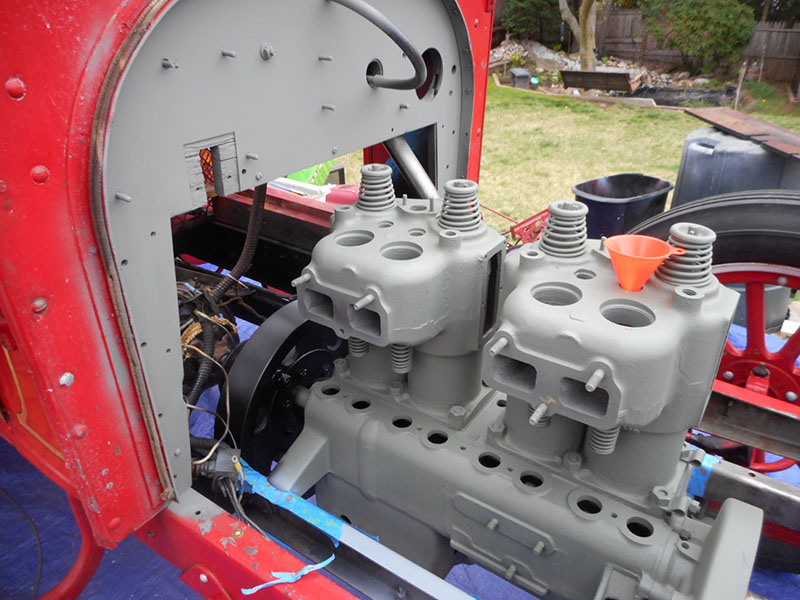
May 5, 2017
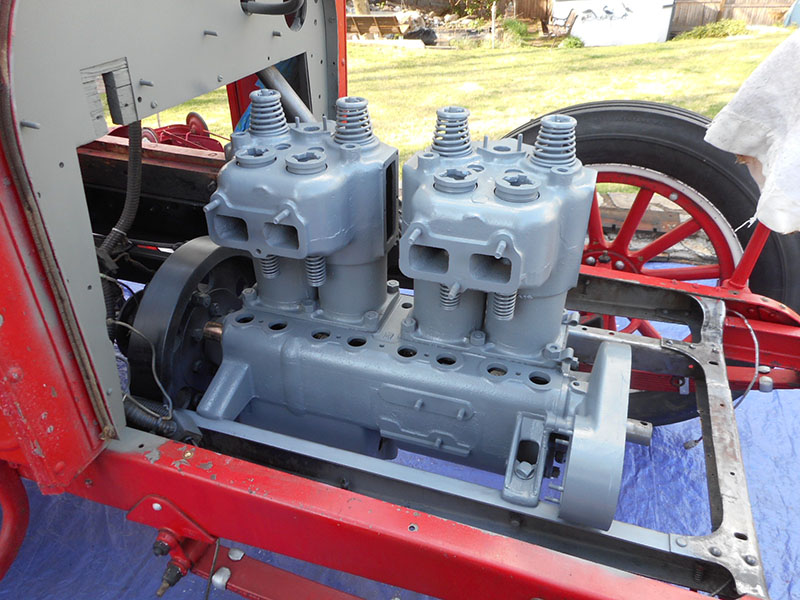
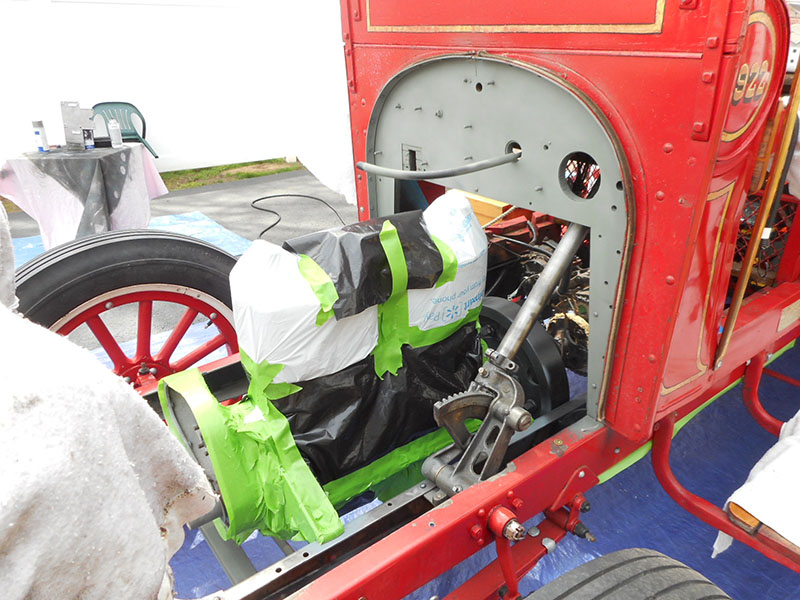
The weather has been terrible mostly every day here still, but I've managed to find enough small windows of dry time to be able to complete the process of stripping, cleaning, priming, and painting. If you've ever tried to paint an engine and it's compartment with the engine still installed in the vehicle, you know what a difficult process it is. I painted the engine, gave it some good dry time, then meticulously masked it all off so-that I could then paint the engine compartment and frame. After repair of the inevitable unintended overspray in small spots and some paint repair due to residual bad stuff like paint stripper remaining in some places, everything looks real good.
To paint the pedals and clutch linkage I had to remove the wood firewall / floorboard, which I decided to replace and has turned into a considerable woodworking and fabrication project. At the time of this writing, just yesterday I started to put the engine back together. I've had parts and materials all-over the garage and basement for months now so it will be great to have some breathing room again. This has also kept me from starting the metal plating process so this remains as the last really big thing that needs to be done before the memorial day deadline.


Summer 2017